make every photo amazing {for free} with pickmonkey
This website may earn commissions from purchases made through links in this post.
(**Update**: Pickmonkey has changed their service to a free-to-try service.)
I have a confession: I edit all my photos, both blog photos and personal ones.
Even the family snaps get edited before being uploaded to Facebook or emailed to nanna, let alone before printing them out.
While a good photo starts at the click of the camera button, you can do a lot with a picture to make it look amazing with a few simple photo edits using a free online photo editing program.
And it only takes a minute or two to do. Unless you start playing around with all the cool tools and features, in which case you can spend hours editing pictures, but hey, it’s loads of fun.
There are dozens of photo editors available, but today I’m going to talk about PicMonkey because it’s the one I use and I love and I’ll show you the very easy basic edits that will make your pictures pop and take your photos to the next level.
basic edits

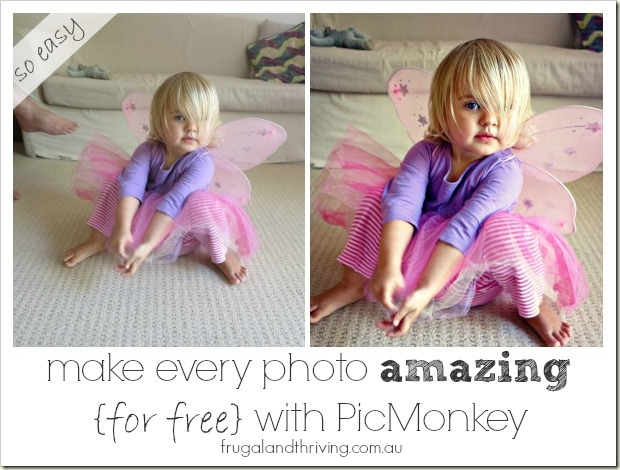
This is a picture of my two-year-old straight out of the camera and I’ll be using it to demonstrate some of the ways you can edit your pictures.
The first edit is optional and you shouldn’t need to do it on many photos. But if you’ve got a picture that’s sideways or upside down, use the rotate tool to turn it up the right way. You may also want to use the resize tool to straighten your picture if it’s looking a little crooked.
The other basic edit is to get rid of red-eye. No alien uploads of friends and family!
1. CROP
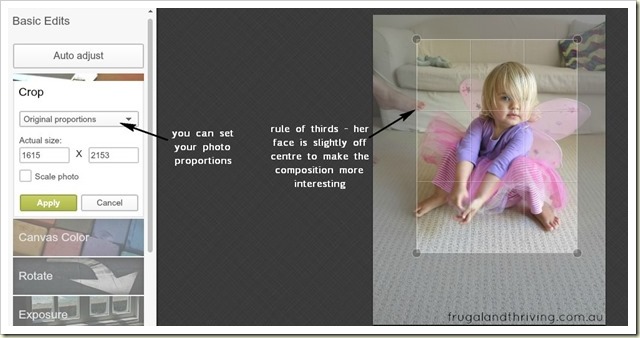
I crop nearly every photo I take. Sometimes it’s hard to take well-composed pictures (especially of kids who are moving around everywhere), and so you can use the crop tool in PicMonkey to get a better composition.
Set the proportions to original or to the proportion you want and drag the rectangle until you’ve got a good crop.
2. AUTO-ADJUST
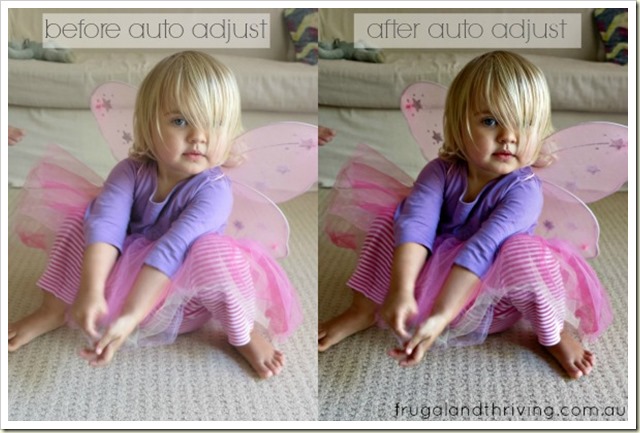
Auto adjust is as simple as clicking the Auto Adjust button and letting PicMonkey adjust the brightness and contrast for you.
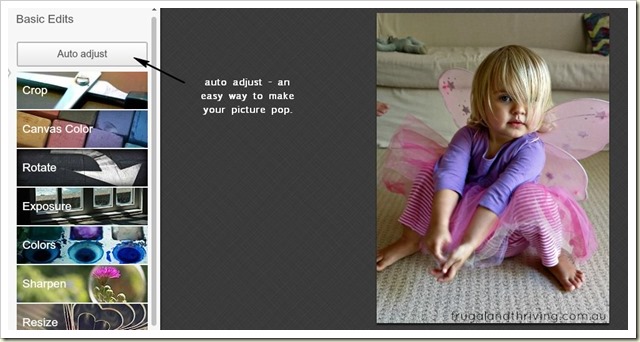
As you can see from the picture below, this one simple click of the button can really make your picture pop!
If you’re happy with your picture, you can save it now and you’re done. Or you can make a few more adjustments to the exposure and clarity to make your picture look even better.
3. EXPOSURE AND COLOUR
In this picture, my daughter’s face is a little dark on one side, so I increased the brightness. It’s important to remember the golden rule:
A little bit of editing goes a long way. So just adjust in small amounts.
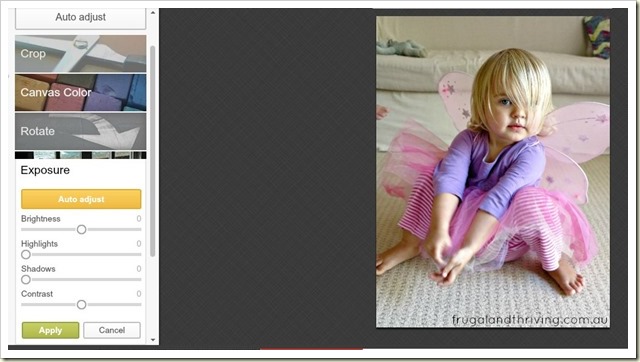
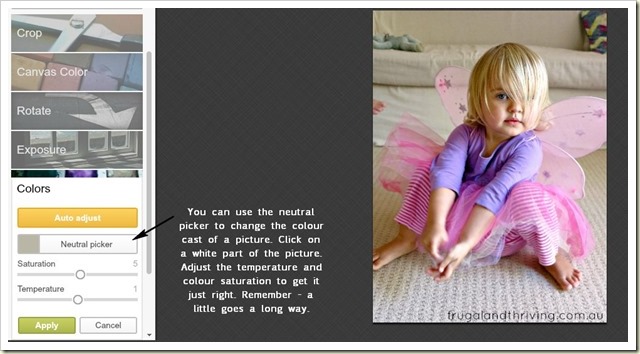
Next, I went to the colours tab and used the neutral picker to adjust the white balance/colour cast of the picture. To use the neutral picker, click on a white part of the picture and the colour cast will be automatically adjusted for you. If you don’t like it, use the undo button at the top of the page.
Mine looked a little blue so I adjusted the temperature very slightly.
I also increased the colour saturation just a little to brighten the pinks and purple.
4. SHARPEN AND CLARIFY
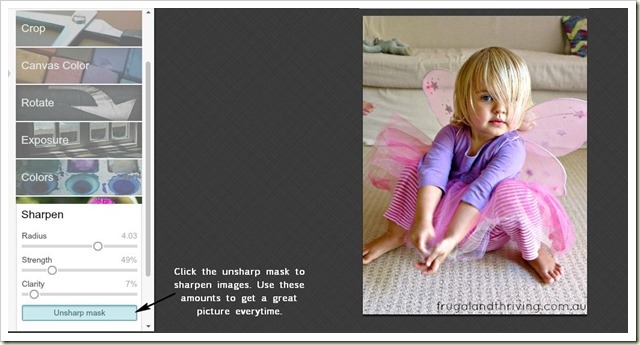
The final edit is to sharpen and clarify your picture. Digital images, as good as they are, don’t produce the same sharpness as the old film cameras did. So sharpening up all your images slightly will make them look better.
For best results that are easy, click on the unsharp mask button under the sharpen tab and use the sliders to give your picture a radius of 4, strength of 50% and clarity of 5-7%.
I’ve played around with the settings but I found that these values, which I learnt from this blog, give great results every time.
Here’s a comparison of the edits we’ve made so far.
What do you think?
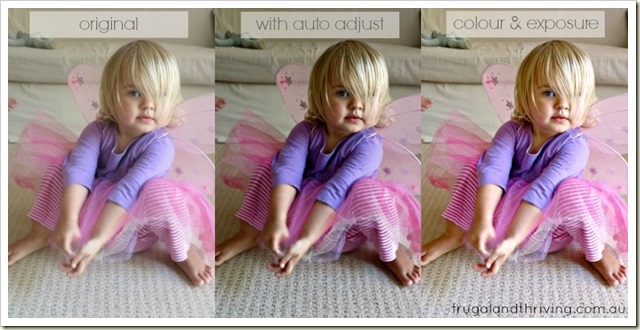
Keep in mind that all these edits take about 2 minutes to do. It’s really quick and easy.
At this point, your image is finished and you can save it, share it, print it or whatever you like.
But I thought I would share a few premium enhancements that I like to use on my pictures as well.
Extra Photo Enhancements
PicMonkey is no longer free, although it is free-to-try. Compared to a program like photoshop, PicMonkey is heaps cheaper and soooo much easier to use! I pay for both photoshop and PicMonkey, but recently cancelled my subscription to Photoshop because PicMonkey does the job for a fraction of the cost.
If you do a lot of photo editing or you like your photos to look great, it can be a good investment. Your photos are a lifetime of memories and it’s worth paying a few dollars to make them look amazing for years to come.
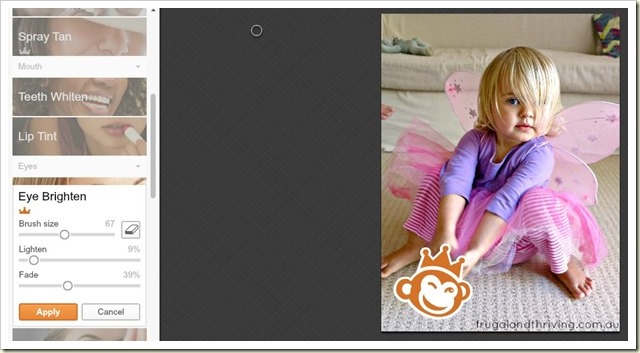
1. EYE BRIGHTEN
You know when you take a photo and the sunlight catches your eye and makes them sparkle? Well adding a little brightness imitates that look without going over the top.
Go easy on the eyebright otherwise, it can look fake. I’m probably going into overdone territory on my picture. It should be a subtle enhancement.
2. CLONE
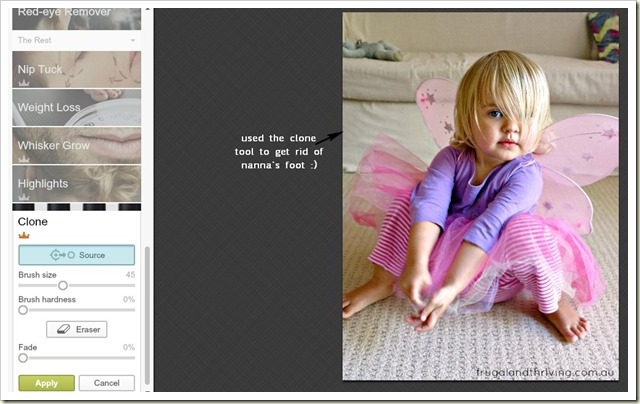
Nanna’s foot looks a little weird sticking out on the side of the photo and it’s a little distracting, so I’ve used the clone tool to edit it out (sorry nanna).
Click a part of the picture you want to clone and then click that over the part you want to disappear.
3. DODGE AND BURN
The dodge tool lightens specific areas of a picture while the burn tool darkens them.
In this photo I’ve used the dodge tool to further lighten the dark side of my daughter’s face, removing some more of the shadow that made it hard to see her face.
Professional photographers would use an expensive reflector to get this effect.

At this point I would stop editing and save. 4 minutes and the picture has gone from ok to fab.
We’ve only touched on some of the features of PicMonkey. You can add text and fun overlays, create picture collages and airbrush yourself to oblivion. All the images you see on the blog from the last year or so have been created using PicMonkey.
But there’s one other edit that you can do that’s lots of fun and very popular at the moment and that is to add special effects.
4. SPECIAL EFFECTS
Special effects change the mood of your picture and are a whole heap of fun to play around with.
You won’t know what effect best suits your picture until you try them out and have a play around with them.
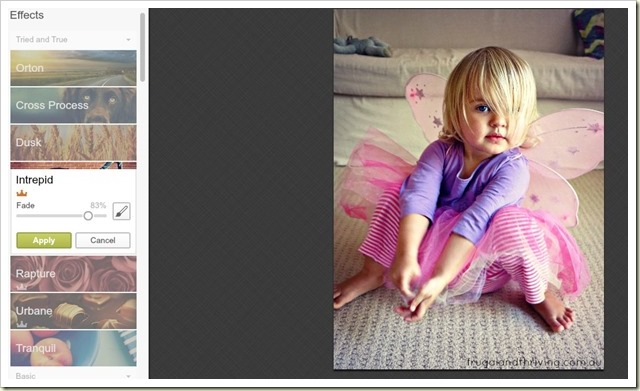
In this picture I used Intrepid. I love the mood it sets and the way it highlights my little fairy and de-emphasises the background.
It is of course totally optional, just a bit of fun. I would probably not use an effect for a photo I was printing out unless I was going for a specific look.
You can improve every photo you take using just the free features in PicMonkey. Or you can play around with the extra features by signing up for the free trial week.
Check out PicMonkey and have loads of fun making your family snaps into mini masterpieces.


I also use Picmonkey all the time on my blog. Isn’t it great? I have thought of paying the $33 or so to join up but haven’t done that at this stage. There is so much available without paying isn’t there? I haven’t used the clone option or a few of the others you have mentioned so I will check them out. Thanks for the info.
Hi Nanna,
It is great! There is heaps available without paying. You can get heaps out of it with the free features. You’ve got a great blog!
I haven’t tried PicMonkey before, but I have been using Picasa (which has similar options).
I don’t think people appreciate the power of a good crop though, even if a picture is pretty good, a crop will almost always improve it (I think!). I’m just starting to use better pics on my blog, using a proper camera instead of a camera phone (although I appreciate that iPhone owners seem to get pretty good photos, if like me you have an ancient piece of junk the photos are awful!). It’s hard not to feel a little bit smug posting your edited selection of holiday photos to facebook when every week there is someone uploading every single picture they took, all unedited. Nobody needs to see 900+ snaps of your vacation!
Picasa’s pretty good – I used it for years before switching to PicMonkey! Oh I so agree, an edited selection is best! Thanks Lucy!
I so enjoyed your blog and you are very cool. Maybe you are a leader instead of just one of the crowd. I do a blog about traumatic brain injury called http://www.allbeginningsstartwithanending.blogspot.com
I was involved in a four car collision which left me with a TBI. I had to re-design my life. I had breast cancer this past year and had to stop bogging while I was having surgery and taking treatments. I tried to resume and update the blog and Google wouldn’t accept my password. I’m working on getting in to update.
I too love to write. I am a free-lance writer and a newspaper reporter. I love to actually write with a lovely pen that feels elegant in my hand. I saw your address and thought it might be nice to actually send you a letter expressing how very much I enjoyed all your tips on your blog. Then I couldn’t get back to your address. I was going to encourage you to write a book. You very well could. And you could do your own photography.You have the skill,and the knowledge. You could earn money for that dishwasher:) Please post some pictures of your lovely Queensland. I was selected to go to Australia as an honors student and was unable to go because of family responsibilities. It is one of the most beautiful locations in the world. I will look forward to your newsletters and your new posts-Sylvia