how to liberate your digital photos and enjoy your memories offline
This website may earn commissions from purchases made through links in this post.
Remember the good old days when you could pull out a photo album and reminisce through your memories without any hassle?
Nowadays, looking at photos often means searching through your hard drive or your Facebook account!
Digital photography has enabled an explosion of photos, but most of them are locked away on hard drives and phones where no one can see them and are vulnerable to digital malfunction.
Oops, forgot to backup my smartphone.
As much as I love being able to take photos without worrying about processing or film costs, I miss the old style photo album and being able to enjoy my photos without hunting through thousands on my computer.
And I want to be able to share photos with friends and family (especially those who don’t use a computer) without exposing photos of my kids to the darker sides of social media.
And so, like a lot of things, I’m going back to the old ways – in this case by creating a family photo album, but with a modern twist.
If you too have thousands of hidden photos you’d like to liberate and print, here’s how we’re getting them off the computer and into a family album.
1. JUST THE HIGHLIGHTS
“That’s me hiking…and that’s me hiking again…and again….”
Part of the beauty of digital photography is that you can take dozens of photos in pursuit of the perfect one. You don’t need to worry about the cost of film and processing anymore.
However, that’s no excuse to keep all those second-rate photos! They become digital clutter. And it becomes overwhelming to deal with all those photos – for you, and for anyone looking through them.
Like most parents, I have a lot of photos of my first child.
And somewhere on my hard drive, in a file called “photos to sort” are hundreds of photos of child no. 1, that should have been deleted. I’ve been putting off organising them for years.
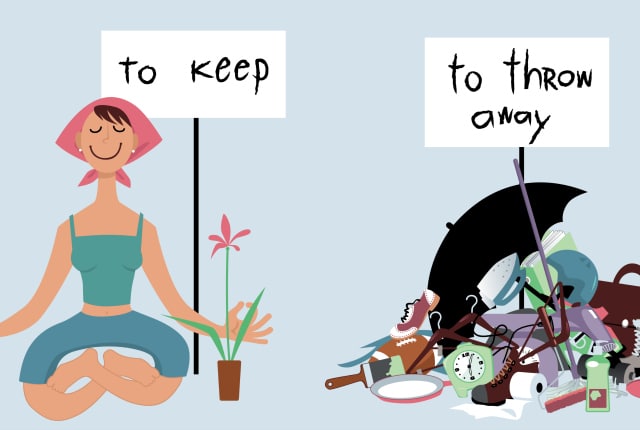
The first step in dealing with family photos is to keep only a few of the good ones and get rid of the rest. Delete, delete, delete! You’ll feel lighter once you do.
Pare it down to just a couple of photos that represent the essence of an experience, event or person.
Don’t forget to write a caption for each picture: who is in the picture, when and where it was taken and for what occasion. Memories fade, and the names of the people you hand with now can be forgotten. Avoid the “who was that again?” dilemma by captioning your photos.
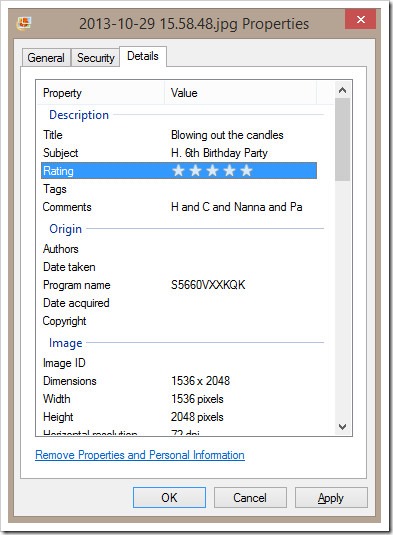
The best way to caption digital photos is to change the properties. Simply right click on a photo and select Properties and then in the Details tab, fill in the Title, Subject and Comments section as you see fit. Your subject might be the occasion the photo was taken and the comments might include who is in the photo.
If you later print these photos out for a photo album or create a photo book, you can refer back to these properties to caption the printed photos.
Read further: Guide to organising your digital photos
2. MAKE YOUR PHOTOS POP
Photos straight from the camera usually look pretty ordinary.
But you don’t have to settle for ordinary!
It’s really easy to make ordinary photos look amazing with a few quick edits using a free photo editor.
And if you’re printing these photos for prosperity, then it’s worth the time it takes to edit your photos.
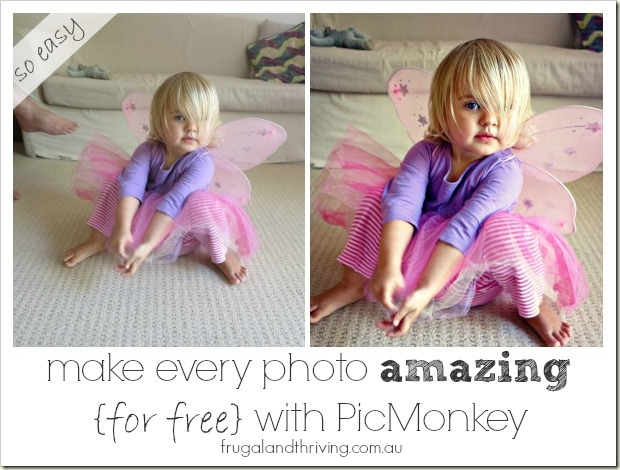
I use the online editor PicMonkey because it’s basic settings are free and it’s very easy to use. Here’s an example of what a few edits can achieve:

We’re not talking about Photoshopping the heck out of our pictures, just making a few edits to give them a lift.
You can read the whole tutorial about how to edit photos in PicMonkey here, but the very basic edits ever photo should go through include:
- Red eye elimination
- Adjust orientation and straighten
- Crop
- Auto adjust
- Sharpen
Read further: How to make your photos look amazing with PicMonkey
3. COMPILE YOUR PICS
After you’ve organised edited and backed up your photos, it’s a good idea to create a separate and temporary folder for photos to be printed or uploaded. This makes the process quick and easy.
Create a separate folder and copy the photos into it that you want to print or upload. Number the photos in the file name so that they are in order. If you’re creating a family year book, this will make putting the photos onto the pages in the correct order super easy.
Once you’ve printed or uploaded your photos, delete this file to reduce digital clutter.
4. PUBLISH YOUR PHOTOS FOR PROSPERITY
Now that you’ve selected the very best pictures and edited them to make them amazing, how are you going to get them off your hard drive and display them?
You could print them and put them in a traditional album. You could create fancy scrapbooks of your photos if that’s your thing. Or you could frame your photos and display them.
Personally, I love the idea of creating a family year book.
A year book is a photo book that covers the events, occasions and family members for that year in chronological order.
I’m still working on our yearbooks, but we’ve created a few photo books for gifts using Snapfish. It was easy to use, they came out great and they were affordable.
I signed up for their emails, and so far I’ve never had to pay full price for a product because we until their sales before creating a book.
All that editing, organising, compiling and captioning? This is where it comes to fruition.
Start by choosing the photo book template you like then upload all the photos you’ve already sorted and edited for the year. Customise your layout and background, add text and embellishments to personalise your photo book, then wait for it to arrive in the post!
Your photos are now no longer hidden on your hard drive. They are easily accessed, viewed and shared whenever you like. Nanna coming for a visit? She’ll appreciate being able to sit down and look through a book with a hot cup of tea.
And kids love looking at photos of themselves when they were younger. Now they can because the photos are in the bookshelf and accessible.
How do you organise and display your photos? Share your tips in the comments below.




Just the firm nudge I’ve been needing! I must get onto this! I even have some photos sitting on an old computer. Time to load onto the current one and start sorting methinks. Thanks for sharing a great reminder.
Your fairy picture is gorgeous!
Once it becomes a big job, it’s hard to get into it!
I like Photobook Australia for my photobooks. However it’s hard to find time to get the files sorted and then laid out in a digital scrapbook.
It’s not about liberating photos but one thing I recommend is regular backups to an external hard drive (kept elsewhere) or the cloud (eg Flickr) to reduce the risk of losing photos entirely to a corrupted/lost computer.
Finding time is always the hardest part! :) Good tip to backup!