The Complete Guide to Successful Gardening For Free {Free Soil, Plants, Tools, Compost}
This website may earn commissions from purchases made through links in this post.
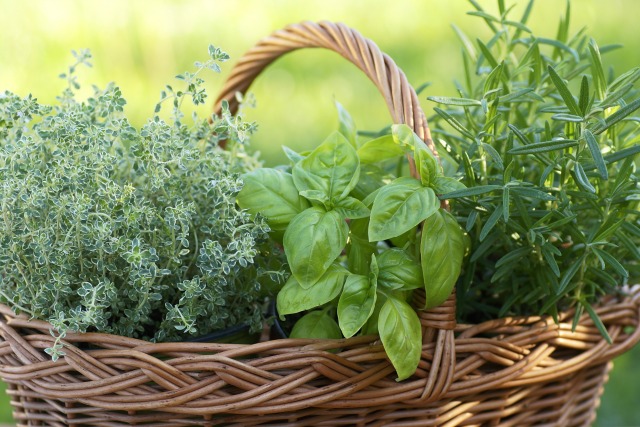
People have been gardening for free for thousands of years – you don’t have to rely on expensive nursery plants and products. Here’s everything you need to know to start a garden for free or very cheaply.
When I was a kid, my parents had extensive gardens. All the tips below – collecting seeds, taking cuttings, making fertiliser and compost, using free mulch – they did as a matter of course. Because free gardening isn’t novel; it’s how people have been growing food for thousands of years.
Thirty years on, I have a tiny courtyard that intermittently blooms like a tropical paradise or languishes like a cement jungle depending on our time commitments.
Recently, my daughter wanted to grow some flowers, so we headed to Bunnings and bought a punnet of seedlings. And while buying seedlings is much quicker and easier than the old ways – a one-hour project – there are so many gardening skills she wasn’t learning that I learned as a kid.
So free gardening is about more than just saving money. It’s also about preserving timeless skills, holding onto a bit of independence, and having an enjoyable and productive hobby that’s also great for your physical and mental health.
Starting a garden doesn’t have to cost much money if you have a little patience and creativity. This guide shares all the tips and tricks for gardening for free or with very little money.
Top Tips When Starting a Garden
My top tip for getting into gardening is to start small—a few pots, a single garden bed, or a vertical garden to get started.
That way, you learn on a small scale, it’s not too much work, and you’re tipping the scales towards success.
The return on investment is gradual; it takes time to build healthy soil, to understand what plants thrive in your location, and how best to respond to site-specific challenges.
Besides starting small, you will also want to consider your garden’s aspect. Do you have a sunny but sheltered spot to grow vegetables? You can grow plants in the shade, but you will want to look at shade-loving plants.
Are you in a frost-prone area? Or the tropics? Growing plants suitable for your region at the right time of the year will maximise your success and enjoyment.
Even if you don’t have a yard, you can start gardening on the cheap with a few pots or recycled containers on a balcony or windowsill. I’ve written an article on the easiest vegetables to grow if you’re looking for something with a high success rate to get started.
Establishing Your Garden for Free
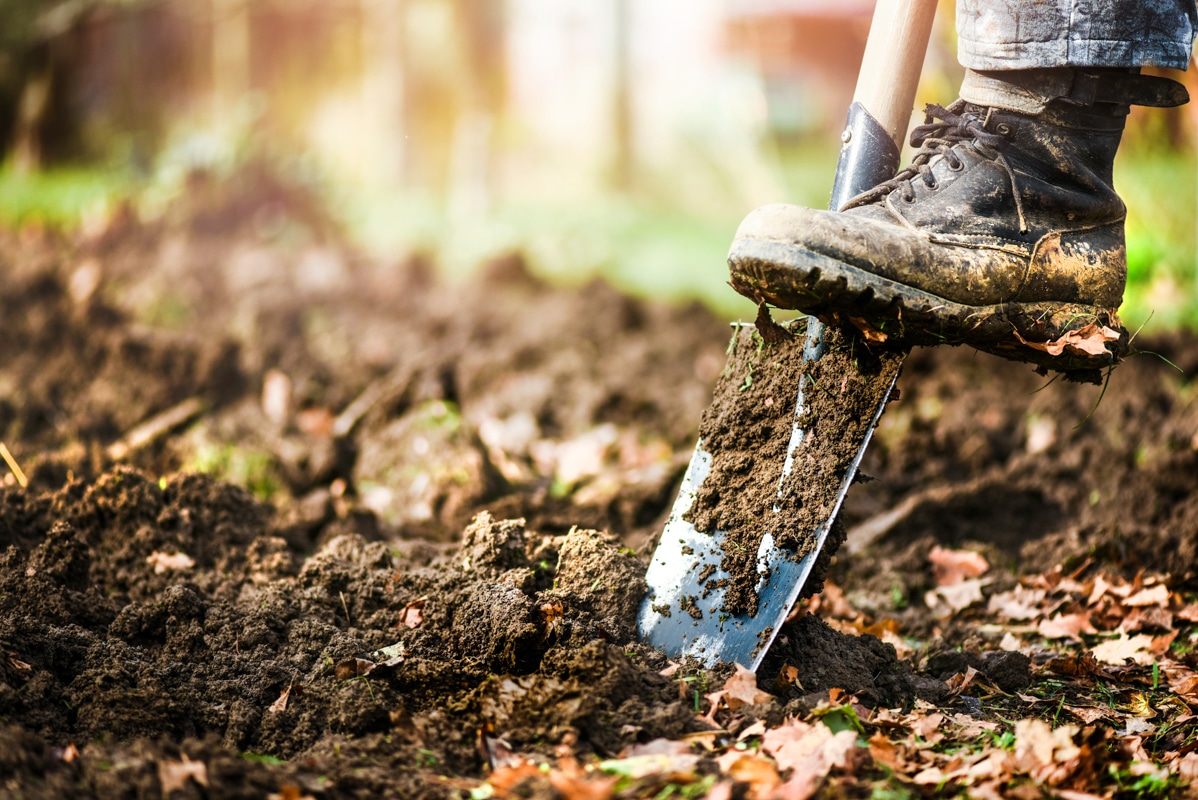
The easiest way to start gardening is with the dirt you have.
If you have a yard, then you have somewhere to dig a garden and plant directly into the ground.
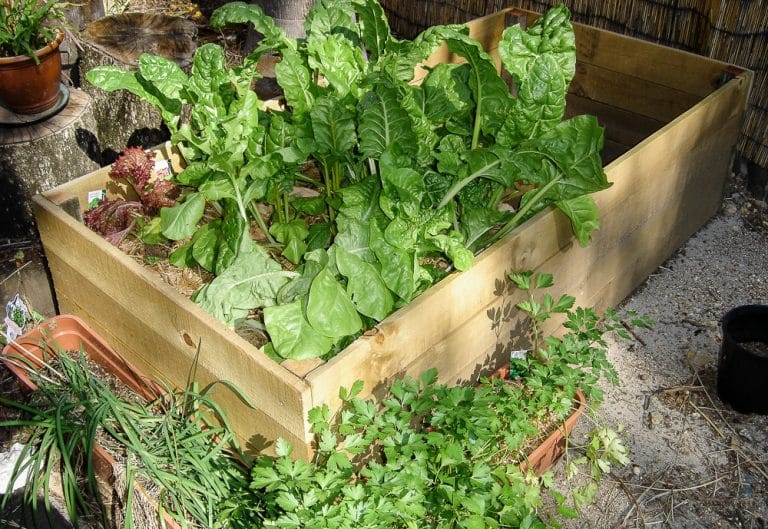
But what if you don’t have a yard, your ground is rock-hard, or you want to build a raised garden bed for accessibility?
Where to Get Free or Dirt-Cheap Soil
While you can buy soil in bags from hardware and nursery stores or by the trailer load from landscape supply stores, if you’re gardening on a budget, then free soil is something to consider.
When sourcing free dirt, you will want to make sure it’s ‘clean’. That means asking questions about where the dirt came from before taking it home.
Clean dirt is free from:
- Chemicals
- Weeds
- Construction materials and other contaminants
You can source free dirt from your Facebook community groups, Gumtree, Freecycle, local council, or construction sites. Maybe you have a friend who is building or adding a pool and needs some soil removed. People excavating pay to dump dirt, so they are often more than willing for you to take it away for them.
You could also ask local landscaping companies if they are getting rid of dirt. And if you can pick it up yourself, you can avoid the delivery cost.
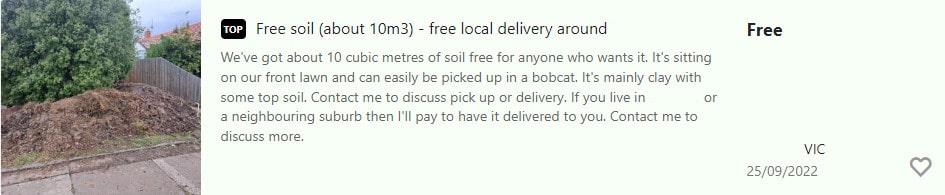
When sourcing free soil, ask about where it is from so you know it’s not coming from contaminated sites. It’s possible to get your soil tested for contaminents, although that will cost moeny.
What’s the difference between topsoil and clean fill? Topsoil is the top 5-20cm of soil. Fill, clean fill, or dirt fill is the dirt underneath the topsoil. Topsoil is superior to fill for growing your garden, but fill can be improved with compost, manure, and mulch.
Free or cheap dirt will often be poor quality, but that’s not necessarily a bad thing.
When I worked in a plant nursery, the horticulturalist told me that it was much better to get this poor-quality soil and build it up with nutrients than to get the expensive stuff which usually isn’t as good as the marketing makes it out to be.
Turning Dead Dirt into Rich Soil
If your soil isn’t that great for growing plants, then there are steps you can take to improve it.
It takes time, but you can rebuild the topsoil naturally and for free.
To make healthy soil, avoid chemical weed killers and fertilisers, and top it with plenty of compost, leaf litter, and other soil improvers like egg shells and coffee grinds.
For more information on building healthy soil, check out this great video by one of my favourite down-to-earth Aussie YouTubers who doesn’t over-complicate things:
Free Garden Edging and Raised Beds
Garden edging helps keep soil and mulch contained, separating the garden from the lawn or paths.
You don’t have to spend a fortune on garden edging. If you get creative, you can edge your garden with all different materials. Check Gumtree, Facebook Marketplace, or your local tip shop for free garden edging. Here are some ideas:
- Reclaimed timber
- Old sleepers
- Reclaimed bricks
- Rock edge
- Gravel edge
- Recycled items
I saw a picture on the net of a garden edge made from old hubcaps. You could also use old glass bottles, old plates…pretty much anything.
If you want to build a raised garden, you can use:
- Old pallets
- Old fence pailings
- Reclaimed sleepers
- Old bricks, pavers, Besser blocks
- A bath or kid’s pool
- Laundry tub
- Water troughs
- Old door panels
- Recycled plastic decking
- Old furniture like book shelves
- Tyres
- Old sheet metal roofing
You may need to drill drainage holes into the bottom for some of these items.
If you’re handy on the tools, you can build a raised garden from reclaimed metal roofing, as in this YouTube video.

Free Pots and Planters
Pots can be anything that holds soil and drains water (you may need to punch some holes in the bottom of your salvaged planters).
The kitchen and recycling bin are a treasure trove of planters: egg cartons for seedlings, yogurt containers, milk cartons and tins.
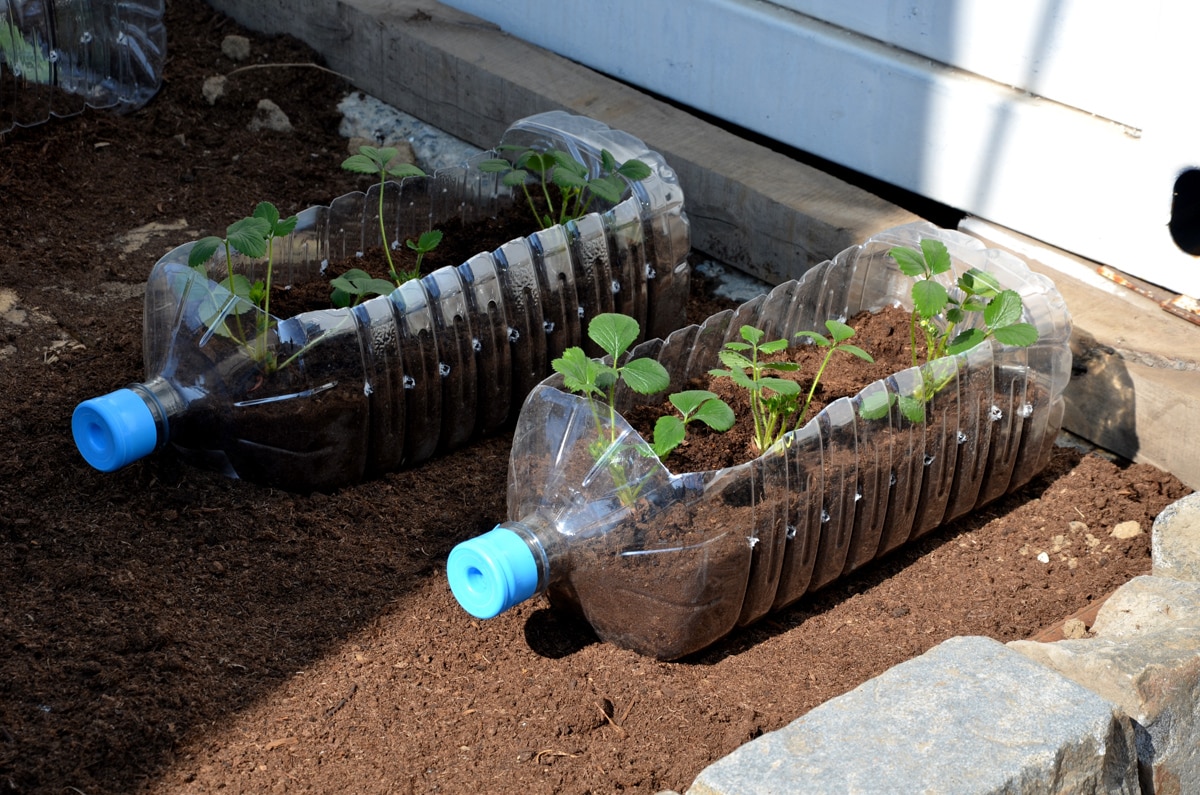
Also, consider plastic bags and soft drink bottles to use as greenhouses, white plastic milk bottles cut up for labels, and plastic bottles for drip irrigation.
But you don’t have to stop in the kitchen.
Old boots are a common ornamental garden pot, as well as baskets, recycled wheelbarrows, and styrofoam boxes from the grocers. Recycled window frames with glass make suitable greenhouses, while pallets can be turned into vertical gardens.
Old pantyhose and cut rags make good garden ties as they don’t cut into your plant. Sticks, fallen branches, or bamboo canes can be used as stakes.
Council collection day, tip scavenging (or tip shop), and salvage yards are a source of recycled materials.
Free Compost
Getting compost for free is the easiest part of gardening because we all have kitchen scraps that need to be disposed of.
You can make compost by creating a pile in your yard and turning it with a fork every now and then.
Alternatively, you can make a homemade compost bin from a bucket with a lid (check your local bakery or restaurant to see if you can pick these up for free), or you can buy a compost tumbler. Our local council offers a rebate on compost bins, so check with your local council; you might be able to get a free tumbler.
As well as a place to put your pile (or a bin), you’ll need ‘green waste’ which are your kitchen vegetable scraps and weedless grass clippings, and ‘brown waste’, which includes dried leaves, newspaper, cardboard, twigs and other dry materials.
You’ll need at least 50/50 brown to green waste or more brown if your compost is too wet. This might mean keeping a collection of torn-up cardboard boxes or collecting dried leaves, so you’ve got the balance correct.
Making compost is pretty simple. Combine your kitchen scraps (fruit and veg scraps only – no dairy, meat, or grains) with the brown waste. Turn your pile regularly or tumble if you’re using a compost bin, and top your garden with the compost once it looks like soil.
Free Garden Mulch
Mulch is essential for keeping moisture in the soil, saving you water. It helps keep the soil temperature more consistent, keeps weeds at bay, and breaks down over time, providing nutrients for your garden.
You probably have a few sources of free mulch already. If you have fallen leaves, it’s perfect as mulch. So too are weed-free lawn clippings. If you have a lot a good idea to shred fallen leaves before adding them to your garden, so they don’t form a barrier against the rain.
Many local councils have a free mulch service. Ours is at our local waste facility (the tip), and we get 100 cubic metres of course mulch for free.
Other places to look for free mulch include local Facebook community groups and Facebook Marketplace, Gumtree, local tree loppers, and local hay or sugar cane farms (look for ads on Gumtree or Facebook). We even have a local Facebook group dedicated entirely to sourcing free mulch.
Neighbours and friends may also have leaf litter or grass clippings you can use.
Free Fertiliser
Take a drive in the country (or maybe look online), and you’ll come across a few bags leaning against a farm gate with the sign ‘free poo, please take’.
Whether it comes from the butt of a cow, a chicken, a horse, or a sheep, manure is a great way to add nutrients to your garden.
Manure is nature’s recycling system – today’s waste is tomorrow’s food. It’s quite efficient that plants thrive in soil built up with decomposing waste.
Fresh manure can ‘burn’ plants and hold harmful bacteria, so it’s best to use aged or composted manure. Aged manure has been left out to dry in the sun. Composted manure has been added to a compost pile to break down.
If you add fresh manure to your garden, the US Department of Agriculture advises to do it in the off-season, 120 days before planting, and don’t apply manure to a garden with plants, especially edibles, already growing.
(They would have fainted watching me as a kid, digging fresh horse poo into the garden, in the rain, with no shoes on. Lovely, squelchy between my toes. Lucky I didn’t cut my foot.)
If I’ve turned you off poo, comfrey is a great alternative.
Comfrey is a herb with long tap roots that reach deep into the soil, pulling up the three essential nutrients for plant growth: nitrogen, phosphorus, and potassium (NPK). When you use the leaves as mulch, dig the crop into the soil, or make liquid fertiliser from the leaves, it will add those essential nutrients into the topsoil for your fruit and veggies to thrive. No poo needed.
Other options to add fertiliser to your garden include coffee grounds and tea leaves, both of which add nitrogen. You can also collect your egg shells, dry them out, crush them and add them to your garden for calcium.
2. Filling Your Garden with Free Plants
Now that you’ve got your garden bed sorted, how can you source free plants?
While not as easy as popping into your local Bunnings for a few seedlings, there are lots of places to source free or very cheap plants if you’re creative and don’t mind a little work.
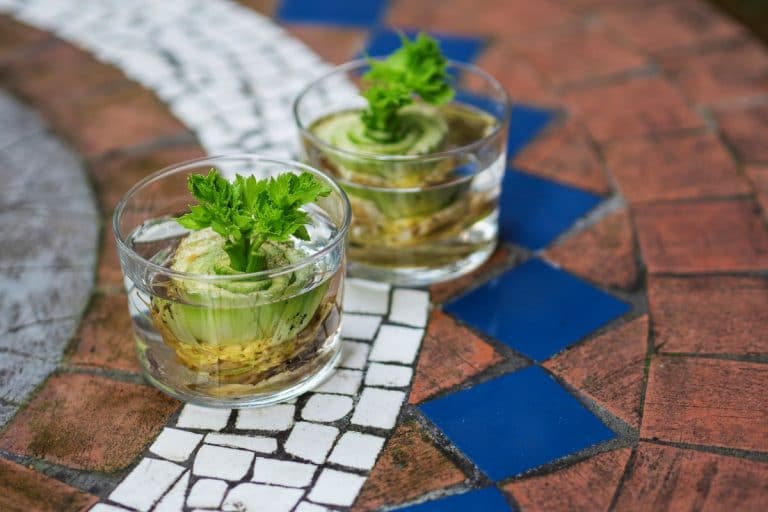
Growing Plants From Scraps
Many vegetables can be regrown from your kitchen scraps.
Some growable scraps include:
- Potatoes
- Celery
- Onions
- Sweet potatoes
- Lettuce
Potatoes and sweet potatoes can be grown from chunks of skin that have an ‘eye’ in it. Just plant them in the soil with the eye facing up. If you’ve ever left some in the pantry, you know how easily they sprout!
Vegetables like celery, green onions, brown onions, and lettuce can be regrown by placing the roots or root base in a small amount of water. Once the roots form, you can plant them in the garden.
Free Plants from People
Gardeners love to share plants. Many of the shrubs in our yard come from divided plants in my father-in-law’s garden. It’s a win-win; I get free plants, and it’s an easy way for him to declutter the garden.
Here are some ideas for filling your garden for free:
- Ask friends, family, neighbours, and work colleagues for cuttings or spare seeds
- Offer to help divide, remove, or prune plants
- Join local online gardening groups and keep an eye out for free plants or plant swaps
- Look on Gumtree
- Local councils and environmental groups, like the Living Smart program, sometimes give away free native plants, so it pays to sign up to their newsletters
- Join your local community garden
And, of course, once your garden is up and growing, you can pass on the love.
Plants for Pennies
While not free, here are some places you can find plants very cheaply.
- Gumtree and Facebook Marketplace
- Garage sales
- Carboot sales
- Local markets
- Markdowns and clearance items at nurseries or Bunnings
- Aldi and other supermarkets, health food stores
- Dumpster diving (this one is free)
- Curbside pickup (also free)
My neighbour had a knack for finding clearance plants that were practically dead and nearly free and bringing them back to life. If you can revive plants, it’s a great way to save money and reduce waste.
Saving Seeds
Seed saving is something we’ve been doing since the dawn of agriculture.
As well as being a cheap way to garden, seed saving is vital for biodiversity. Biodiversity is important for ensuring our future food supply.
Many heirloom plants are dying out or have already become extinct – saving seeds ensures genetic diversity.
For example, at the beginning of the 20th century, over 100 varieties of potatoes were commonly eaten. Now we commonly eat only about four types.
Easy Start to Seed Saving
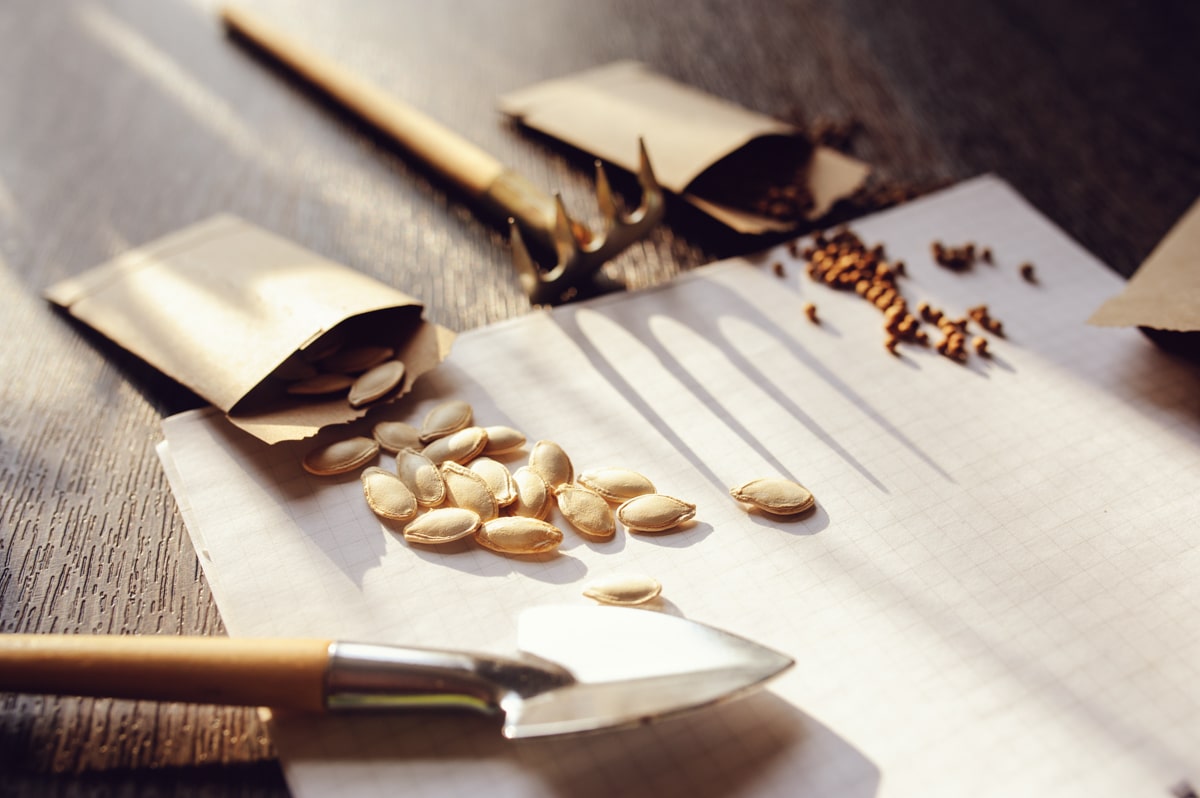
The easiest way to start saving seeds is to save them from the food you have purchased to eat. For example, when you eat a tomato or pumpkin, take a moment to collect and dry the seeds.
Unfortunately, many fruits and vegetables sold in supermarkets aren’t ideal for seed collecting, so it’s best to buy organic produce from farmer’s markets if you want to collect seeds. That can be pricey, but just a couple of tomatoes could give you tomato crops for years to come.
How to Collect and Store Seeds
My favourite way to regrow plants from seed is to let the seeds drop and self-seed. The natural way. I call these serendipity seedlings.
Homegrown tomatoes are great, but homegrown tomatoes that practically grow themselves each year without any work are the sweetest of all.
But what about collecting seeds more proactively?
Many plants have specific tips to save their seeds successfully. For example, tomato seeds need to be fermented before drying. It’s not a hard process – just leave them in some water for a few days – but when you save seeds, it’s worth making notes on how to seed save for each type of plant.
Below are some general tips to get you started.
Some commercial seeds are hybridised, so the seeds you collect either don’t grow or don’t grow true to form. It’s best to grow heirloom varieties from quality seed sources such as The Seed Collection, Eden Seeds, or the Diggers Club, or seeds from organic produce you’ve bought at the markets.
Choose the best quality plants, flowers, fruits and vegetables from which to save seeds. Look for great flavour. Next year’s plants will only be as good as this year’s seed.
Harvest seeds when the pod has dried on the plant or when the fruit or vegetable is fully ripe but not over-ripe. It’s a good idea to harvest in dry weather after the morning dew has dried.
For plants with flower heads like onions, ensure that the fruit and seed are very ripe, pull the whole plant up from the roots, cover it with a paper bag and hang it upside down in a cool, dry place.
Finally, make sure your seeds are completely dry before storing so they don’t go mouldy and label the envelope or jar, so you know what seed is what next growing season.
Some plants cross-pollinate with other varieties. If you’re not worried about growing plants the same as last year, you don’t need to worry about cross-pollination. If you DO want your plants to grow exactly the same, it’s a good idea to read up on whether your plant can cross-pollinate (not all plants do) and how to avoid it.
For more in-depth information in one place, check out The Seed Saving Bible, which is ‘free’ to read if you have a Kindle Unlimited account (which you can try for free), or for a more thorough guide, check out Seed to Seed, the Complete Guide to Saving Seeds or the books available at your local library.
Taking Cuttings
Taking cuttings is one of my favourite ways to grow plants – it’s so satisfying watching the roots grow. With time, you can propagate an entire garden with cuttings.
There is an abundance of plants already around you, and all you need is a little twig to create more.
The first rule of taking cuttings is to always ask permission. Most avid gardeners will be delighted to share a cutting with you, and it’s an opportunity to meet the people in your neighbourhood and make friends along the way.
To take cuttings, you will need a sharp, clean pair of secateurs or scissors, a bag to put your cuttings in, and a pot with some compost, soil, or seed-raising mix. You can also sprout cuttings in a jar of water. As cuttings are susceptible to disease, it’s important everything is clean.
An optional extra is hormone powder to help the roots grow. Some people dip their cuttings in raw honey to help them take root, but this is optional too.
There are four types of cuttings, leaf cuttings, softwood, semi-hardwood and hardwood. Succulents and softwood cuttings are the easiest to take and the most common, so they are best for getting started.
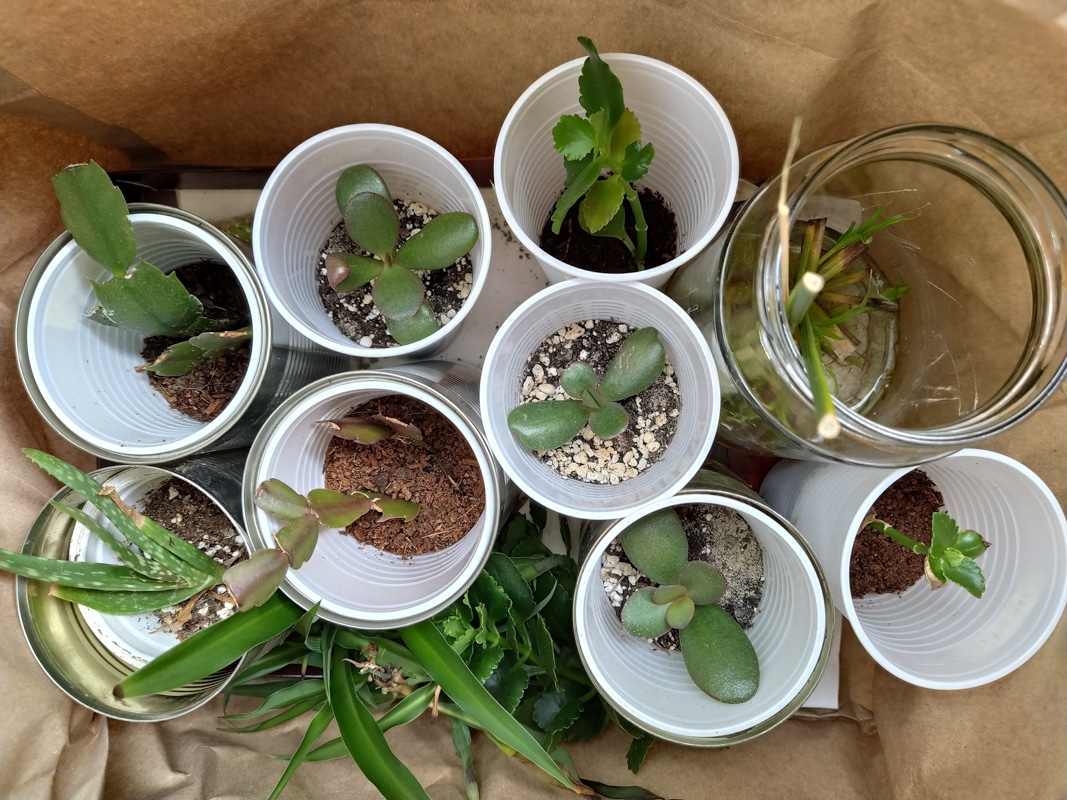
Succulent Leaf Cuttings
Succulents will propagate from leaves. One succulent can turn into hundreds with a bit of care.
For succulents, you can cut leaves off, arrange them on a tray of soil on top of the soil, concave side up, and just leave them. Once they take root, you can transplant them.
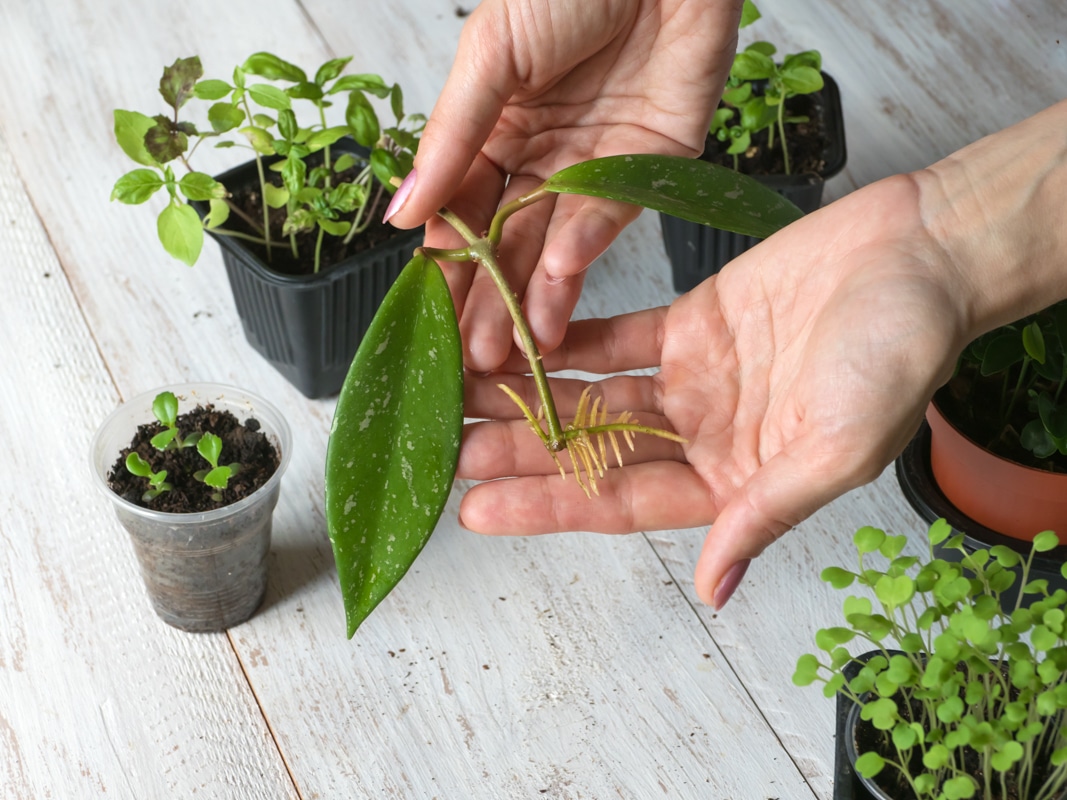
Taking Softwood Cuttings
Softwood cuttings are the second easiest to strike. Softwood refers to a stage of growth rather than a type of plant. It’s between when the stem is fresh and green and when it’s hard and woody.
Too young and green, and your cutting will rot before the roots grow. Too woody, and it’s harder to propagate. If a stem bends then snaps, it’s at the softwood stage.
The best time to take softwood cuttings is in the spring and early summer and the early morning while plants are still moist.
To take a cutting, choose a firm, flexible shoot without fruit, flowers, or seeds. Make a clean cut with sharp scissors. It’s a good idea to take a few cuttings if one fails.
To plant, moisten the soil in your container and trim the leaves from the lower half of the stems. Dip in hormone powder if using, and stick the stem in the soil.
As the plant no longer has roots from which to get moisture, it’s important to keep the plant humid and moist by making a little greenhouse around it. This can be done by placing the cut end of an empty soft drink bottle over the pot or by placing sticks around the side of the pot and placing a plastic bag over them, securing them with a rubber band or string.
Place your cuttings in a shady spot and ensure they don’t dry out. Once roots appear (check after two to three weeks), they are ready for replanting.
For an in-depth guide to taking cuttings, check out Fine Gardening.
Semi-Hardwood and Hardwood Cuttings
Taking semi-hardwood cuttings is the same as softwood cuttings, but you take them later in summer from more mature plants or evergreen trees. Semi-hardwood cuttings will take longer to root than softwood cuttings.
Hardwood cuttings are harder to ‘strike’ (take root). They are taken from deciduous trees during late autumn and winter when the plant is dormant and requires extra skill and attention. If you’re new to cuttings, start with softwood first.
Garden Maintenance
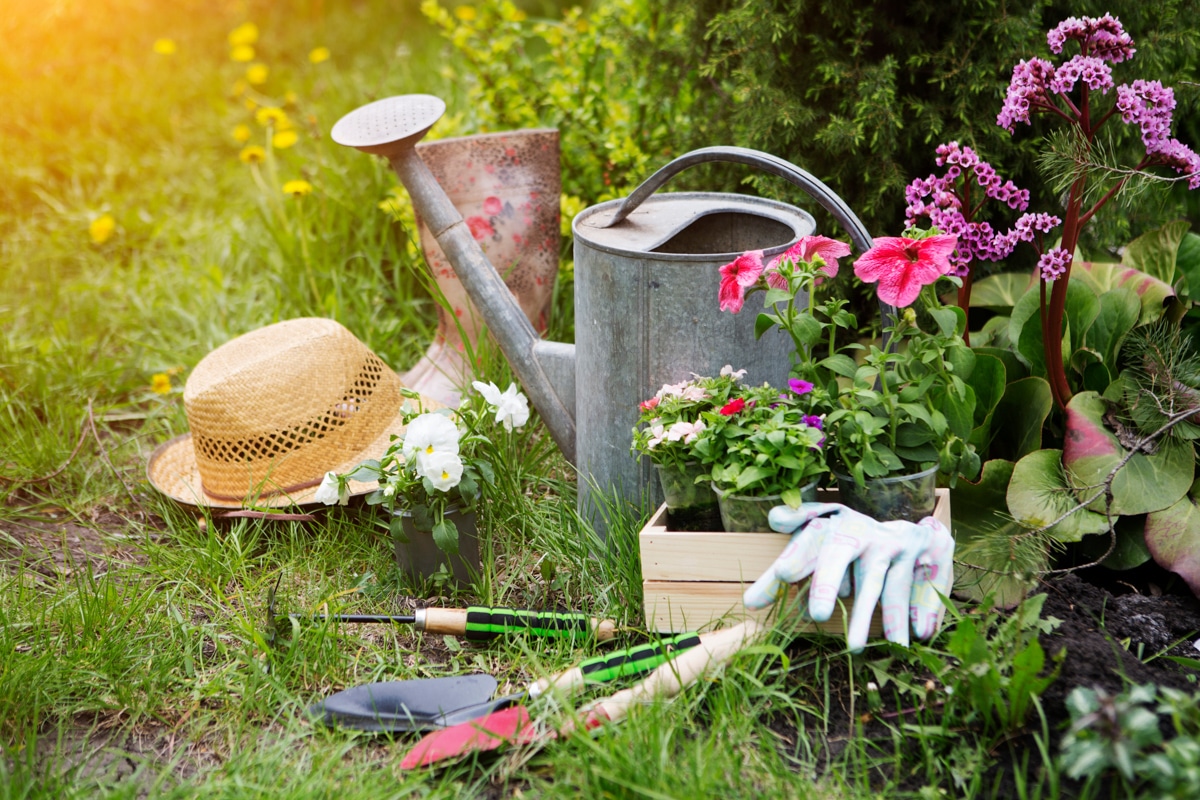
If you love gardening, then maintenance is a joy rather than work. Watering in the evening while sipping wine, tenderly checking for flowers and fruit. But you’ll need a few supplies to look after your garden.
Below are some tips for sourcing low-cost gardening tools and other maintenance supplies.
Free Water
The best source of free water is rainwater.
While a rainwater tank might be expensive, you can collect smaller amounts of water in barrels, buckets, or other containers, many of which you can pick up cheaply or for free from your local tip shop. The important thing to note when collecting water is to keep your water covered or use a fine mesh cover to prevent mosquitos from breeding in it.
The other great source of (sort of) free water is wastewater, not to be confused with grey water. Grey water is not recommended for your garden, especially if you’re growing food plants. However, households waste a lot of water that doesn’t have any chemicals in it and can be collected for the garden.
A good example is the water that runs down the shower drain while you’re waiting for it to warm up. This water can be collected in a bucket and used on the garden. Just be sure to push the bucket aside in the shower, so it doesn’t get shampoo and soap in it. We did this for years during the last drought here in Australia.
It’s not just in the shower where water is wasted. The kitchen sink is another place where you can collect clean but wasted water waiting for it to heat or when you wash vegetables. If you’re boiling vegetables or pasta for dinner, that water can be cooled down and used on the garden, as long as it’s unsalted. Aquarium water is another source of ‘free’ water that can add nutrients to the plants.
To minimise the amount of water your garden needs, use plenty of mulch, so water doesn’t evaporate quickly from the soil.
Managing Garden Problems and Challenges
Pests and diseases are big topics requiring special advice, so this section will skim the surface – a mindset intro, if you will.
The first mindset is that problems are the best way to learn about gardening, so rather than viewing pests, diseases, and weeds as a pain, use them as a learning tool to diagnose the health of your garden.
For example, after doing some reading, I think our anemic-looking cucumbers mean our garden needs more minerals as we planted directly into just compost. The more I learn from the problems as they arise, the better my gardens will be next year.
The second mindset is to consider whether pests and weeds are actually causing a problem. For example, while weeds can compete with your plants for nutrients and need to be pulled, they also provide cover during the winter months, preventing soil erosion.
Are pests causing significant damage, or can you share your garden if pests are just eating a little bit?
When I grew strawberries, we would just cut off the bits the insects had eaten, and we ate the rest. No biggie. When I started selling them, however, it was a different story. No one wants to buy strawberries with holes in them.
My point is, before managing problems, assess whether they really are a problem because sharing your garden will cost you no time, no money, and no effort.
The third mindset is looking for ways to naturally deal with pests and weeds.
Chemical pesticides is that they kill indiscriminately. Not all garden insects are harmful. Spiders eat bugs that might eat your plants (not to mention mozzies), birds eat slugs and grasshoppers, ladybug larvae eat aphids, and earwigs eat bugs that eat your plants…before spraying, you want to take the time to get to know your thriving little ecosystem.
Dealing with Pests for Free
When it comes to pests and diseases, prevention is better than cure.
Ensure that your plants are in nice, healthy soil and get plenty of water. Cut off any diseased leaves. Try companion planting and permaculture principles to ward off pests naturally and grow healthier plants.
Other tips include:
- Rotating your crops so you’re not growing the same thing in the same spot year after year
- Removing any infested or sick leaves and plants to stop the spread
- Growing plants to attract ‘useful’ bugs
- Removing weak plants, leaving only the strong and healthy ones
- Having a no-dig garden, so the beneficial bugs don’t get disturbed
Finally, if you need to deal with pests, looking to your kitchen first can help you deal with them for free. Garlic and chilli both make great pest deterrents, milk or baking soda can help with fungal disease, soapy water can fight aphids, and while not a kitchen staple, diatomaceous earth stops snails and slugs in their tracks.
Free Garden Tools
Depending on your garden, you may only need a few tools or use what you have on hand. For example, if you use the no-dig garden method, there’s no need for a fork.
The other day I made holes in the ground with a knitting needle (you can use a stick) to plant seedlings. Or an old fork can be used for weeding.
If you’re serious about gardening, it pays to get quality tools. We once bought the cheapest available, and the handle snapped off the spade the first time we used it.
However, getting good quality doesn’t mean paying top dollar. Here are some ways to get free or cheap garden tools:
- Borrow. If you’re only digging the soil once or twice a year, borrowing will save you money and storage space!
- Barter. Can you swap the use of tools for something else?
- Check out Gumtree, Facebook Marketplace and Freecycle for free tools
- Look for second-hand tools at garage sales, thrift stores and online.
Tools that we’ve found useful are:
- A spade
- A garden fork
- A small trowel
- Secateurs
Gardening for free isn’t revolutionary – it’s how it’s been done for millennia. But because we are no longer predominantly rural, we have to use a little more ingenuity to find free stuff.
I love the quote below because it shows how there are plenty of location-specific free resources available when you search them out:
“My other scores included coffee grounds from nearby shops, fallen leaves from neighbors’ yards, and the occasional pile of discarded oyster or mussel shells from a friend’s dinner table. I loaded my loot into buckets and bags and packed them into our Subaru hatchback. And though we had no farm animals for manure, I scored “zoo doo,” the composted equivalent from elephants, zebras, and other herbivores at Seattle’s Woodland Park Zoo—which, luckily, is about a mile from our house.” [source]