
Easy Homemade Easter Chocolates That Will Save You Money
This website may earn commissions from purchases made through links in this post. As an Amazon Associate, I earn from qualifying purchases.

Save money at Easter while enjoying indulgent chocolate treats by making your own homemade Easter chocolates.
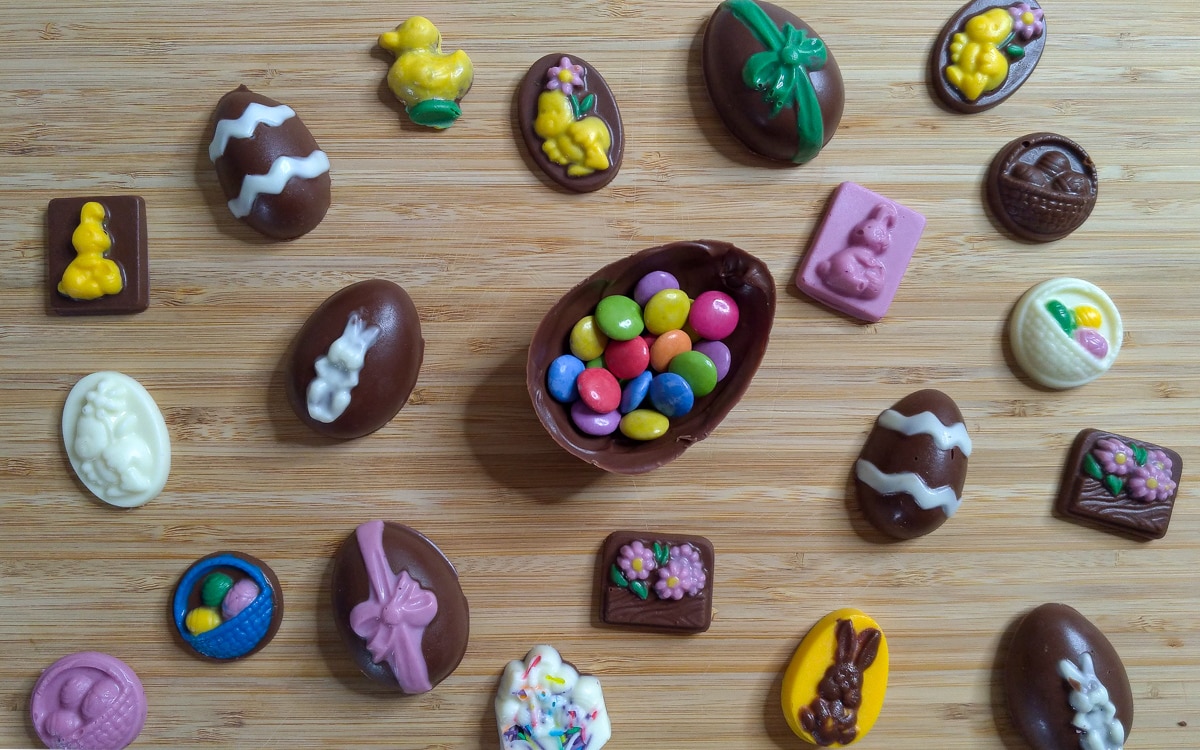
Save money, get crafty and give beautiful, delicious homemade chocolate this Easter – the process is simple, and there are lots of ways to get creative and have fun.
Chocolate and I go way back.
My mum had a chocolate-making business, so I grew up with the smell of chocolate wafting through our house every day, and I would help her paint and mould choccies to sell.
Then one of my first jobs was in a chocolate shop.
So this article covers all the tips and tricks I’ve learned over the years.
Below I’ll cover everything you need to know to melt and mould basic chocolates, whether for Easter or other events. I cover everything from equipment and chocolate choice, how to make simple moulded chocolate, making fancy hand-painted chocolate, chocolate with fillings, and how to make hollow Easter eggs with a surprise inside.
Why Make Your Own Chocolates at Home
Making your own Easter chocolates is a bit time-consuming, but it’s waaaay cheaper than buying them, especially if you use chocolate purchased at half-price.
If you have the time, DIY Easter chocolates are a great way to save money at Easter.
A Lindt bunny costs around $10 for 100g of chocolate. A block of Lindt chocolate is $8.50 per 100g, and if you stock up when they are half-price to make your own bunnies, it is $4.25 per 100g.
You don’t have to use Lindt chocolate, of course.
You can also use cheaper chocolate (see below) or even make your own chocolate from scratch. Chocolate melts are easier to use than Lindt and other higher-quality chocolate, so starting with the cheaper option is better.
Whatever chocolate you choose to use, it will be less expensive than buying Easter chocolate.
It’s also fun to make chocolates. Years ago, my mum would get together with friends and spend the evening making Easter chocolates over wine and a chat. Now that my kids are older, they enjoy making chocolates for Easter with me.
Basic Chocolate-Making Equipment Needed
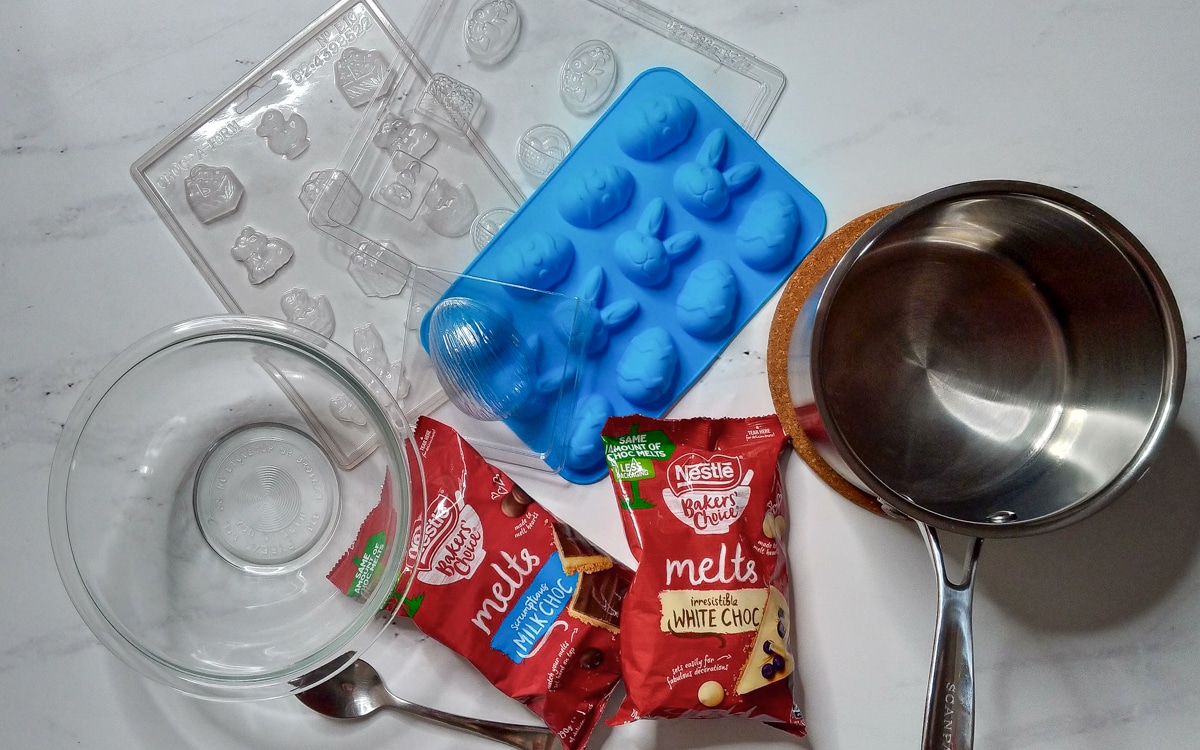
You don’t need much to make Easter chocolate. The basic equipment includes just five things:
- Chocolate moulds
- A bowl and saucepan to make a double boiler OR a microwave-safe bowl
- A metal or silicone spoon to stir and spoon chocolate into moulds
- And, of course, some chocolate.
Optional Equipment
Here’s a list of optional equipment you might consider, depending on the type of chocolates you want to make:
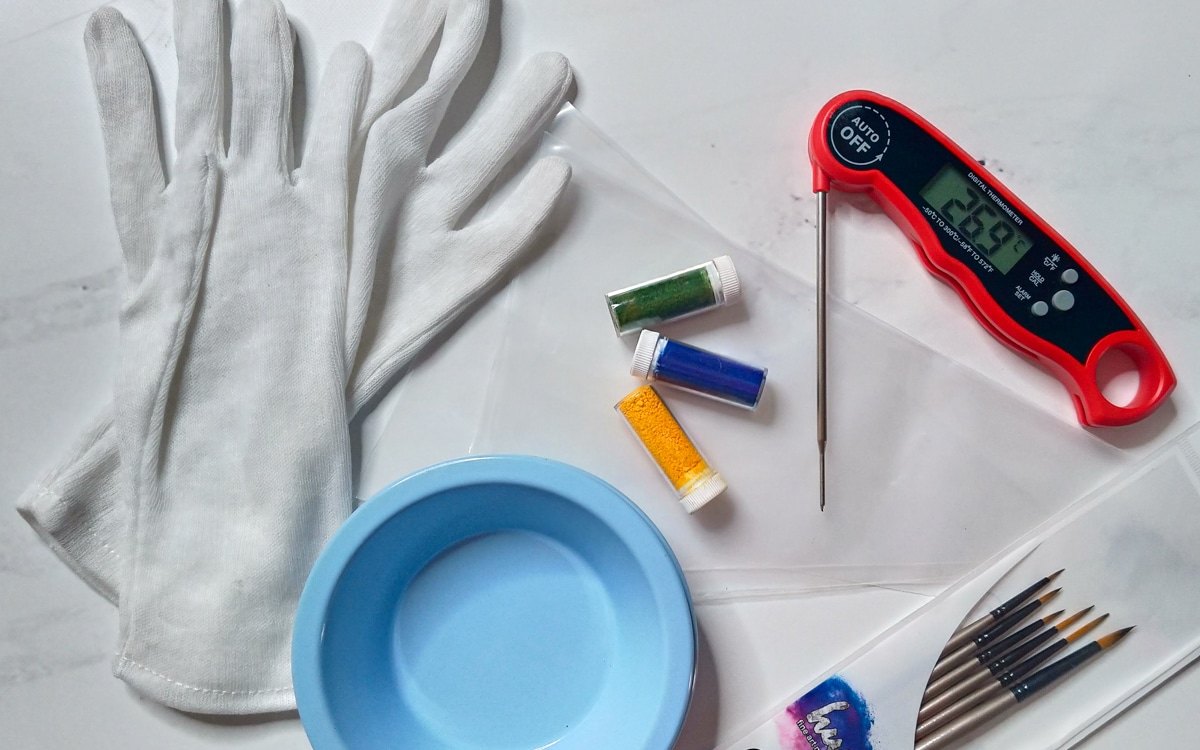
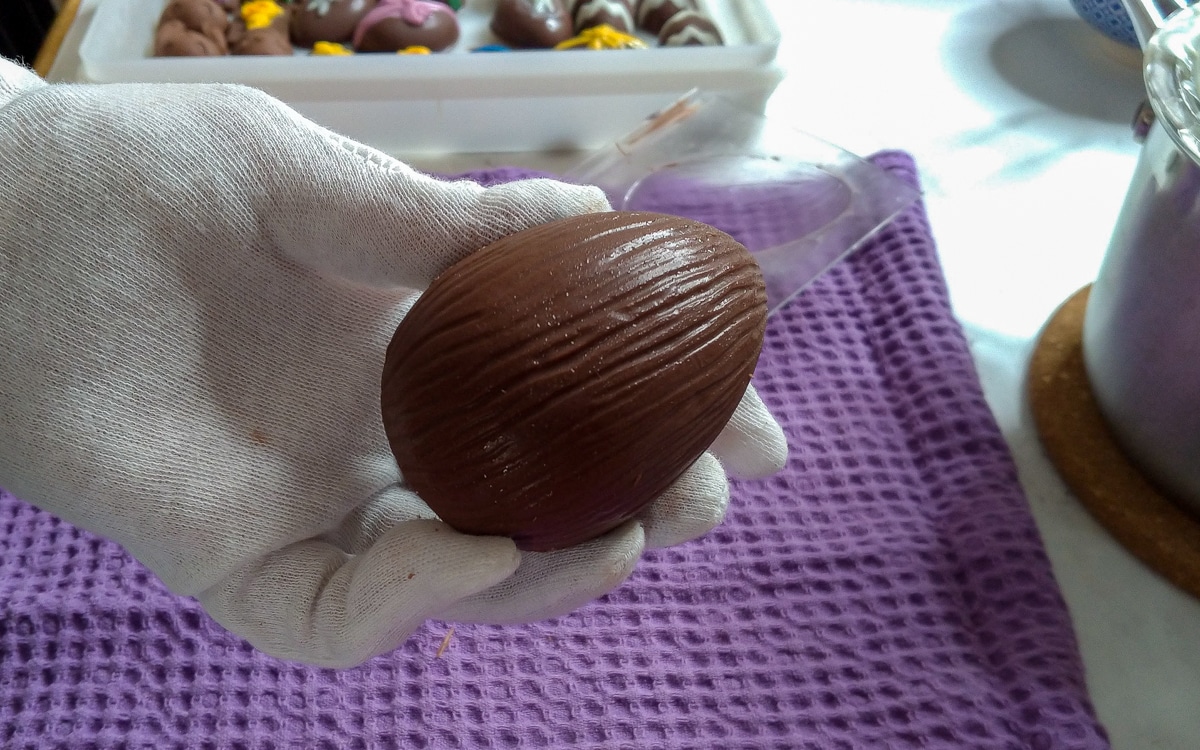
- Cotton gloves (great for handling the moulded chocolates)
- Filling to make filled chocolates (see below for more information)
- Piping bags to more easily fill the chocolate moulds
- Powdered colouring for colouring white chocolate (see below for more details)
- Paint brushes for hand-painting the chocolates (see below for more details)
- Extra bowls to mix the coloured chocolate

Wear cotton gloves to keep finger marks off your chocolate. These are a dollar or two from supermarkets or Officeworks.
Where to Buy Moulds

Just before Easter, many stores stock chocolate moulds.
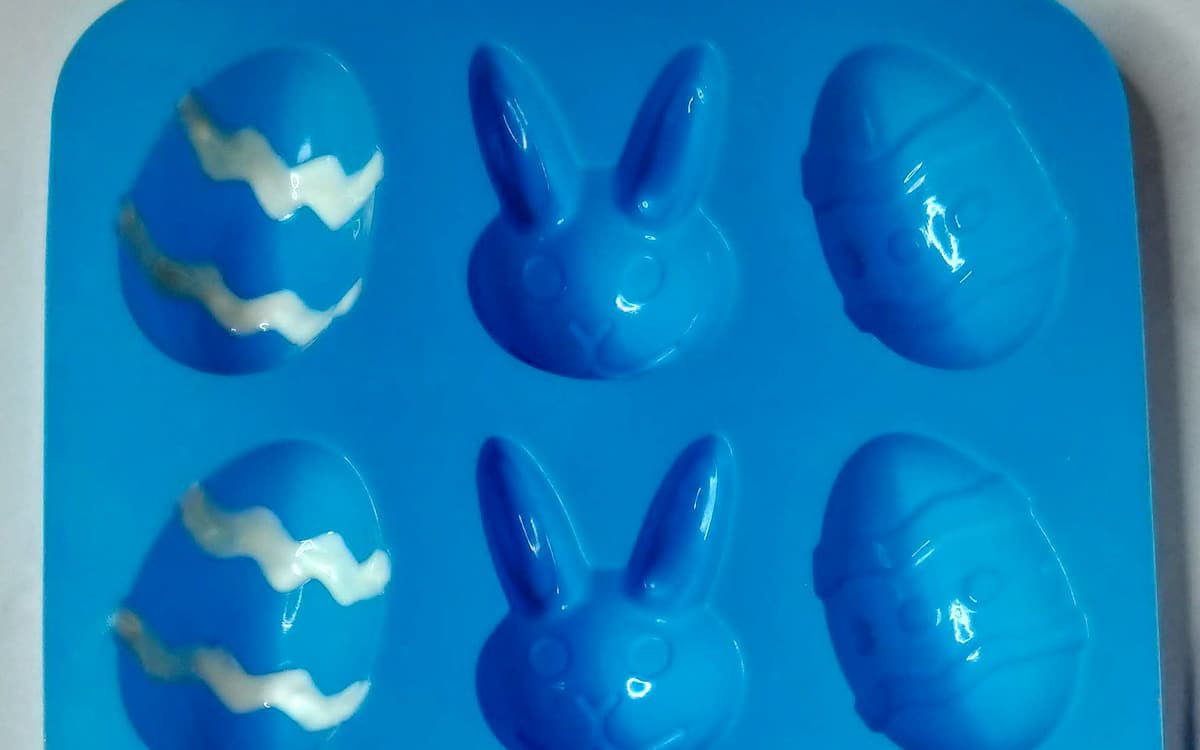
I got the blue one (pictured) from the Reject Shop, but I’ve also seen them in Coles, Kmart, and Big W.
You can buy chocolate moulds all year round from craft stores like Spotlight and online from cake and chocolate suppliers like the Easter Egg Warehouse (Sydney), the Party People (also Sydney), and Amazon (aff. link).
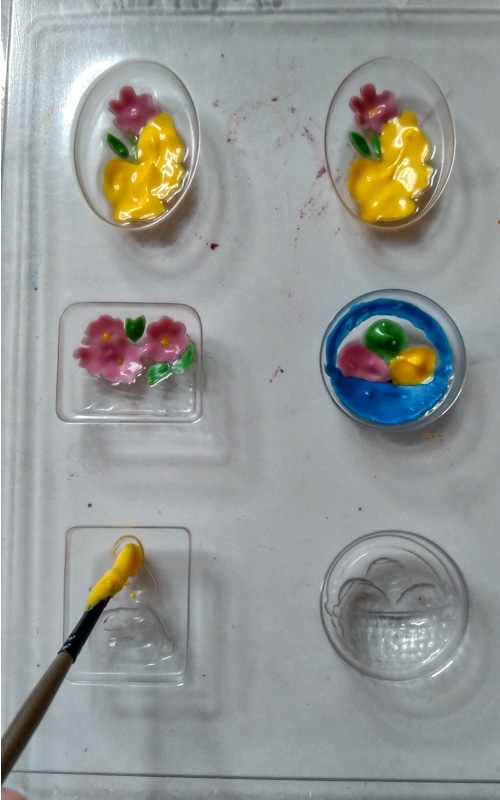
The clear moulds in the photo are my mum’s old moulds from the 80s, so if you look after them, they will last a long time.
Silicone moulds are bendy, making them hard to move around when full of melted chocolate without spilling it! Put the silicone mould on a cold baking tray to keep it flat when moving it around.
What Chocolate should You Use for Homemade Easter Chocolate?

You have a few chocolate choices when making your own chocolate.
The first and easiest option is to use chocolate (candy) melts or buttons. Chocolate melts are good because:
- They’re cheaper than pure chocolate
- They’re easy to melt and use
- They don’t need tempering
- They are easier to handle once moulded
Cadbury and Nestle chocolate melts are readily available in supermarkets and are cheap, especially when purchased at half-price. You could also use Caramilk, and craft stores like Spotlight sell ‘candy melts’.
Another option is to use eating block chocolate like Cadbury, Choceur (Aldi brand) or Lindt.
Better quality chocolate like Lindt – chocolate with cocoa butter in it – will result in better quality Easter chocolates. However, it is fiddly and may need tempering (see below) for the best results.
It can also melt more quickly when being handled after moulding. We used both Lindt chocolate and chocolate melts, and the Lindt Easter eggs we made melted very quickly when being handled compared to the chocolates made from the melts (but they tasted amazing).
You can also make your own chocolate from scratch. This will not give the same smooth results as commercial chocolate, but it’s fun to try, and you know exactly what’s in it.
How to Melt Chocolate
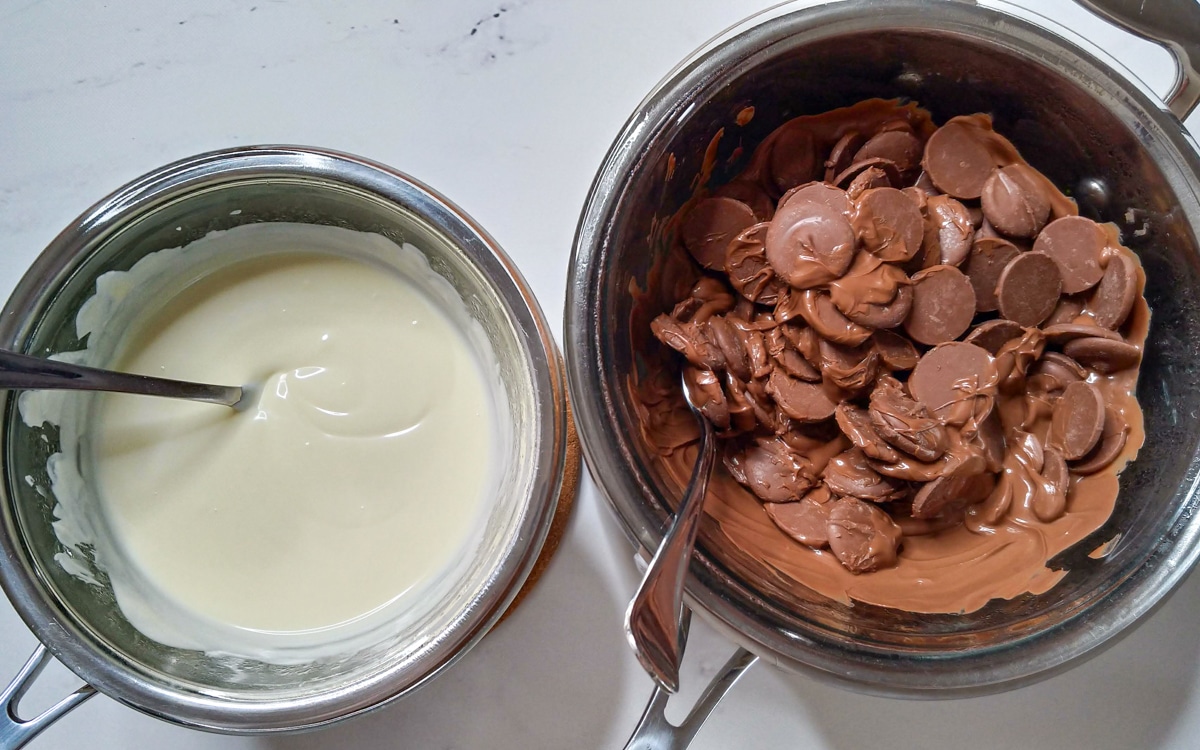
You can melt chocolate using a makeshift double-boiler (a bowl and saucepan) or in the microwave. Pictured is the double-boiler method.
If you’re using chocolate melts, simply place them in your bowl or microwave-safe bowl and melt them as per the instructions below.
If you’re using block chocolate, chop your chocolate up into small pieces before melting. Melt according to the stove or microwave instructions below, stirring regularly.
Stovetop Method
Place chocolate in a heatproof bowl, and place the bowl over a pot of boiled water to create a makeshift double-boiler. I boil the kettle and put the boiled water in a saucepan with the bowl over the top.
Let the bowl sit, uncovered, until the chocolate melts, stirring it occasionally.
I find that I don’t need to turn the stove on – boiled water from the kettle is sufficient to melt the chocolate. If you live in a colder climate, you may need to add some heat, keeping in mind the precautions below.
First, make sure the bowl doesn’t touch the water. If the chocolate gets too hot, too fast, it can scorch.
Secondly, make sure no steam or water droplets get into the bowl. Water will cause the chocolate ‘seize’ and go lumpy. If you are simmering the water, it is important to ensure the steam doesn’t make its way into the bowl.
Microwave method
To melt chocolate in the microwave, place chocolate melts in a microwave-safe bowl and microwave on high for 15-30 second bursts until melted, stirring in between.
If you use block chocolate that needs to remain tempered, check the temperature after each nuke to ensure it doesn’t get too hot.
Water will make your chocolate ‘seize’ and go grainy and yuck – not what you want! So ensure your bowls, moulds, spoons, etc., are completely dry and that no water (including steam) touches your melting chocolate.
Tempering Chocolate (Optional)
Tempered chocolate is chocolate that has been heated and cooled to stabilise it and give it a smooth, glossy finish.
High-quality store-bought chocolate will already be tempered, so melting it can take it out of temper, and if that happens, you will need to retemper it to get the same smooth finish.
However, if you’re careful and don’t get your chocolate too hot, you can melt it enough to mould without taking it out of temper.
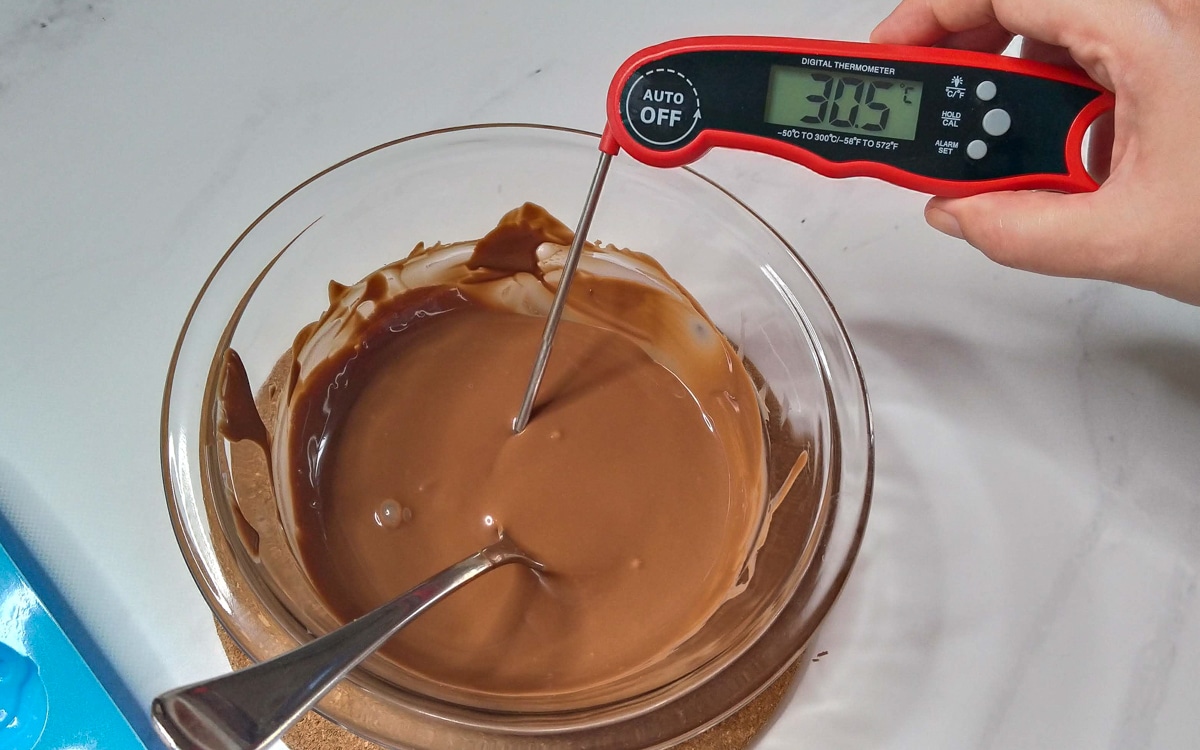
A thermometer is super useful for this process. I use this one for everything.
Temperatures to keep your chocolate tempered are:
- Dark chocolate: 31°C-32°C
- Milk chocolate: 30°C-31°C
- White chocolate: 29°C-30°C
It shouldn’t need tempering if you don’t go over these temperatures when melting your chocolate.
Chocolate melts very fast and reaches these temperatures very quickly before all of it has melted. So you want to keep stirring it and checking the temperature, even before it’s all melted, to ensure it remains tempered.
Keep about 25% of your chocolate unmelted in case your melted chocolate gets too hot and you need to retemper it.
If your chocolate gets hotter than the above temperatures, you can retemper it with the remaining 25% of the chocolate you didn’t melt.
To temper your chocolate:
Melt 75% of the chocolate to the below temperatures:
- Dark chocolate: 46°C-49°C
- Milk chocolate: 43°C-46°C
- White chocolate: 43°C
If heating over hot water on the stove, remove the bowl from the heat and add about half of the reserved chocolate.
Stir until melted.
Keep stirring and adding more of the reserved, unmelted chocolate until your chocolate reaches temper temperature:
- Dark chocolate: 31°C-32°C
- Milk chocolate: 30°C-31°C
- White chocolate: 29°C-30°C
To check your chocolate is tempered, dip a metal knife into the chocolate and let excess chocolate drip off until you have a thin coating on the blade.
Let the chocolate dry (3-5 mins) – it should look shiny, and you’re good to go.
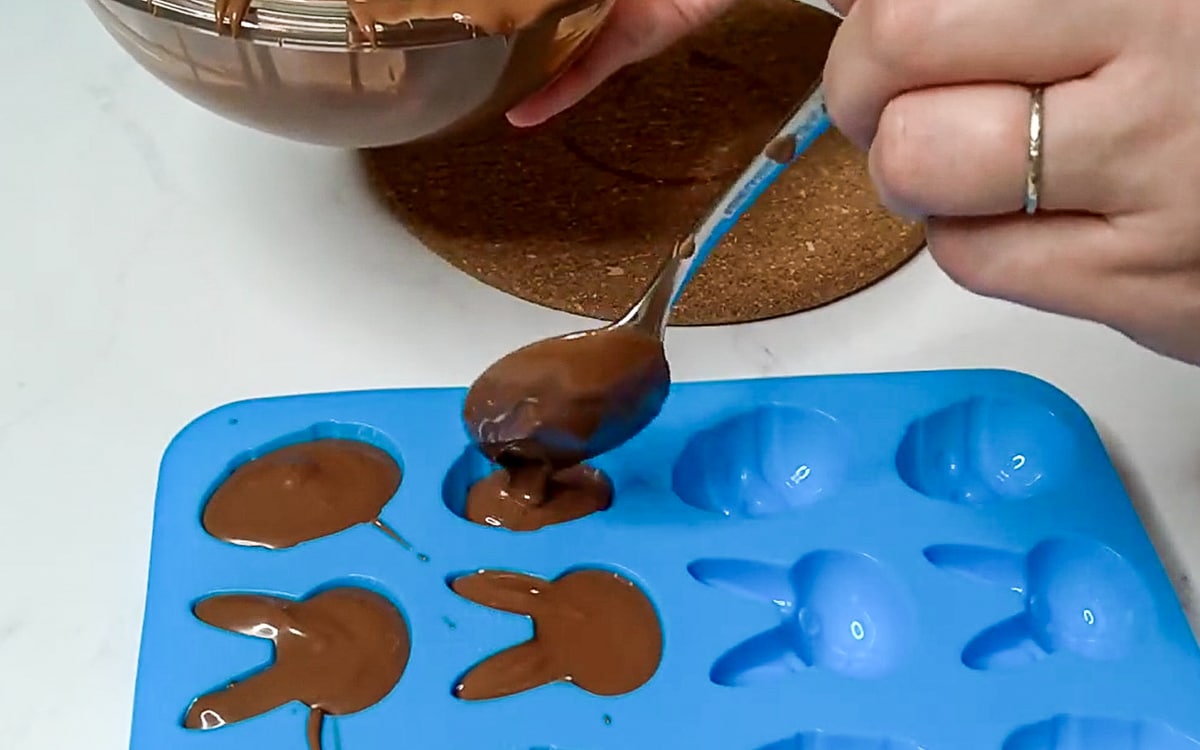
Making Simple Easter Chocolates – How to Fill a Chocolate Mould
Firstly, make sure your mould is clean and 100% dry.
There’s no need to coat or grease your mould – you want to keep it completely clean – simply fill it with melted chocolate.
The best way to fill moulds is to use either:
- a clean, dry teaspoon or dessert spoon
- a pyrex measuring jug or ceramic jug
- a squeezy bottle
- a piping bag
- a chocolate pouring spoon; or
- a silicone chocolate melting pot
A spoon is the easiest choice, but a piping bag will ensure a clean fill without drips or spills.
For a clean look, try not to overfill your chocolates – the melted chocolate shouldn’t come over the edge of the mould.
Once you’ve filled your mould, give it a gentle tap on the table to remove any air bubbles.
Freeze the moulded chocolate for 5-10 minutes or refrigerate for 15-30 minutes until set.
Remove by gently tapping on a tea towel or pushing the chocolates out of the silicone mould. If completely set, the chocolates should come out easily.
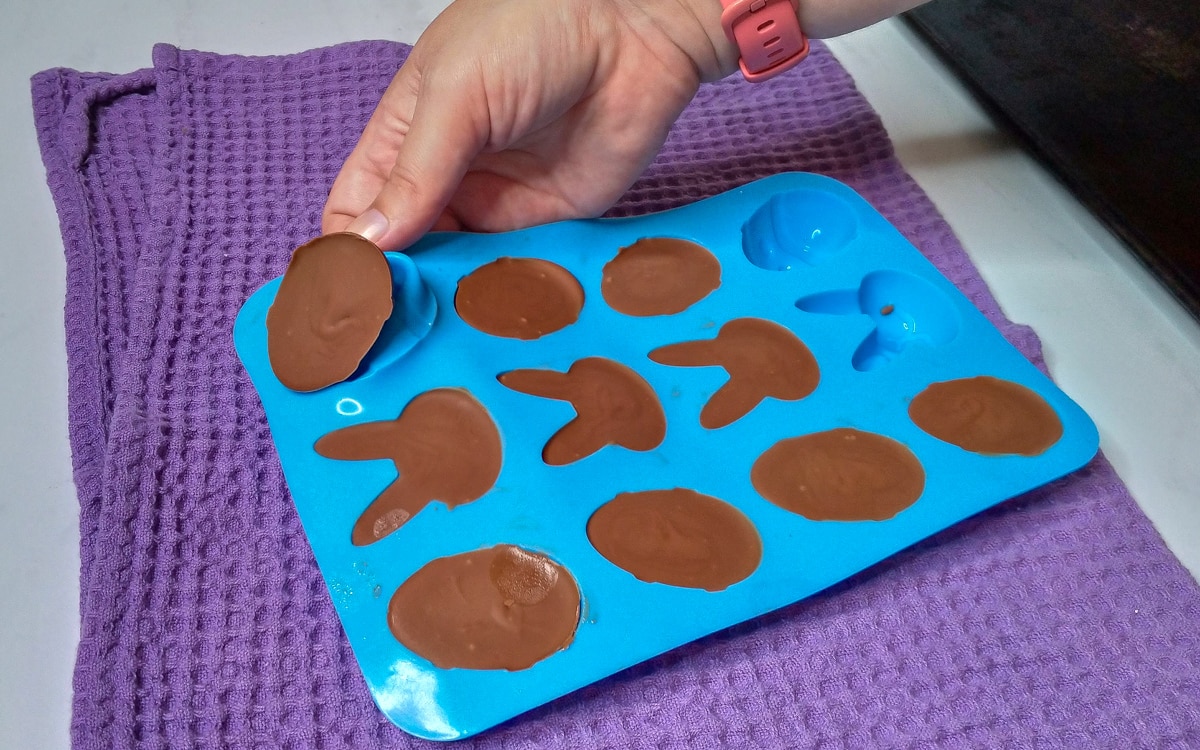
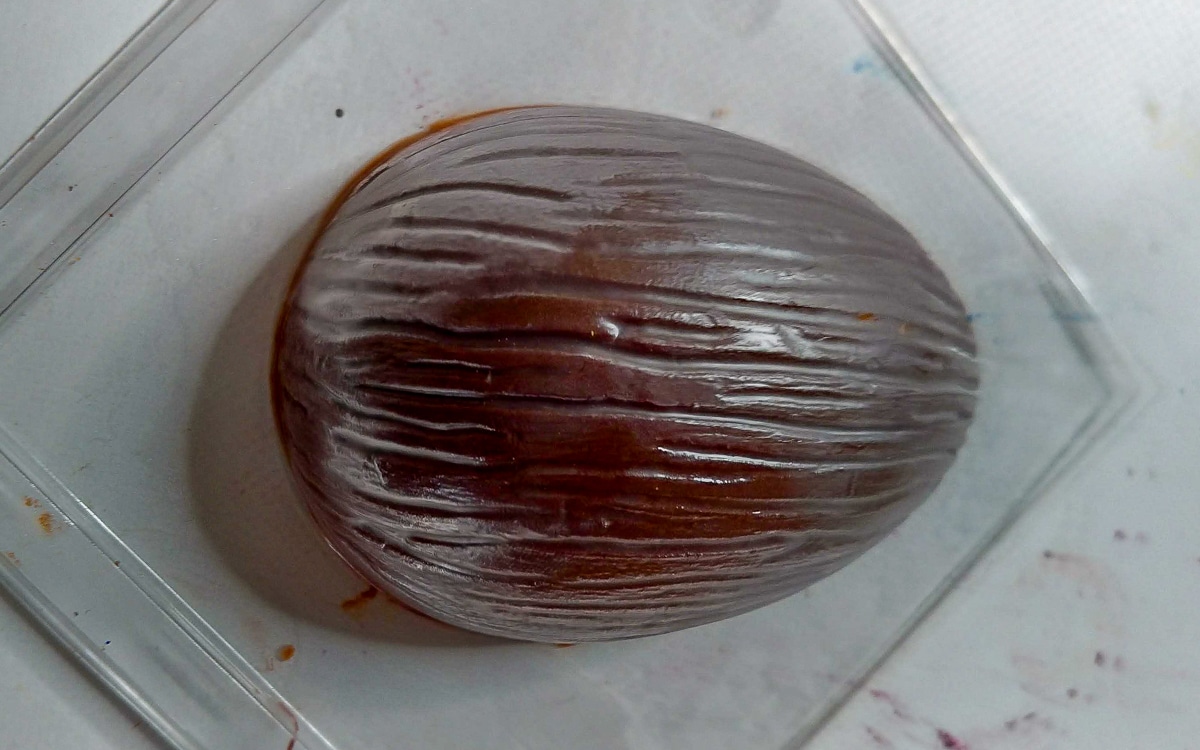
If you’re using clear moulds, you can see where the chocolate hasn’t quite set by holding it up and carefully looking underneath – the unset chocolate will be darker than the set chocolate, as pictured below.
Water will make your chocolate ‘seize’ and go grainy and yuck – not what you want! So ensure your bowls, moulds, spoons, etc., are completely dry and that no water (including steam) touches your melting chocolate.
Making Filled Chocolates
Traditionally, chocolates are filled with fondant creme, either plain or flavoured.
You can buy fondant creme (Roberts brand) at Spotlight stores or online, or if you’re feeling particularly adventurous, you can try making your own fondant creme.
If you’re looking for something easier, cheaper, and more accessible, you can use these simple alternatives to fondant creme:
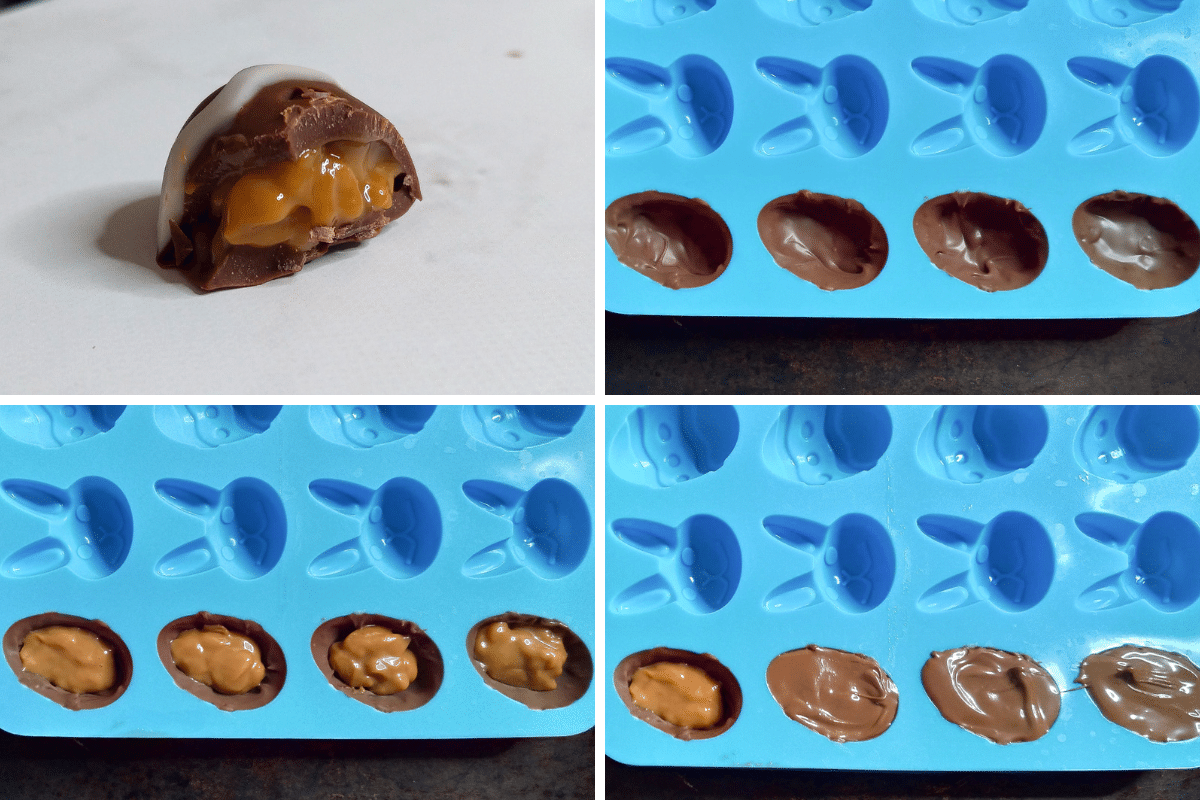
- Caramel (like the Top’n’Fill from the supermarket – pictured above)
- Nutella
- Flavoured ganache (cool ganache first to a spreadable consistency – cold ganache can be rolled into balls)
To make filled chocolates:
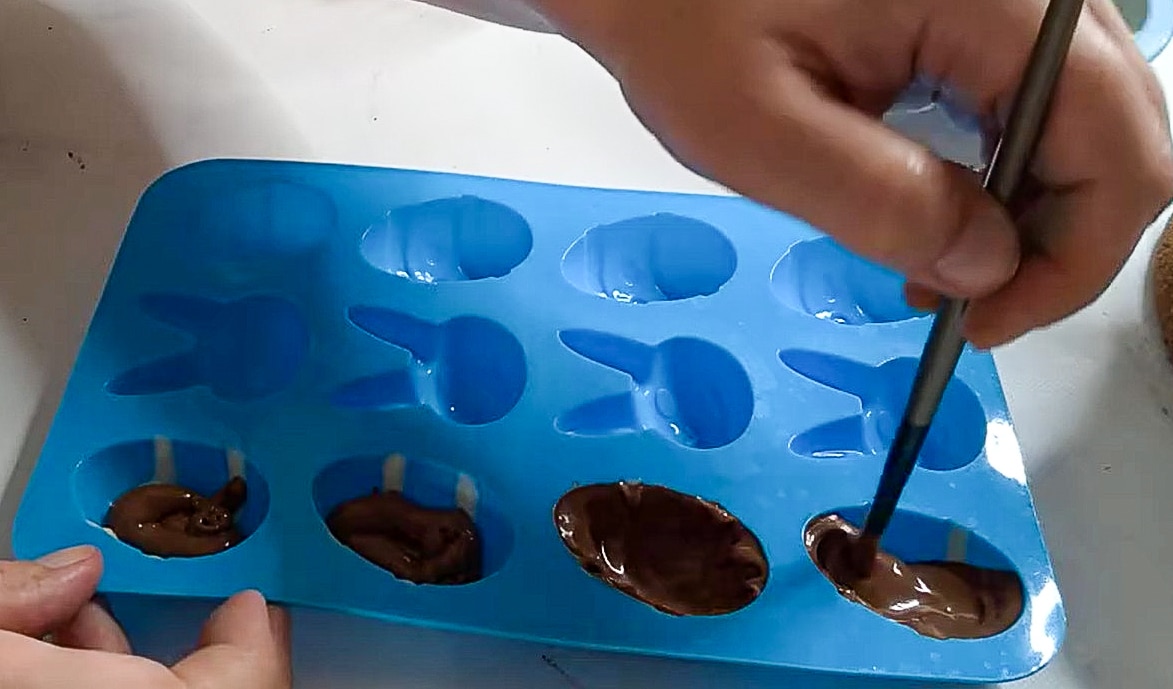
- Spoon or pipe a little chocolate into the mould and use a spoon or brush to spread it up the sides of the mould to make a cup.
- Freeze for 3-5 minutes to harden.
- Add filling as pictured above.
- Top with more chocolate and freeze for 5-10 minutes to harden before removing them from the mould.
Making Hollow Eggs
Nothing says Easter like hollow Easter Eggs.
These are slightly more fiddly than the moulded chocolate above but still easy to make.
To make hollow eggs:
Fill a half-egg mould approximately ¼ to ⅓ full of chocolate. Swirl the chocolate to coat the sides, pouring out any excess chocolate, or, if it’s not quite runny enough, use a spoon or brush to push the chocolate up the sides. Do the same with the other egg moulds.
Freeze the filled mould for 3-5 minutes to set the chocolate.
Gently tap the mould on a clean tea towel to release the hollow chocolate egg half.
If the egg breaks during the unmoulding process, place the pieces back into the mould and use melted chocolate to paint it back together. Re-freeze and unmould again.
To ‘glue’ the egg halves together to make a whole egg:
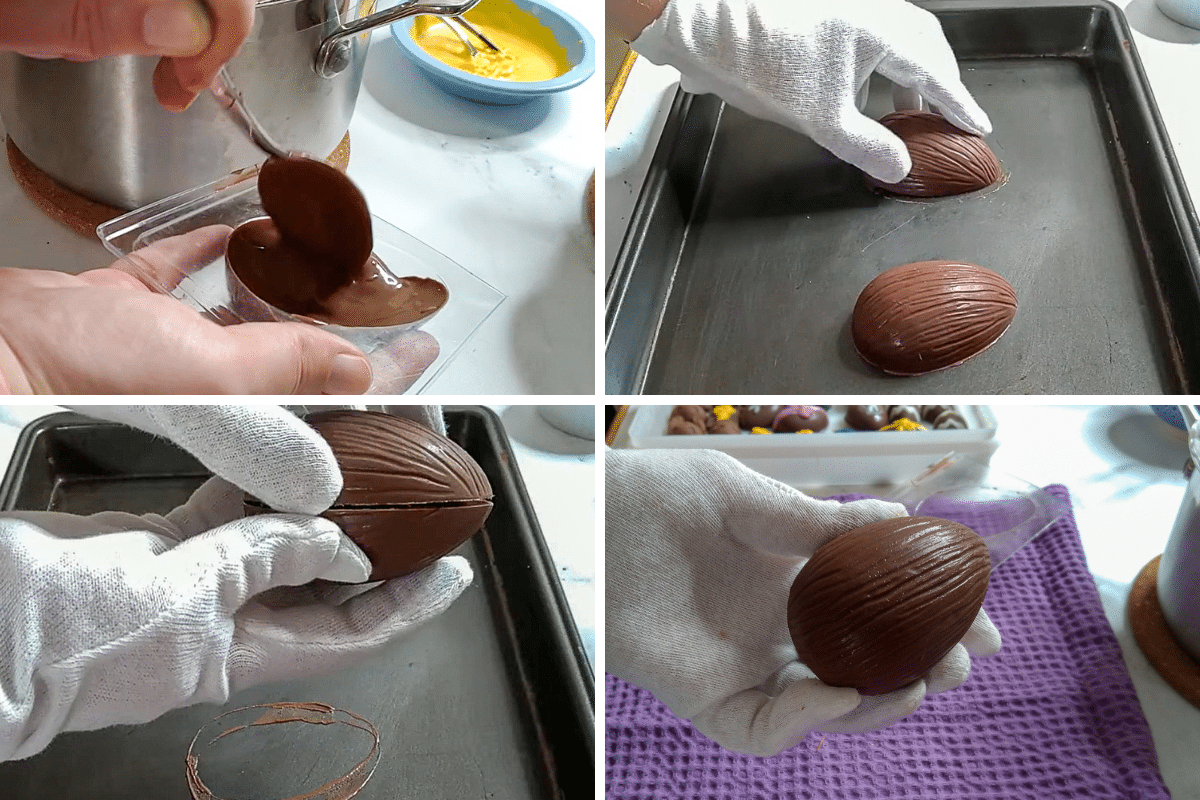
- Warm a clean baking tray in the oven on low for a few minutes.
- Place both halves of the chocolate egg onto the warm tray to slightly melt the edges of each half.
- Align the halves and place the melted edges together to seal. Hold them together briefly before gently placing them into a mould for stability. Place the egg in the fridge for a couple of minutes to set.
Easter Egg Surprise – Filling Hollow Eggs with Smarties or Other Treats
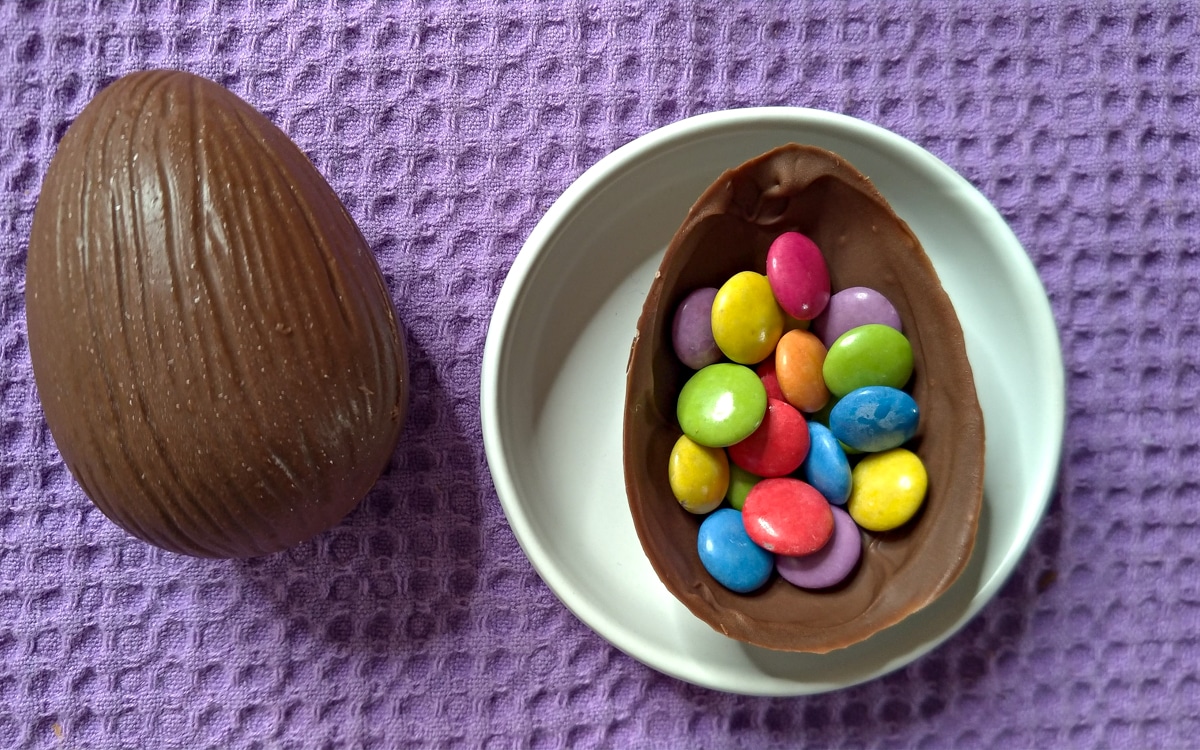
Want to make your own Kinder Surprise?
You can easily seal treats like Smarties inside hollow eggs. Here’s how:
- Make each half of the hollow egg as described above.
- Melt the edges on a warm tray.
- Fill one-half of the egg with your treat.
- Align the melted edges to seal the egg.
- Place back in the mould and freeze for 3-5 minutes to set the seal.
Making Handpainted Easter Chocolates
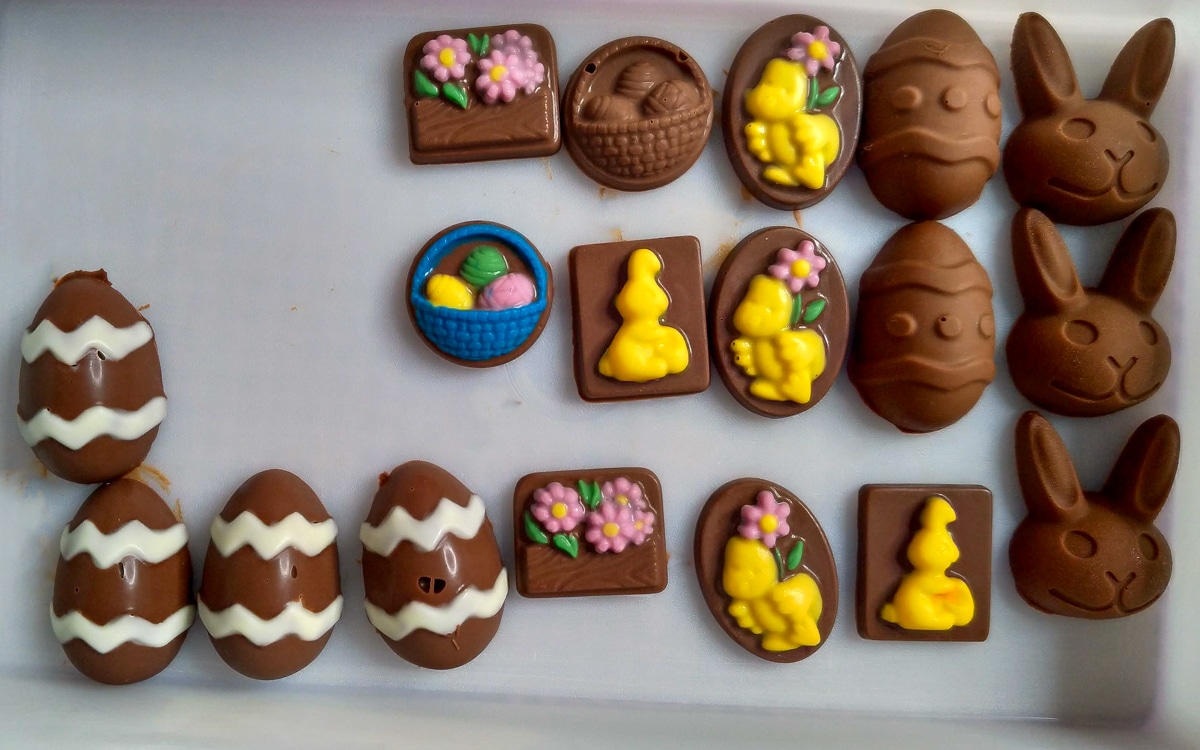
Painting chocolates can be a relaxing creative outlet if you’re feeling creative and have time.
It’s not essential – plain chocolate tastes just the same! But it can be a fun craft option for the family during the Easter Holidays.
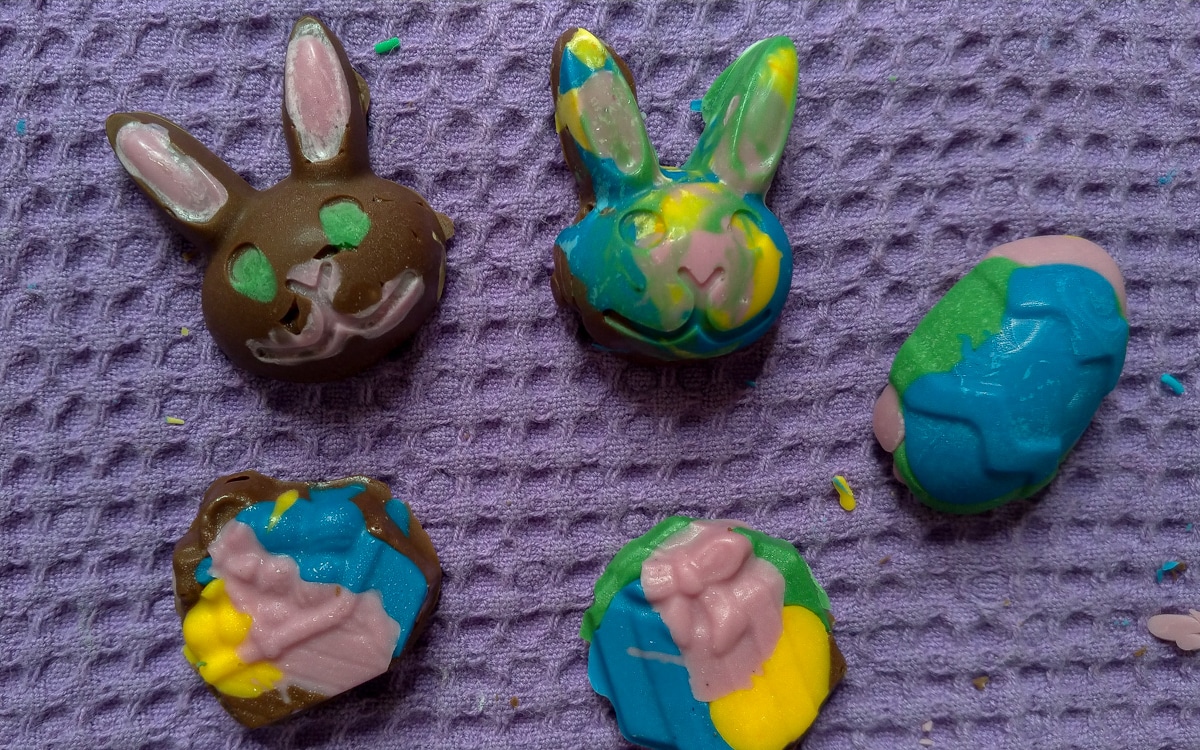
You can paint your chocolates with milk, white, and dark chocolate, or add some colour to white chocolate and paint your chocolates as pictured above.
Colouring white chocolate
You can buy pre-coloured chocolate melts from Spotlight or make your own colours by adding powdered food colouring.
It’s important not to use liquid food colouring because it can make your chocolate ‘seize’ and go lumpy.
Powdered food colouring can be purchased from craft stores like Spotlight or online chocolate and cake decorating stores. A little bit goes a long way, so it will last a long time and can be used to colour cake icing and other food projects.

To colour white chocolate:
- Melt the white chocolate melts using your preferred method.
- Divide the chocolate into smaller bowls.
- Add a little bit of powdered colour and stir until dissolved.
- Add more powder until you get to the desired hue.
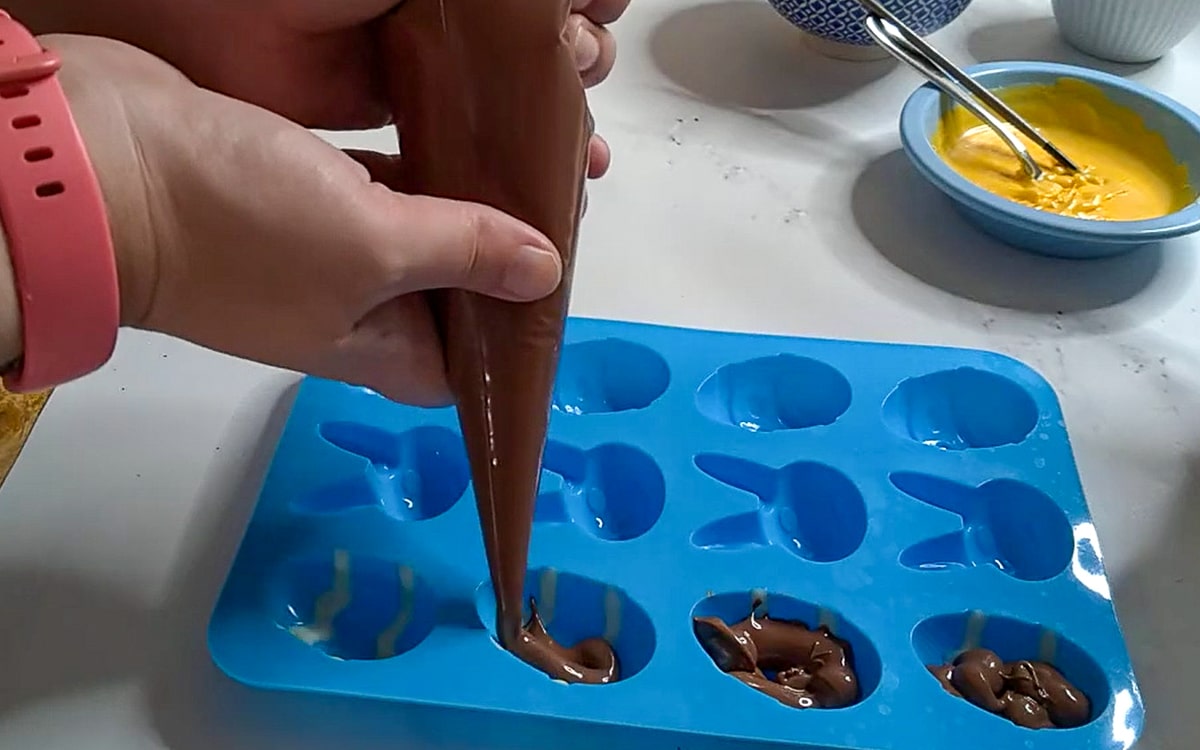
Painting Chocolates

When you paint chocolate, you actually paint the mould before filling it with chocolate.
Use a clean paintbrush or fine-tipped piping bag to fill parts of the mould with different coloured chocolate. You will want to add a thick layer of coloured chocolate; otherwise, the milk chocolate you add later will show through.
Once you’ve finished painting the moulds, freeze them for a couple of minutes to set the colour, and then fill the moulds to the top with milk, white, or dark chocolate.
To ensure the colours don’t run into each other, freeze for a few minutes before adding the next colour.
To keep the small bowls of coloured chocolate melted, place them over a small bowl or coffee mug of boiled water. Stir frequently to ensure it all stays melted.
Alternatively, you can re-microwave for a few seconds to remelt – make sure you are using microwave-safe bowls.
If you are using oven-safe bowls, a third option is to place them on a tray in a low oven for a couple of minutes to re-melt.
Flavouring Chocolate and Other Variations

For variations on standard chocolate, you can also try:
- Adding a flavouring like mint, orange, or hazelnut flavouring to the chocolate. Be sure to get oil-based flavouring essence, as it won’t make your chocolate seize. Roberts Essence can be purchased at Spotlight stores or online.
- Stiring in chopped nuts or dried fruit like sultanas.
- Decorating the top of the chocolates by dipping a nut, coffee bean, or edible decoration in a little melted chocolate to ‘glue’ to the top of the chocolate.
Buying Foil Wrap
Personally, I don’t wrap my homemade Easter chocolates – no wrapping means less expense and waste.
However, if you want to wrap your chocolates, you can purchase foil from where you buy easter egg moulds or on Amazon.
Cleaning Moulds and Equipment
Clean moulds and brushes by hand using warm soapy water and a soft cloth.
If there are extra chocolate drips, you can freeze the moulds for 10 minutes and easily scrape those drips off before washing.
Air-dry chocolate moulds and brushes in the dish drainer. You can use a clean, dry tea towel or microfibre cloth to polish the moulds and ensure they are completely dry.
Only use or store moulds and brushes when they are dry.
A Great Holiday Activity For the Family
Making chocolates with the family is a fun Easter activity to do together.
I made chocolates with my daughter, and she had a great time painting the moulds and mixing up all the colours to create rainbow chocolates.
She also experimented by adding smarties and sprinkles to her chocolates.
And the great thing about this type of craft is you get to eat the results.
Combining making chocolates and swapping them/ giving them to each other for Easter can save you money while providing hours of fun over the Easter holidays.


This was fantastic. Thank you SO much for a comprehensive and beautifully written walkthrough. I’m now super excited to make chocolates with my little guy this year.
I hope you have heaps of fun and your little guy! :)
Thankyou! This information is the best!