How I Use Todoist to Manage Household Tasks for Free
This website may earn commissions from purchases made through links in this post. As an Amazon Associate, I earn from qualifying purchases.

Staying on top of all the household chores, projects, and random to-dos can be overwhelming. Here’s how I use Todoist to manage household tasks.

Do you need a way to keep on top of all the household tasks? A way to get them out of your head so your thoughts aren’t looping through ‘must do this, must do this…’?
I have been using the free task management app Todoist for the past few years now to do just that – keep on top of all the things. All the little to-dos that need doing.
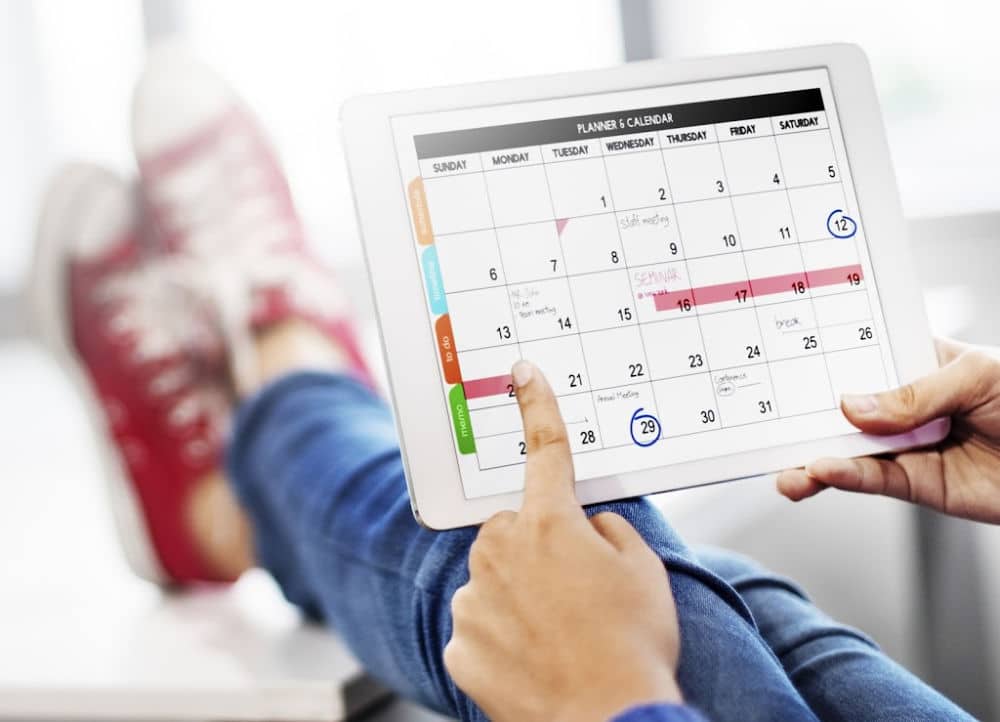
I used to keep all of my tasks in Google Calendar (check out the link below for how). It works great, but my brain works better with separation between events and tasks.
So I use Google for things like staying on top of the kids’ schedules (I talk about how in ‘Google Calendar for School’) and Todoist as a to-do list.
And this system has worked really well for me over the past few years.
One of my favourite things about it is that when you tick off a task, it just disappears. You don’t get that from Google Calendar.
I have the app on my phone, and the little noise it makes when you tick something off? Double-tick satisfaction.
Capturing tasks on the fly? Super easy with voice-to-task tech.
And my fav feature?
If I don’t feel like scrubbing the shower, I can easily ‘postpone’ the task, and it almost feels like ticking it off.
So this article walks through, step-by-step, how I set up Todoist and use it to keep on top of everything.
1. Getting Started with Todoist
The first step is to download Todoist and/or install the app. It’s totally free to use, which is nice, although it does have an optional subscription if you want more features. For household purposes, the free version is perfect.
You can do this entirely in the mobile app (no desktop needed), but it’s easier for me to demonstrate using the desktop, so don’t worry if you don’t use a computer; everything can be done on the phone, too.
To get started, visit the Todoist website (or app store), download the Todoist app, and sign in using your email, Google account, or Facebook.
Even if you use the desktop version, it’s a good idea to download the mobile app as well, because you’ll get the most out of it with both versions, and I’ll show you how below.
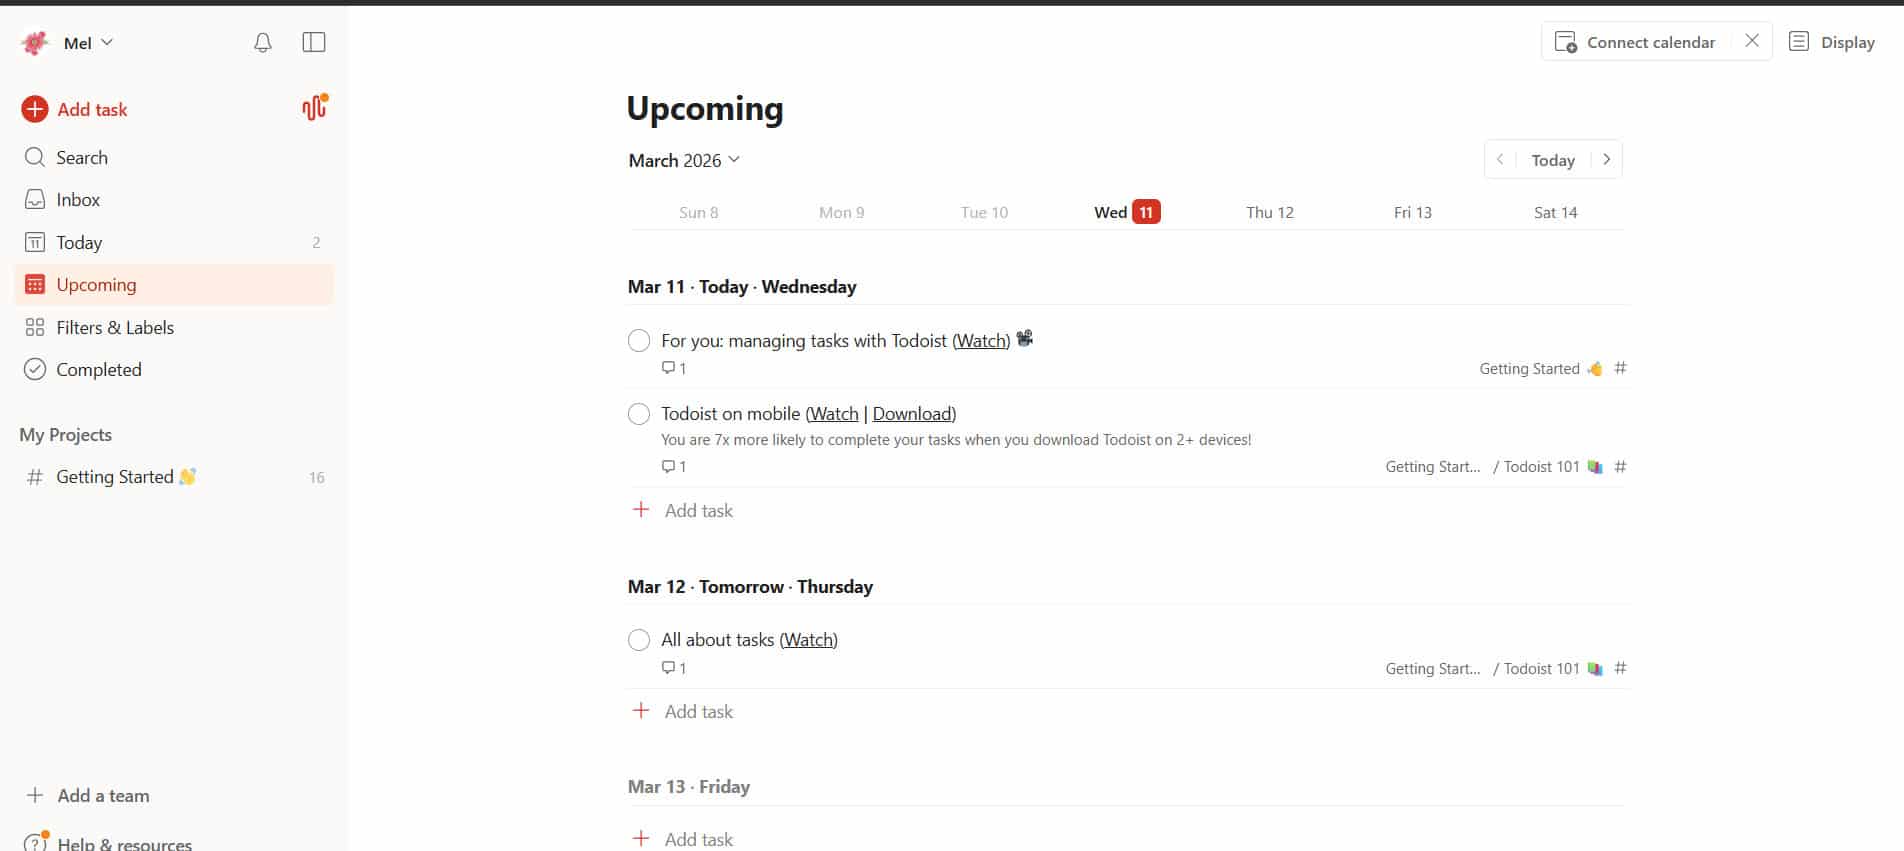
Once you log in, the first thing you see are some pre-populated tasks that are there to teach you how to use Todoist. Feel free to check them out if you’d like to get a feel for the app.
But if you’re ready to skip to the good stuff, you can delete them by removing the entire ‘Getting Started’ project under the ‘My Projects’ section.
Once they’re gone, I’m going to walk you through the 3 projects that work for me for managing our household, including how I set them up and how I organise the tasks within them.
Finding Your Way Around
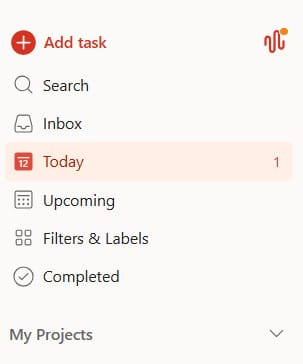
On the desktop version, you’ll see a few options in the sidebar. At the top, there’s Inbox, Today, and Upcoming. These are also the 3 main options you’ll see in the mobile app.
Underneath that is a Favourites section (not visible until you favourite something), where you can pin your most-used projects for quick access. And at the bottom, you’ll find My Projects, where you can add and organise your specific projects.
I’m going to start by working in the Projects section to set everything up, but once you’ve got your tasks up and running, the screens you’ll probably find yourself using most day-to-day are Today, Inbox, and Upcoming.
If you’re on the mobile app, you’ll find Projects under the Browse option at the bottom of the screen.
Setting Up Your First Project – Household Routines
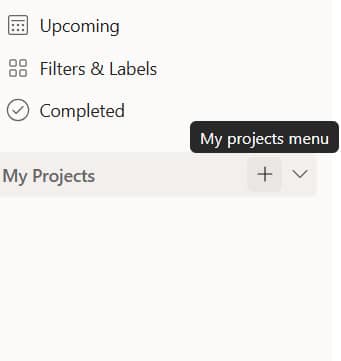
The first project I like to set up is a Routines project. To create it, click the + sign next to My Projects and select Add Project. Give your project a name for this one, just call it Routines.
From there, you have a few options to customise it. You can colour-code it to make it easy to spot, and if it’s a project you know you’ll be using all the time, you can add it to your Favourites.
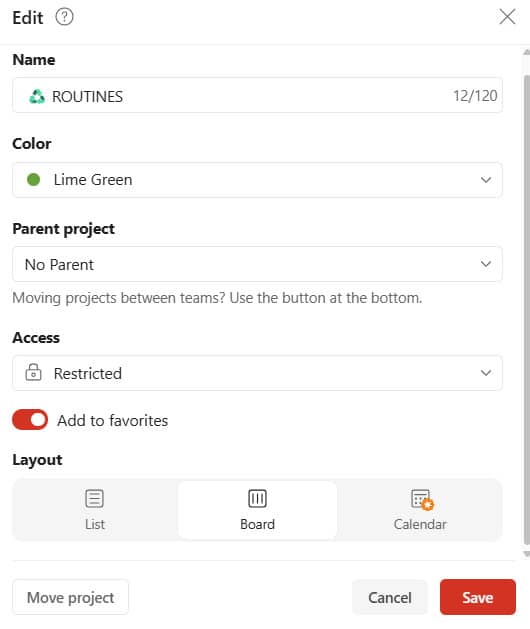
You’ll also be able to choose a layout — for the Routines project, I like to use Boards.
💡I like to add emojis to my project names – it makes them easier to spot at a glance and just looks a little more fun! If you didn’t know, on a Windows computer, you can bring up the emoji picker by pressing the Windows key + . (full stop).
Within my Routines project, I set up 5 boards:
- Weekly
- Fortnightly
- Monthly
- Quarterly
- Yearly
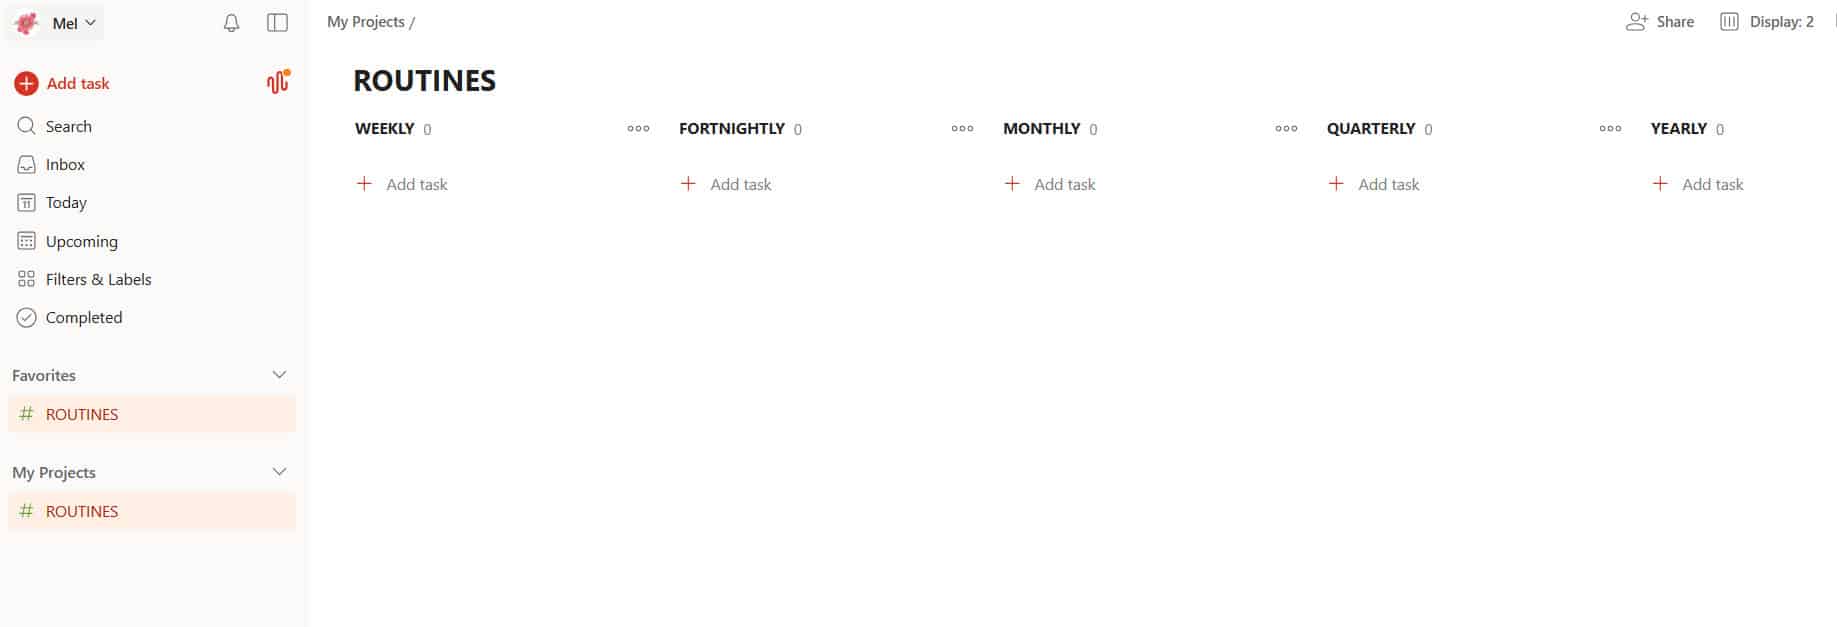
To add a task, simply click Add Task. One of the things I love about Todoist is that it understands natural language, so you can just type something like “wash the sheets every Wednesday” and it will figure out what you mean.
From there, you can set a priority level, check that the date looks right, and hit enter. That’s your first recurring task created!
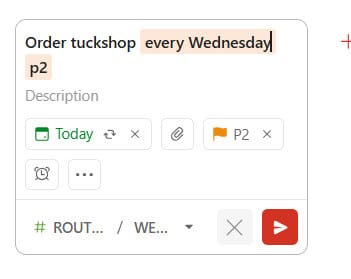
Then it’s just a matter of working through and adding tasks for your Weekly, Fortnightly, Monthly, Quarterly, and Yearly boards. You don’t have to get it perfect straight away. If something pops into your head and you think, “I need to remember to do this every week,” just add it as you go.
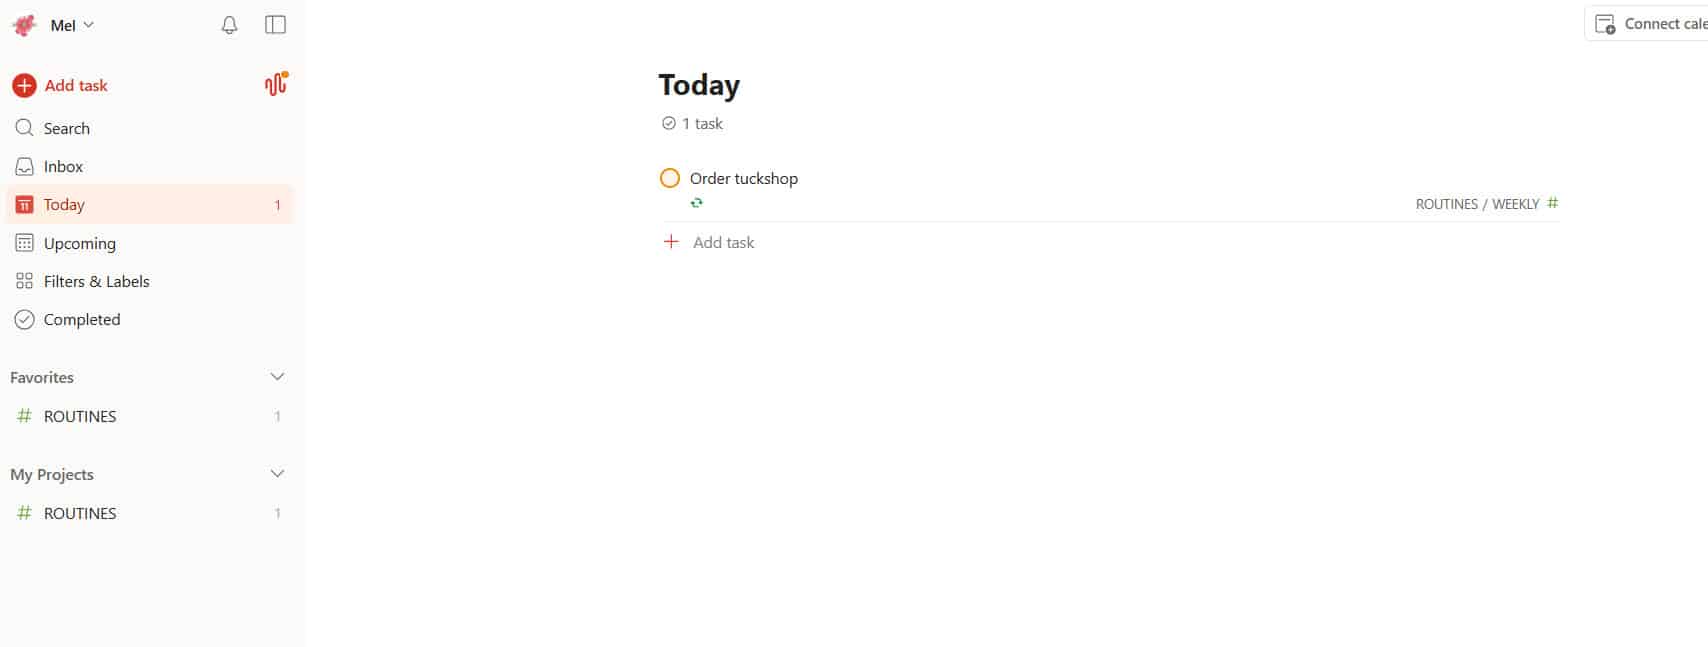
When you tell Todoist a task is weekly, it automatically becomes a recurring task. It’s American software, so for fortnightly tasks, you’ll need to type bi-weekly or every two weeks. If the date doesn’t come out quite right, you can click on the task and manually edit the start date and set a custom recurring schedule.
Project 2 – Miscellaneous Tasks
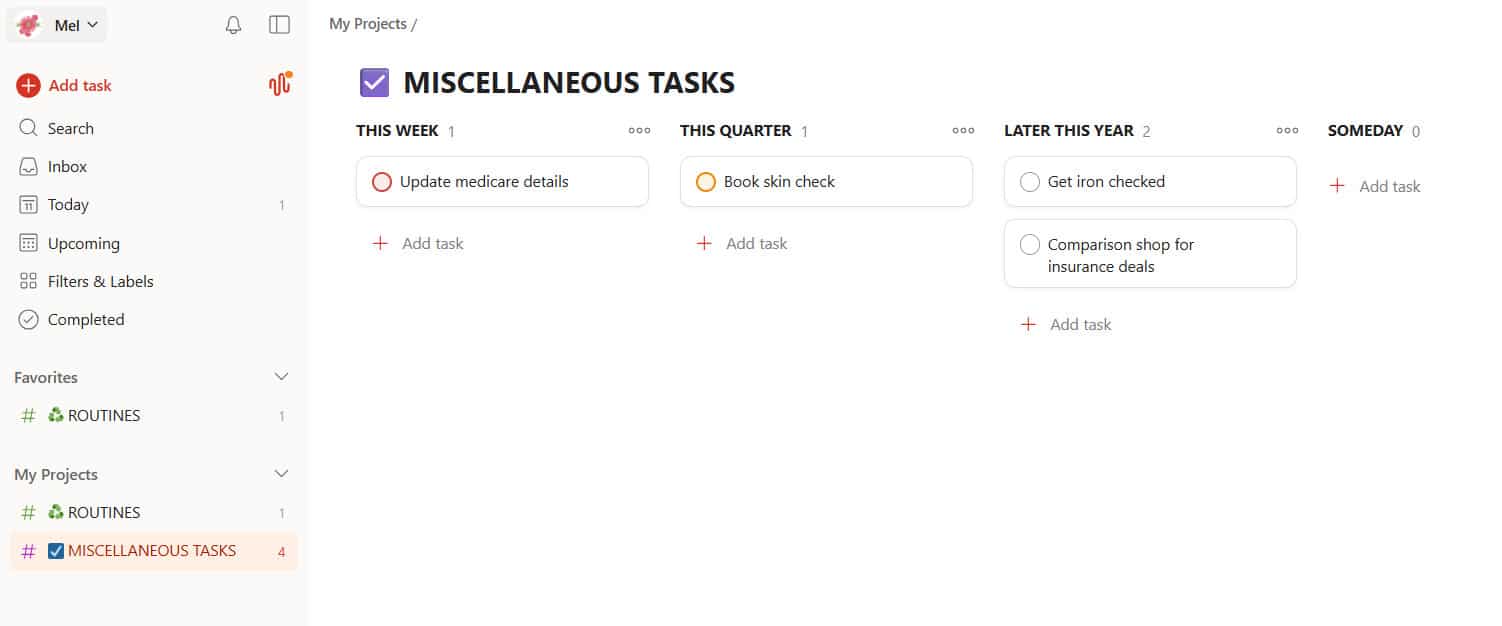
Once I’ve set up my Routines, the second project I create is Miscellaneous Tasks. These are the things I need to remember, but that aren’t recurring, just random one-off tasks that pop up in life, like don’t forget to pick up the cake on Saturday.
Now, you could just leave these sitting in your Inbox and skip creating a separate project altogether — and that’s totally fine! The reason I like to set it up as its own project is so that I can use the Board view and organise tasks across several boards:
- This Week
- This Quarter
- Later This Year
- Someday (a David Allen idea, from his book, Getting Things Done (Amazon), this is a place to park ideas and things I’d like to do eventually.
The idea is that it lets me clear out my Inbox while still being able to prioritise by time and urgency. Some tasks need to be done soon, and others can be pushed off without worry. I have a place to put them so they’re not taking up mental space. Out of sight, out of mind, but never lost!
You might also like:
Project 3 (and Beyond!) – Actual Projects
Projects involve lots and lots of tasks to complete. Often, when we stall on something, it’s because we’re treating a project as a single task rather than a series of tasks.
Breaking projects down in Todoist makes it easier to get them done.
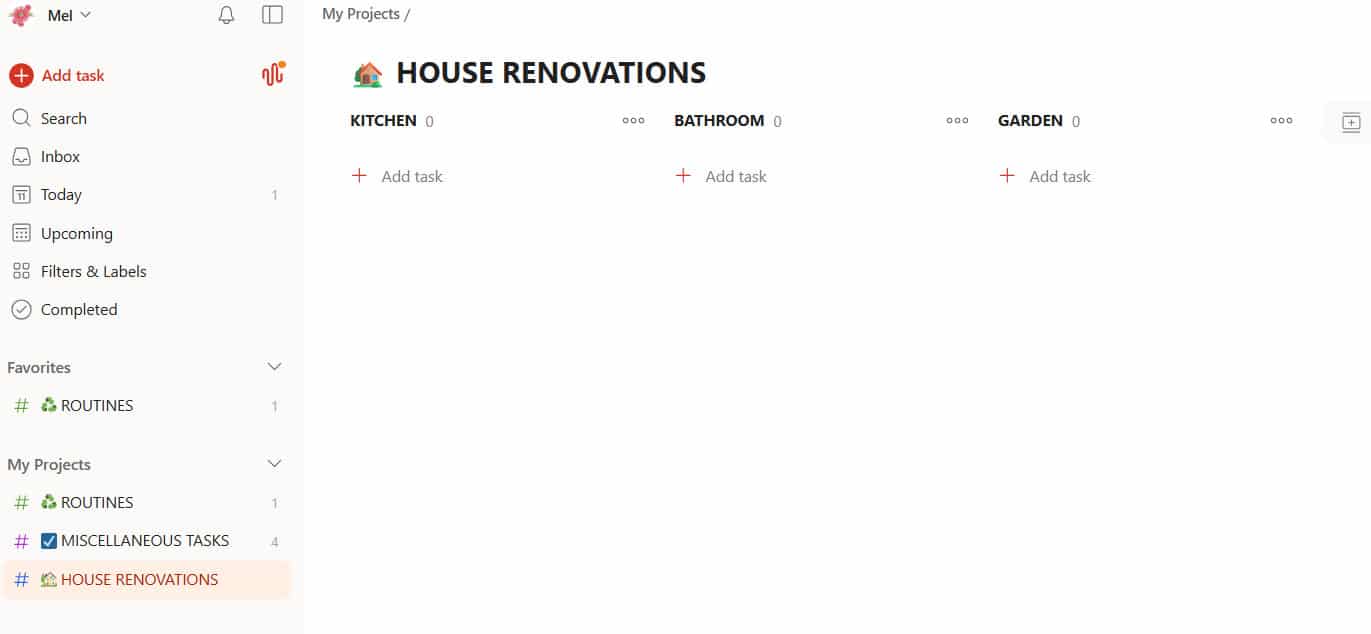
So, the third project, and there could be a fourth or fifth, depending on your life, is where you manage actual projects, like planning a trip, organising a wedding, or renovating the kitchen. These are things that benefit from having their own dedicated space, separate from your everyday tasks and routines.
The great thing about keeping projects separate is that you can see all the tasks together. It compartmentalises tasks from the every day.
However, when you add due dates to your tasks, they’ll automatically appear in your Today view when the time comes. So you get the big picture view of your project, and the right tasks surface day-to-day without you having to think about it.
Setting Up Your Boards
Again, I like to use Board view for large projects, and there are a few ways you can organise your boards depending on the type of project:
- By phase — Phase 1, Phase 2, Phase 3 (great for projects with a clear timeline)
- By month — January, February, March
- By space — Kitchen, Bathroom, Garage (for something like a home renovation)
- Or you can have 1 Projects space, and each board represents a different project
Whatever makes sense to you is the right way to do it!
Breaking Down Your Tasks
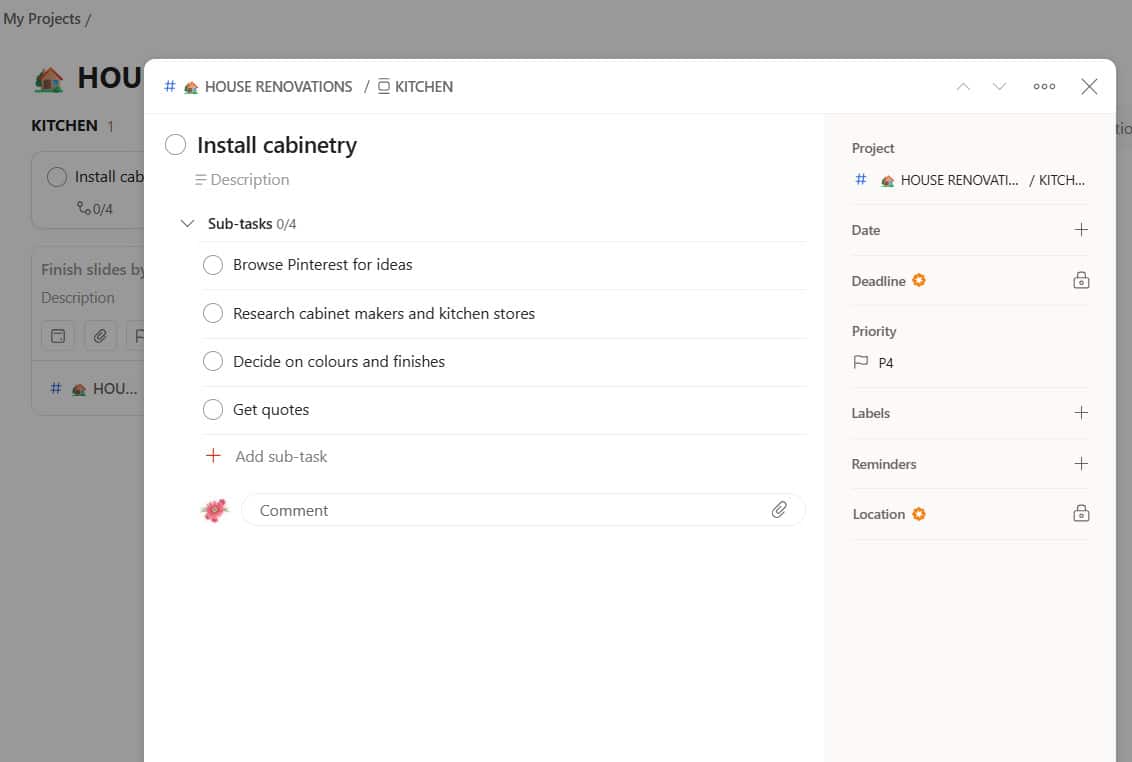
Within each board, you can list all the tasks that need doing. I find it really helps to break things down into baby steps. For example, rather than just writing “Paint the kitchen” as one big task, you could either:
- List each small step as its own individual task, or
- Create “Paint the kitchen” as the main task and add subtasks underneath it, such as:
- Go to Bunnings to pick paint colours
- Research painters in the area
- Get quotes
Each subtask can be given its own priority level and due date, just like a regular task.
How Many Projects Can You Have?
On the free version of Todoist, you can have up to 5 active projects. So if you’re using Routines and Miscellaneous Tasks, that leaves you with 3 more slots for specific ‘big’ projects.
If you find you need more than that, you can combine things in a master projects space.
Mobile Widgets – Your Home Screen Command Centre
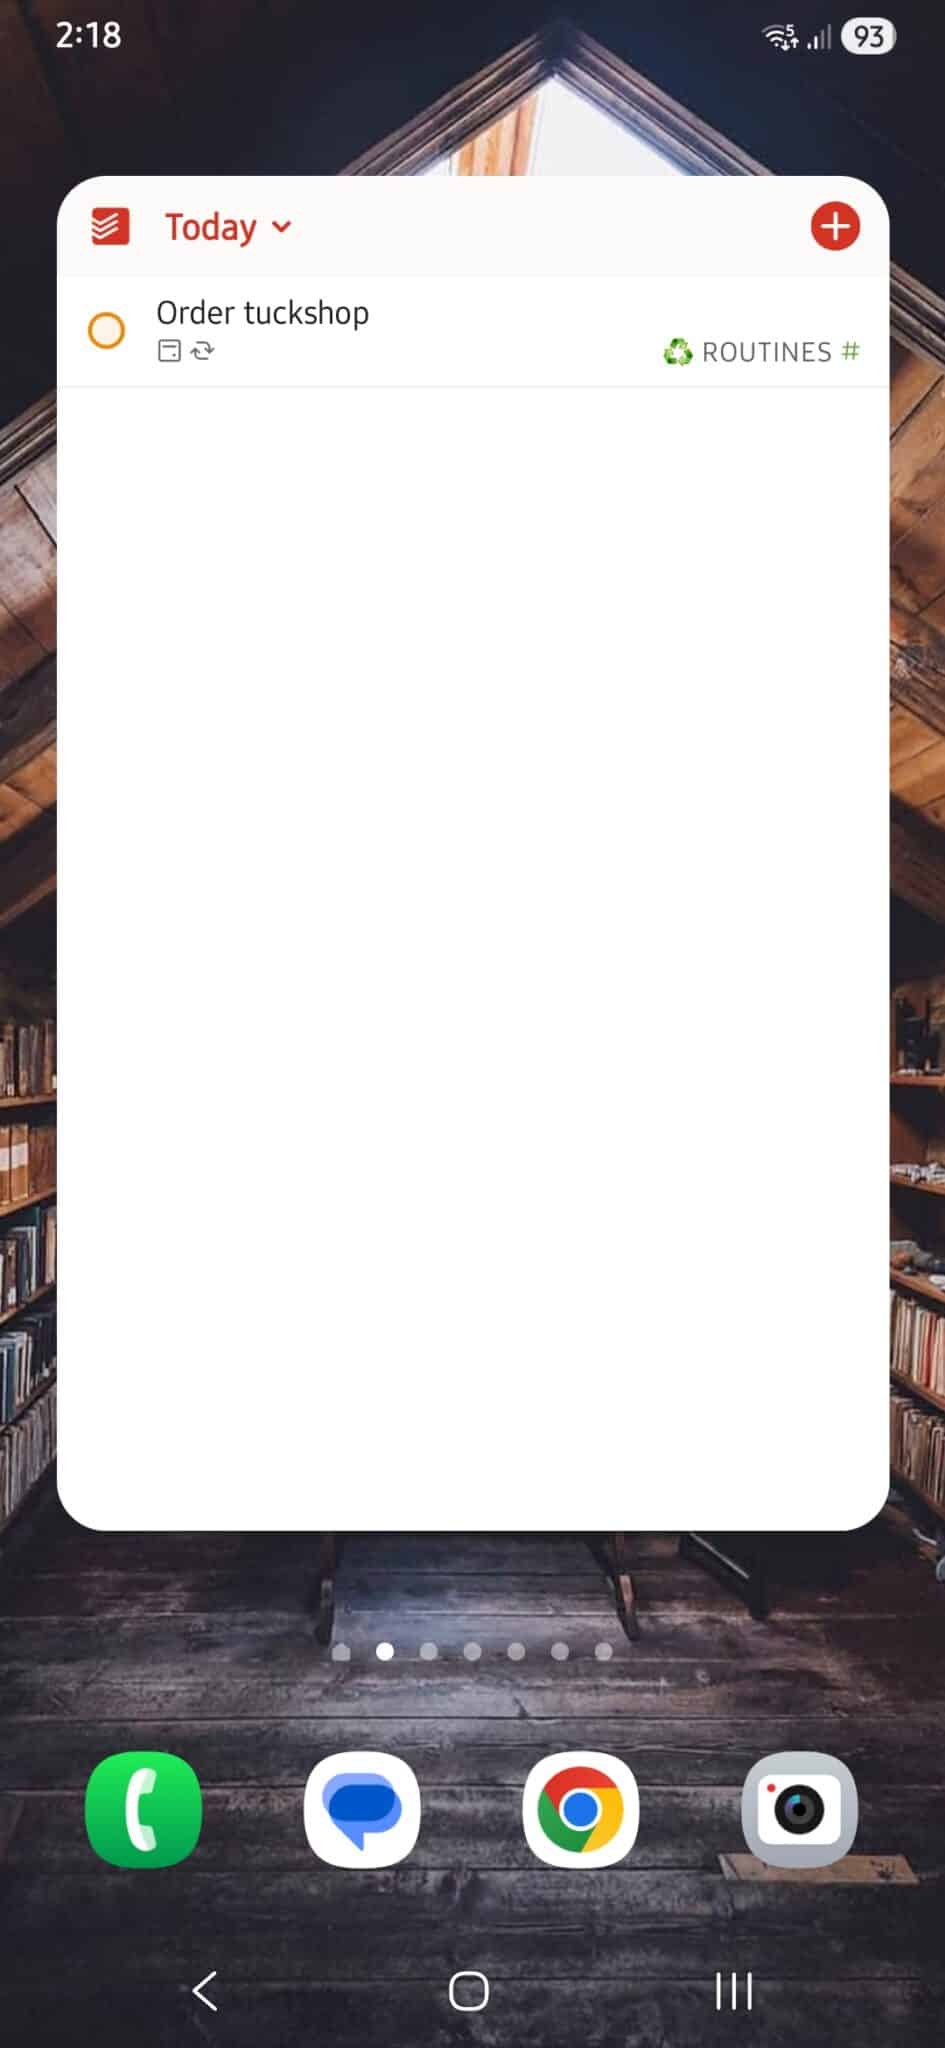
A feature I really love is the Today widget on the mobile app. This shows you everything you need to get done today, all in one glance, right from your phone’s home screen, so you can see it anywhere.
I have my phone set up so that when you swipe to the next screen, it’s just my to-do list for the day – tasks lined up and ready to go. You can tick things off directly from the widget, which means you don’t even need to open the app.
The Inbox – Get it Down to Get it Done
Sorry, that title sounds so hokey – I feel like I should be on stage with a head mic on and a fist pump: get it down to get it done.
Anyhow…
One of the more useful aspects of David Allen’s Getting Things Done (Amazon) is the idea of Quick Capture – immediately recording all tasks into a trusted inbox so they don’t get forgotten.
Todoist has an inbox feature that lets you do exactly that. If you have your phone with you all the time, like most of us do these days, then the easiest way is to use the app. Just open the app, record the task, and you can rest easy knowing it’s in a safe place to deal with later. Without forgetting.
You can also use one of the app’s widgets to record a task, either by typing or using the new ‘ramble‘ feature, where you dictate the task and Todoist creates it for you. I use dictate more and more these days – it’s so handy (or more accurately, hands-free (almost)) for things like adding a task to add rice to the grocery list when you’re in the middle of cooking.
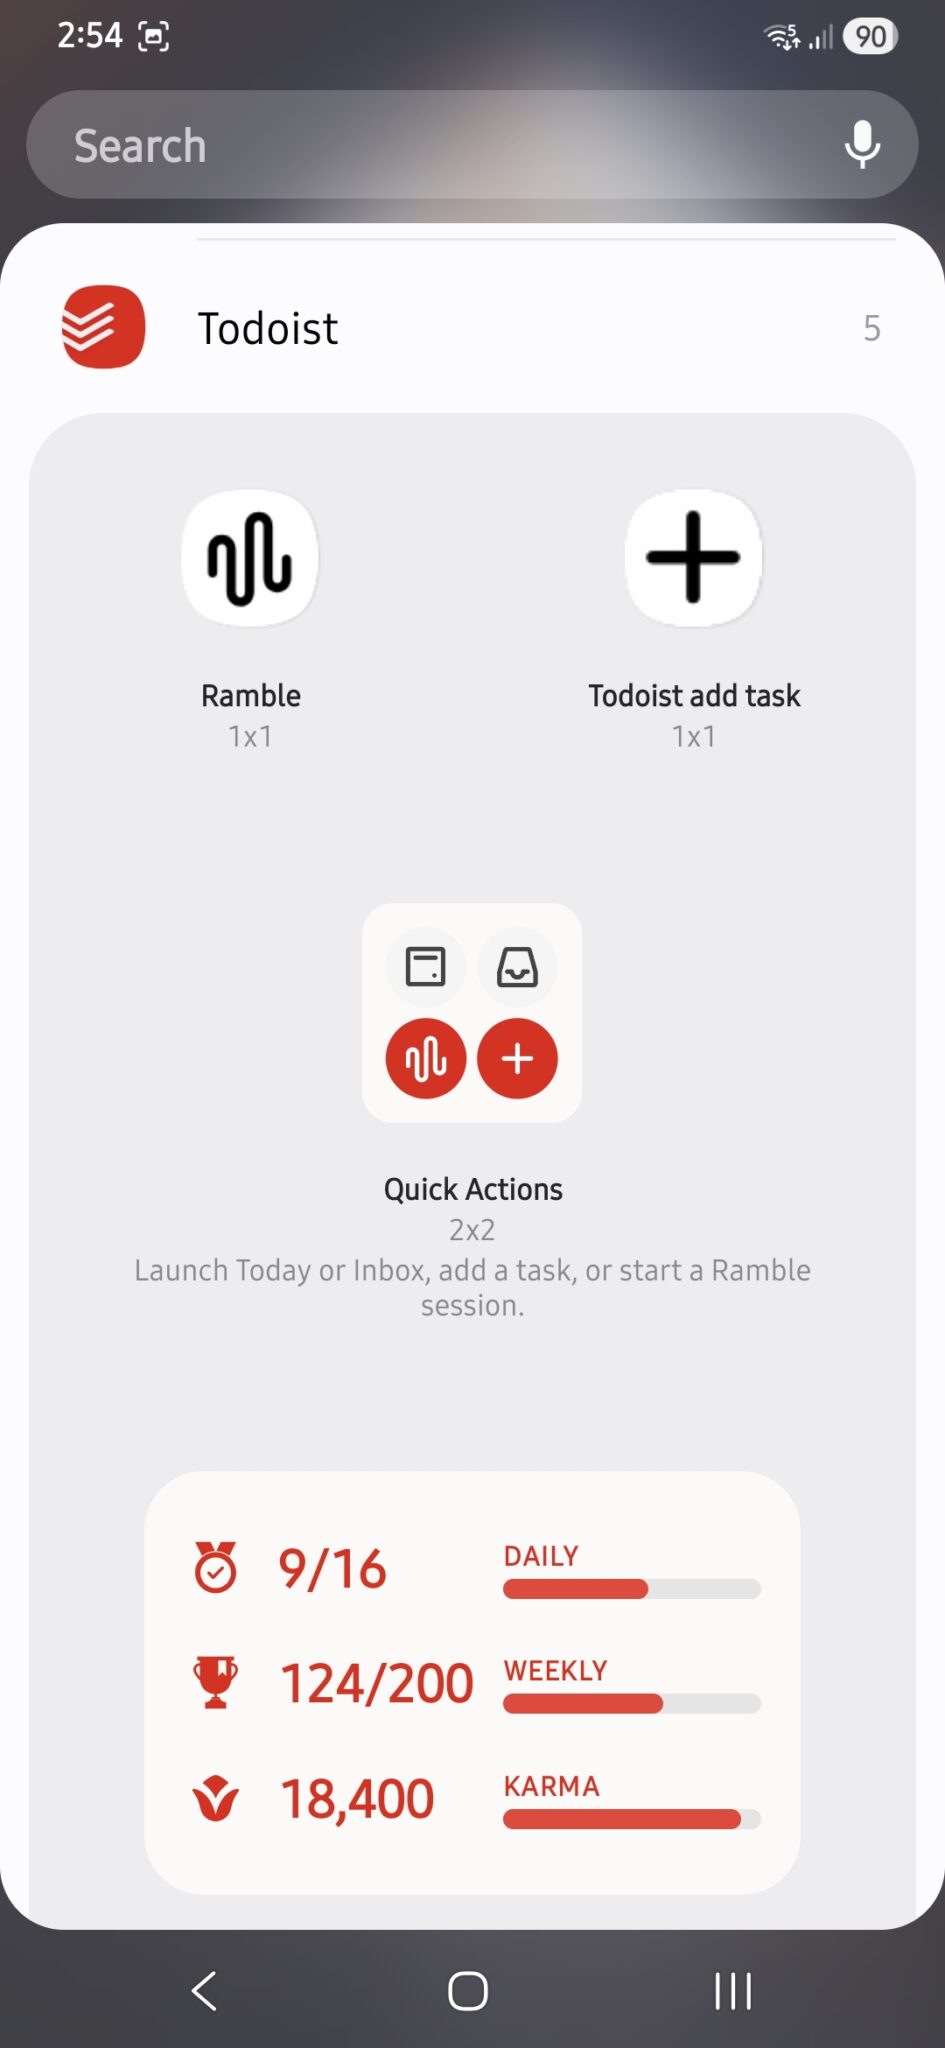
Simply say something like ‘I need to make a vet appointment tomorrow. Can you make that priority one,’ and it will add the task to your inbox for tomorrow.
I find this feature super convenient, and it’s easy to quick-capture tasks on the run.
The only catch is that you need to spend 2 minutes at the end of the day reviewing your inbox, which brings me to the next point.
Making the Most of Todoist – The Weekly Review
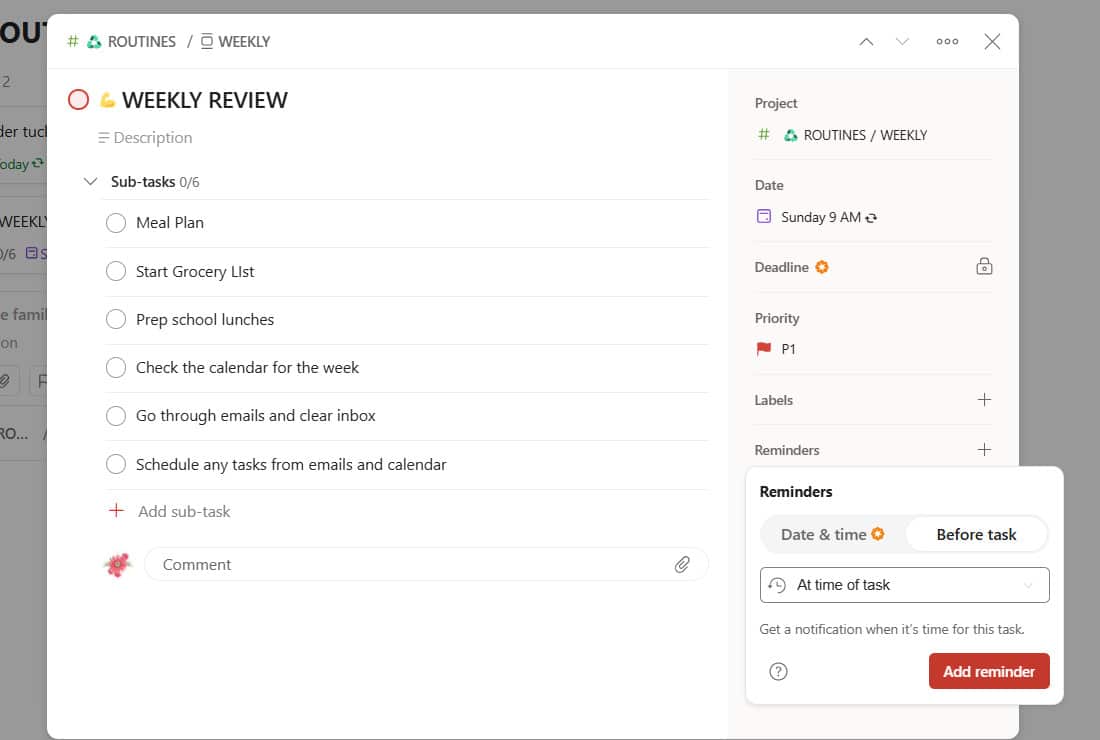
Another idea inspired by David Allen is that I use Todoist to go through my weekly review. This is a game-changer for keeping on top of everything.
I do my weekly review on Sundays, before the week begins, but you can pick whatever day works best for you. To make sure it actually happens, I set it up as a recurring task called Weekly Review and put it in my Routines project. Underneath it, I add a list of subtasks – everything I need to work through each week to keep the household running smoothly.
It takes about 20 mins.
Everyone’s household is different, so your subtasks will look different to mine, but here’s what mine includes:
- Meal planning for the week
- Starting the grocery list for the week
- Food prep planning
- Checking the calendar for the week ahead. If there are any upcoming events that need action, they become tasks. For example, if one teen has a school event and needs to bring food, “buy/make cake” goes into Todoist with a due date before the event.
- Clearing my email inbox. I’m a big fan of the zero inbox. Emails = stress. Unpaid bills, school emails to reply to, anything that needs a response. This is the time I clear it. And if there are tasks from the emails, then I can add them to Todoist. (For example, from this week’s emails so far, I need to take back a library book, do some online training to volunteer at a triathlon (don’t ask), book the dog’s vaccination, and remember to unsubscribe from a free Acorn trial). None was urgent enough to do straight away, but they are all still tasks that need handling. The reason I don’t leave them in my inbox is that they get lost in the constant incoming stream of emails.
- Checking other communication channels. If only email were the only comms channel. I might also need to double-check apps, DMs, texts or whatever we’re calling them these days.
- Checking for upcoming events. This includes things like birthday parties (and therefore gift buying), and anything that needs advance planning.
- Clearing my Todoist inbox. Anything I’ve captured on the fly during the week gets properly scheduled here.
- Nagging the kids to clean their rooms.
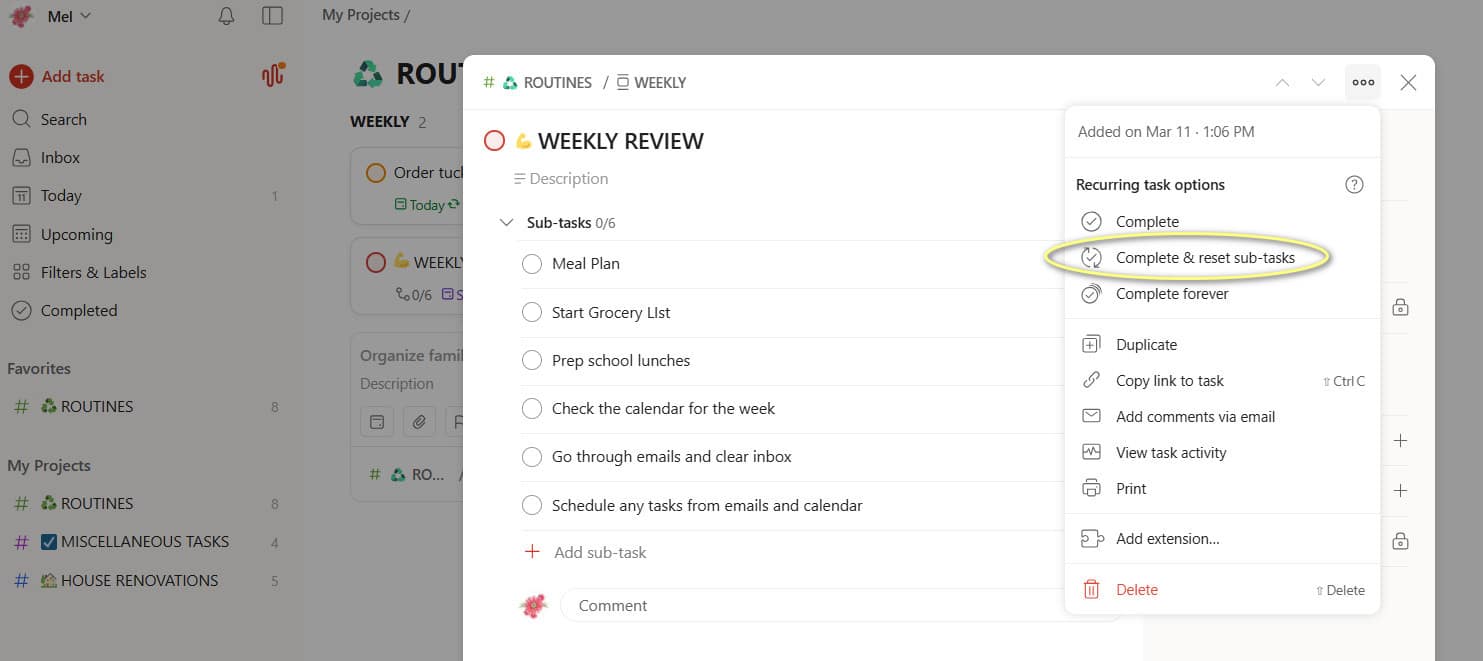
The weekly review is where everything comes together. It means nothing slips through the cracks, and you can start each week feeling clear and in control!
Todoist can be shared with your partner, so you don’t have to carry the mental load alone (even though many of us still have to write the damn list!).
I’m not an organised person. I look organised, but I lean heavily on digital tech to keep things ticking along. Calendars, task managers, phone alarms, timers – I’ve externalised a lot of executive functioning. I was 28 years old when I first started this blog. At 46, I’m now going through the brain-fog years, where life is busier than ever, and my hormones are not-so-quietly packing their bags for Bali. These systems are what keep the household running when I’m running on fumes.