
Easy Handmade Treat Bags – Great DIY Gift Idea for Any Occasion
This website may earn commissions from purchases made through links in this post. As an Amazon Associate, I earn from qualifying purchases.
These little handmade treat bags are easy to make for a super-cute DIY gift. Ideal for Christmas, wedding favours, Halloween, Easter. Also great as part of a hamper.

Looking for a super-cute, but inexpensive gift idea that adds a personal touch to your next occasion?
These handmade treat bags, made from scrapbooking paper or cardstock, are a cute way to package up small gifts in an attractive way.
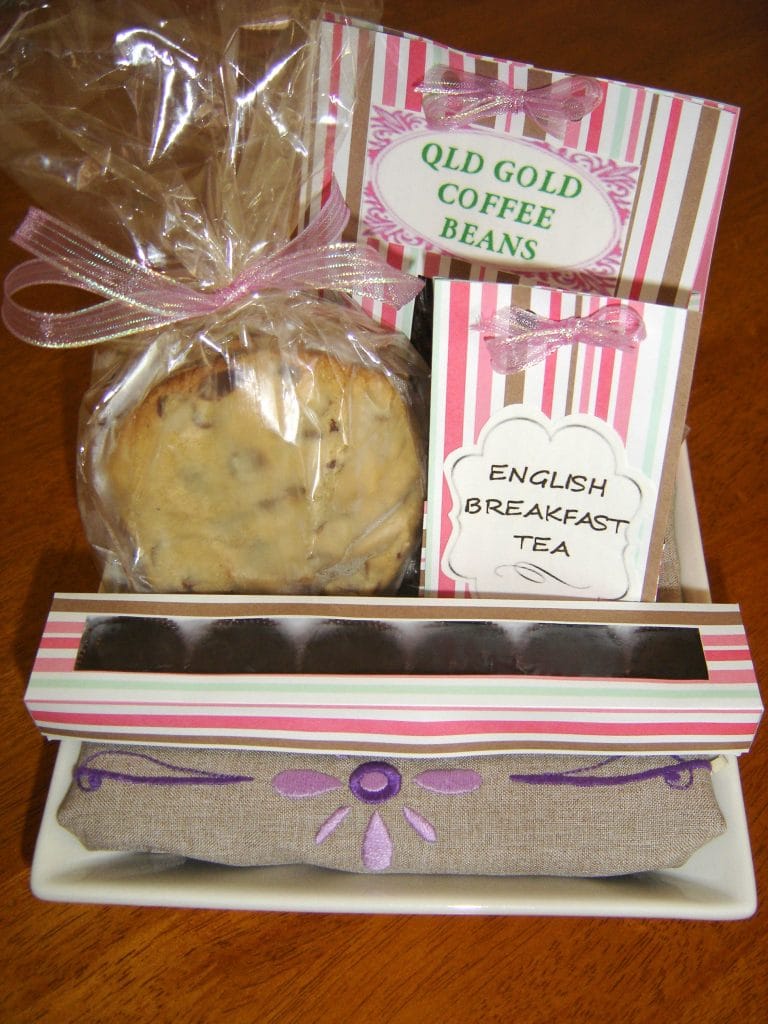
I’ve used these treat bags to package boutique coffee beans, and combined the gift with handmade cookies and handmade truffles – also packed in a cute little DIY box – to create a gift that is frugal but welcoming.
Throw in a lovely second-hand plate (to put the cookies on), maybe a nice mug, tea towel or mug rug, and you have a really nice gift that is frugal, practical, and eco-friendly.
But these treat bags don’t just make great Christmas gifts. Use them for party bags, wedding favours, or even as Halloween gifts. You can also get creative with your designs, adding embellishments to make each treat bag unique and special.
In this post, I take you through the process step-by-step to making a bag, and by the end, you’ll have an adorable tent-shaped bag to fill with goodies. Plus, I’ve included a video tutorial for those who prefer video instructions.
Once you’ve made one, they don’t take long to cut and fold up – so if you’re making a few, pop on a movie and you’ll have a bunch made in no time.
Materials You’ll Need
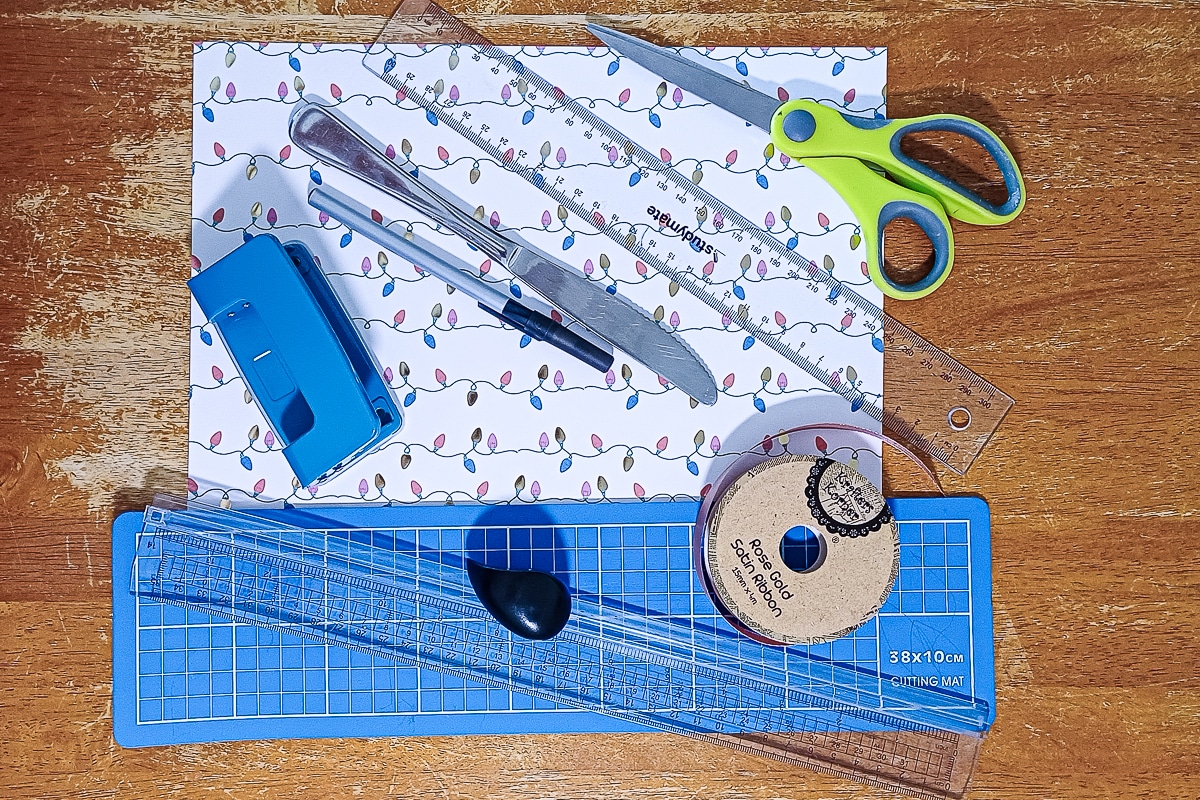
Before diving into the steps, here’s what you’ll need to make these little bags:
What You Will Need
Scrapbooking paper or cardstock, at least 30x22cm
Sealable A6-size plastic gift bags to put treats in
Ruler
Scissors or paper slicer/guillotine
Paper creaser or rounded knife/spoon
Hole punch
Ribbon
Treats
Optional: Stickers, stamps, embellishments to add decoration
You don’t need to buy any tools to make these bags, you probably have everything you need at home, except maybe paper.
For a cheaper version, check out second-hand stores for paper and craft embellishments – it’s always surprising what you can find that people don’t want anymore.
You can also find craft and stationery items in discount stores, including paper.
However, for reference, here are some Amazon products:
Treat Bag Ideas – What Treats to Add
Here are a few treat ideas to put in your bags.
Occasions and Customisation Ideas
The best part about these handmade treat bags is their versatility—they can be easily customised for any occasion! Here are a few ideas to inspire you:
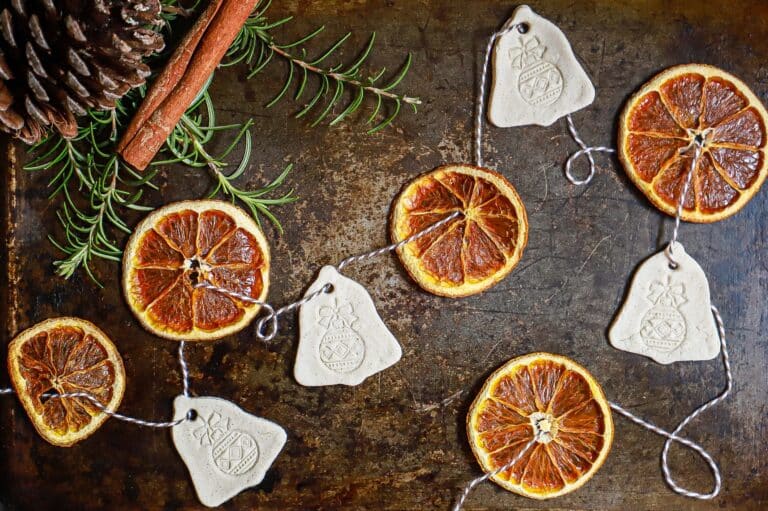
- Christmas: Use festive holiday-themed scrapbooking paper and fill the bags with chocolates, candy canes, or homemade holiday shortbread. You could even add a little tag or salt dough ornament, wishing your recipient a merry Christmas.
- Weddings: For elegant wedding favours, opt for neutral-toned or metallic paper. Fill the bags with delicate treats like truffles, mini macarons, or even a small scented candle. Personalise each bag with a ribbon and the guest’s name for an extra special touch.
- Halloween: Go spooky with dark, eerie paper patterns and fill the bags with Halloween candy, gummy worms, or caramel popcorn. Add themed stickers like bats, pumpkins, or witches to complete the look.
The possibilities are endless—just swap out the paper and treats to match the theme of your event. You can even personalise them by writing guests’ names or adding small notes inside the bags.
Handmade Treat Bags

These little handmade treat bags are easy to make for a super-cute DIY gift. Ideal for Christmas, wedding favours, Halloween, Easter. Also great as part of a hamper
Materials
- Scrapbooking paper/cardstock 30cm2
- Ribbon
- Plastic treat bags, sealable
- Treats
Tools
- Ruler
- Pencil
- Scissors or paper trimmer
- Paper creaser/rounded knife
- Hole punch
Instructions
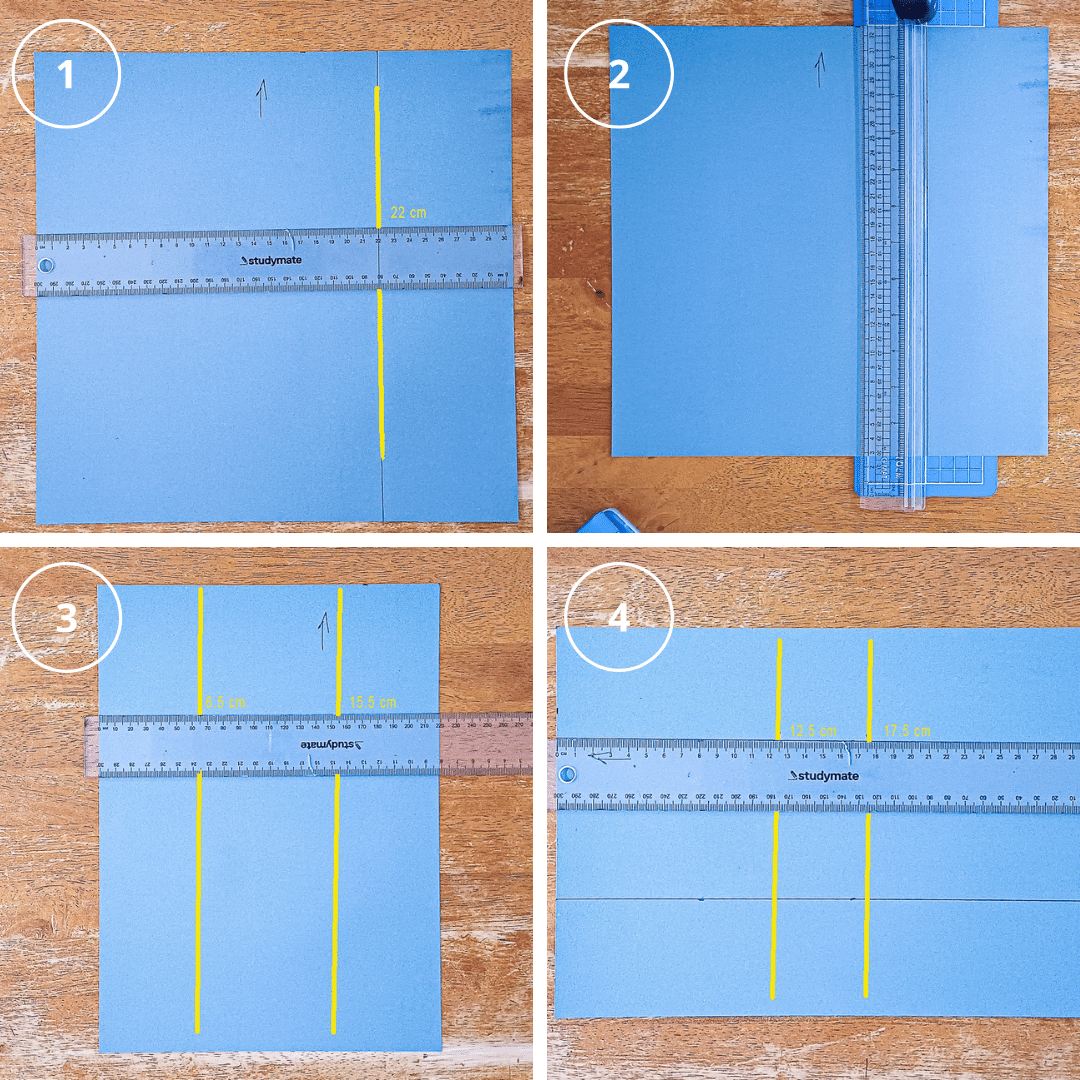
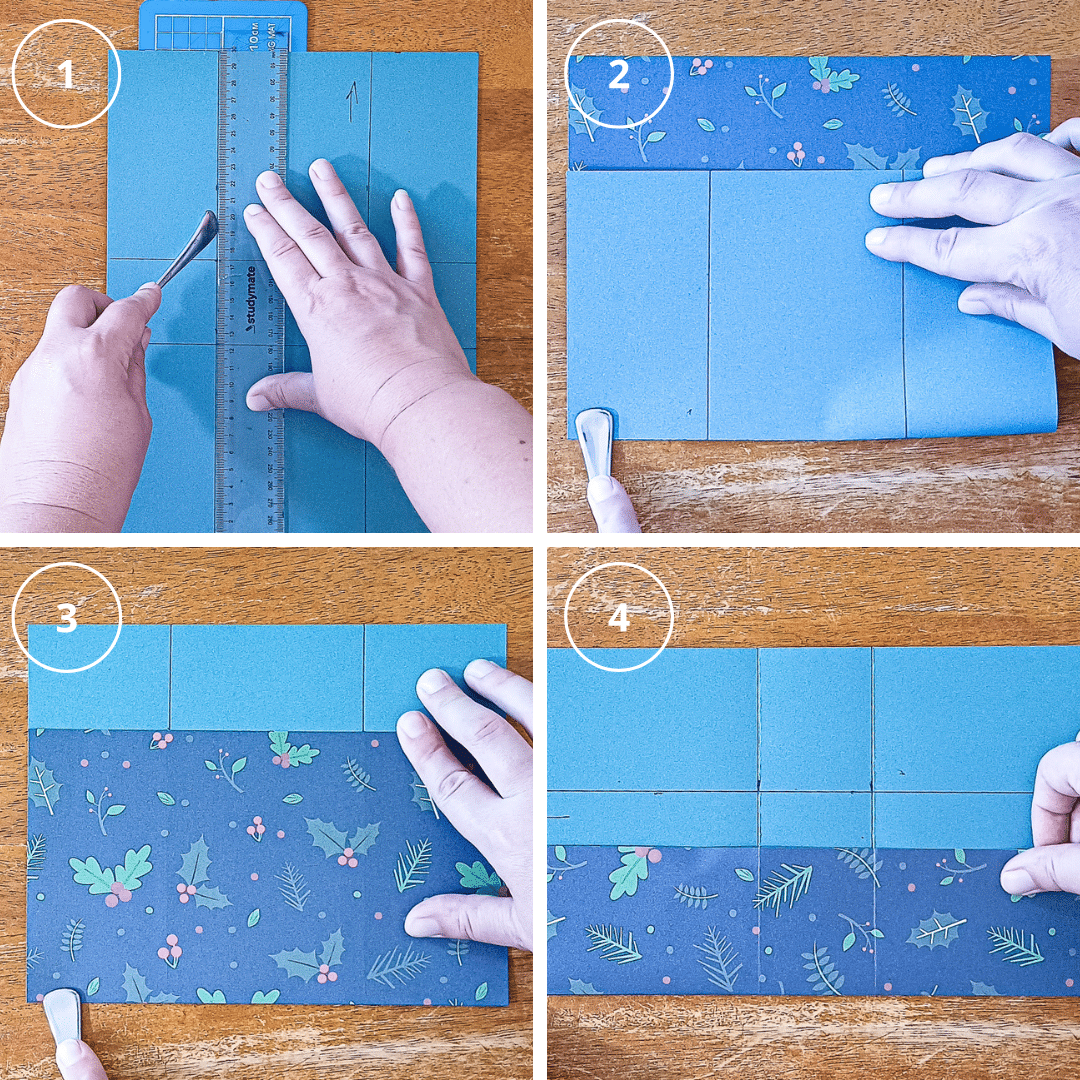
Measure and Trim
- If the paper has a directional print on the front, place the paper right-side down with the pattern or picture up the right way.
- Measure across 22cm and cut. If the scrapbook paper is larger than 30cm, measure down 30cm and cut.
- Keeping the paper the right way up, measure two lines, one at 6.5cm and one line at 15.5cm.
- Turn the paper so the long edge is at the top, and measure and draw two lines at 12.5cm and 17.5 cm.
Fold the Marked Lines
- Score each line with a bone scorer or rounded butter knife (I used the end of a spoon; you could also use a chopstick or biro pen with no ink).
- At each line, fold one way so the lines are shown and run the bone scorer/knife over the crease, then fold the other way and crease well.
- All four lines should be well-creased.
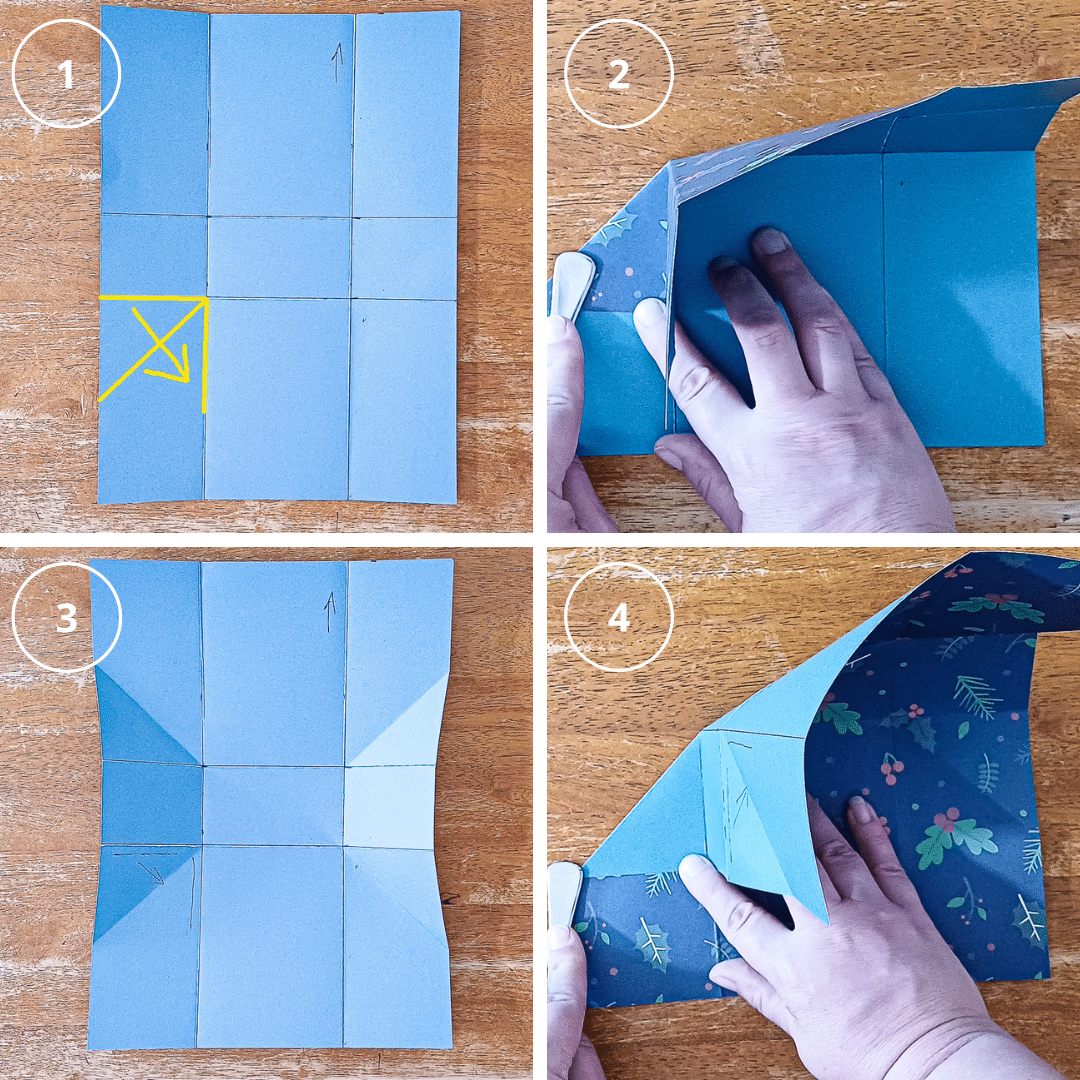
Folding the Diagonals
- As shown in the image below, at each corner, fold the short fold down to the longer fold to make a diagonal.
- Crease well with the bone scorer, then turn the fold the other way around and crease again.
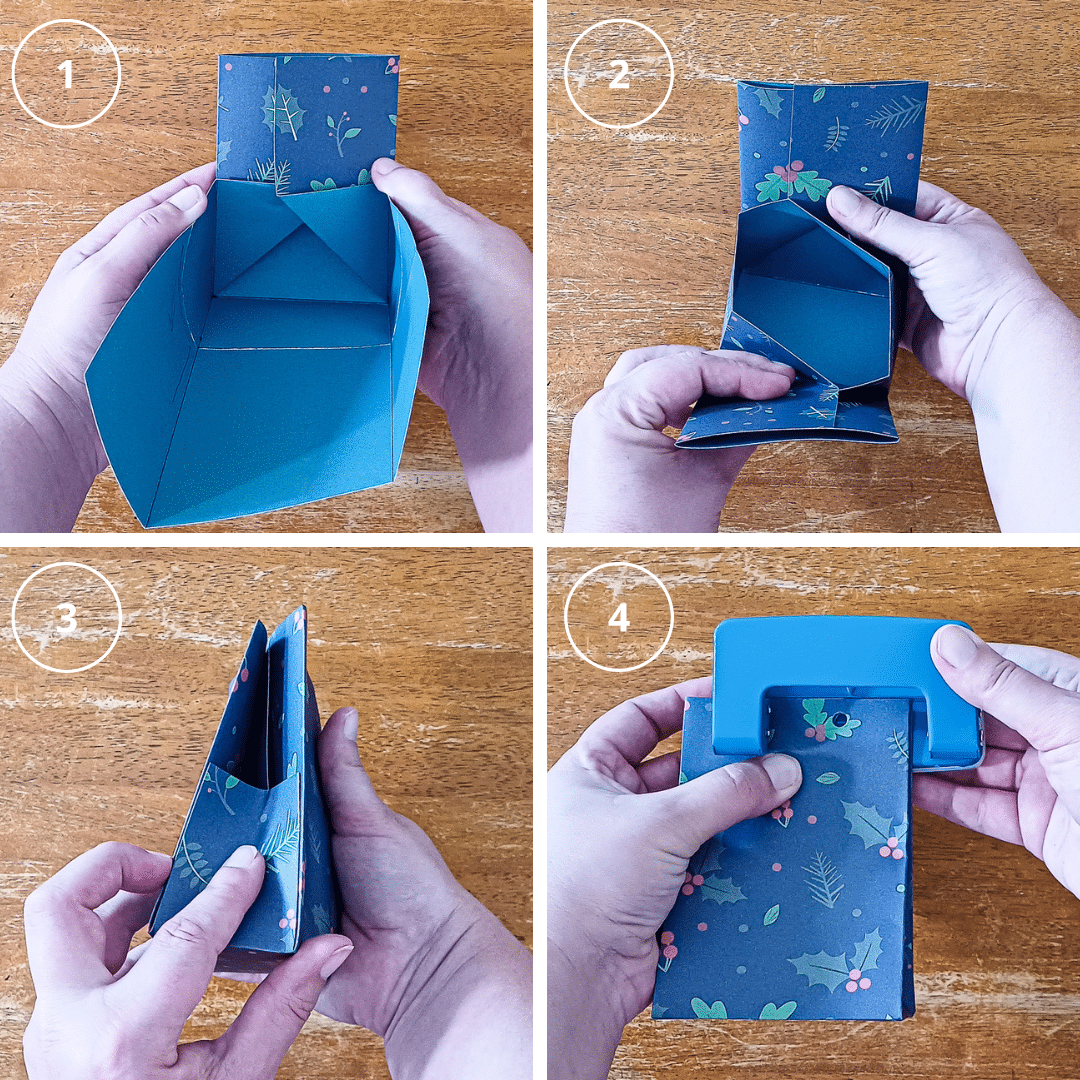
Assembling the Treat Bag
- Fold the bag up as shown—it should collapse fairly easily along the diagonal folds. Then, fold the other side so it comes together in a tent shape.
- Press the sides in slightly for neatness.
- Using a hole punch to punch holes in the top - I had to punch each side separately.
Adding the Treats
- Add your treats to the plastic gift/craft bag and seal it. Place it in the treat bag.
- Thread the bag with a ribbon and tie it to finish.

These homemade boxes can be great as part of a hamper. Check out this article tips on making a personalised hamper.
Have you made these treat bags? Let us know in the comments below. What would you put in them?


Hello Melissa,
Your hampers are delightful. I can imagine the recipients really loved receiving and enjoying them. I will refer to your gift series before Christmas this year. I am planning on a more home made theme this year :-)
Thanks
Kaye
Ta, I think I get more out of it because it’s so fun to make things!