
How to Make Inexpensive Salt Dough Christmas Decorations
This website may earn commissions from purchases made through links in this post. As an Amazon Associate, I earn from qualifying purchases.

Don’t spend a fortune on plastic decorations. Make memories and decorate for Christmas with these handmade salt dough Christmas ornaments.

Looking for a fun, inexpensive way to bring on the holiday spirit?
Skip the store-bought decorations and create lasting memories by crafting your own salt dough ornaments. Not only is making your own salt dough ornaments budget-friendly, but it’s a wonderful way to build lasting family traditions.
I once read a lovely quote from Waldorf schooling, which emphasises seasonal rhythms and festivals. It beautifully captures why preparing for the holidays is so meaningful:
Seasonal festivals serve to connect humanity with the rhythms of nature and of the cosmos. The festivals originated in ancient cultures, yet have been adapted over time. To join the seasonal moods of the year, in a festive way, benefits the inner life of the soul. Celebrating is an art. There is joy in the anticipation, the preparation, the celebration itself, and the memories” [source].
While we don’t ‘do’ Waldorf, I love the idea of connecting with nature and embracing seasonal rhythms. Crafting together helps us slow down and savour the moments, during the hectic Christmas season (especially during the busy Christmas season, when slowing down is most needed).
Handmade ornaments are a lovely way to personalise Christmas and extend the joy and anticipation over the month of December.
Salt dough ornaments are particularly good because they are inexpensive, eco-friendly and easy to make from ingredients you probably already have in your pantry!
How to Make Salt Dough Ornaments
Salt dough is just like homemade playdough, except you let it go hard on purpose.
(As opposed to the bits of playdough that get lost in the carpet or behind the lounge.)
Making salt dough is even simpler than playdough, because it only uses three ingredients – you probably already have them.
Ingredients
cheap table salt
plain flour
water
embellishments (optional)
I’ve seen more fancy recipes with additional school glue, corn starch, or bicarbonate of soda, but sometimes the simple things are the best, and not adding glue makes these more eco-friendly.
Also, I like the texture of the salt.
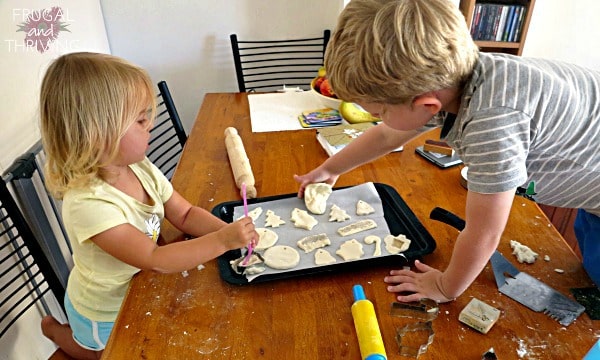
To make the dough, simply mix the salt, flour and water in a bowl to bring together, knead until smooth, and let it rest for 20 minutes (resting it makes it easier to roll out).
Roll the dough to be about 2mm, and use cookie cutters (like these Christmas cutters) to cut the dough into shapes.
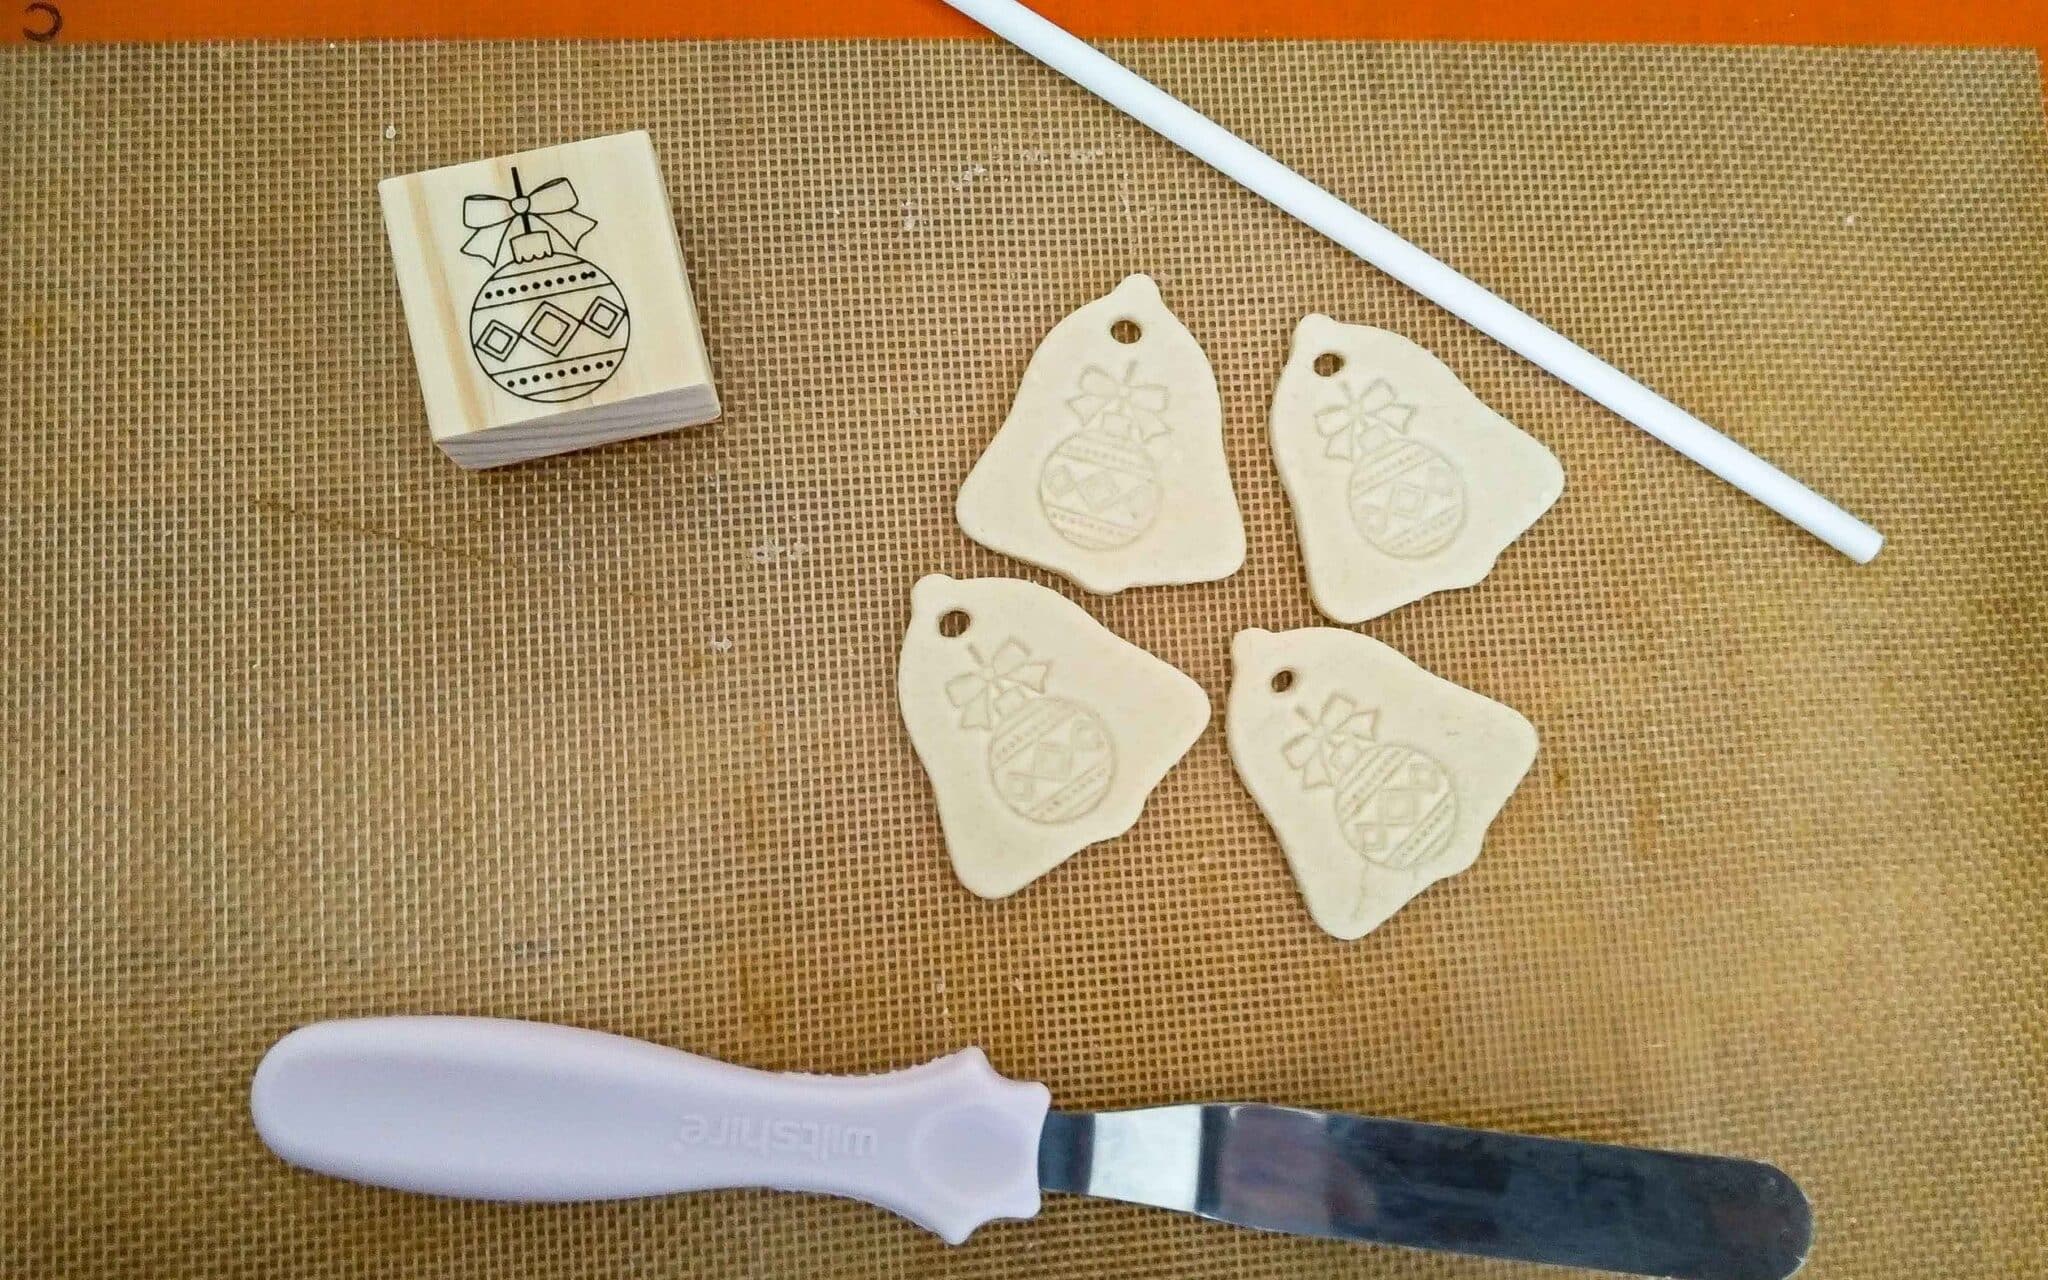
Use a pencil or a paper straw (keepin’ it eco) to put a hole in the top of your ornaments so you can attach ribbon to hang them on the tree.
Then bake the ornaments on a rack on very low in the oven for 2 hours until dry and hard.
If you don’t live in the humid tropics like I do, you can put these in the sun to dry (in a hot car in the sun works well!)
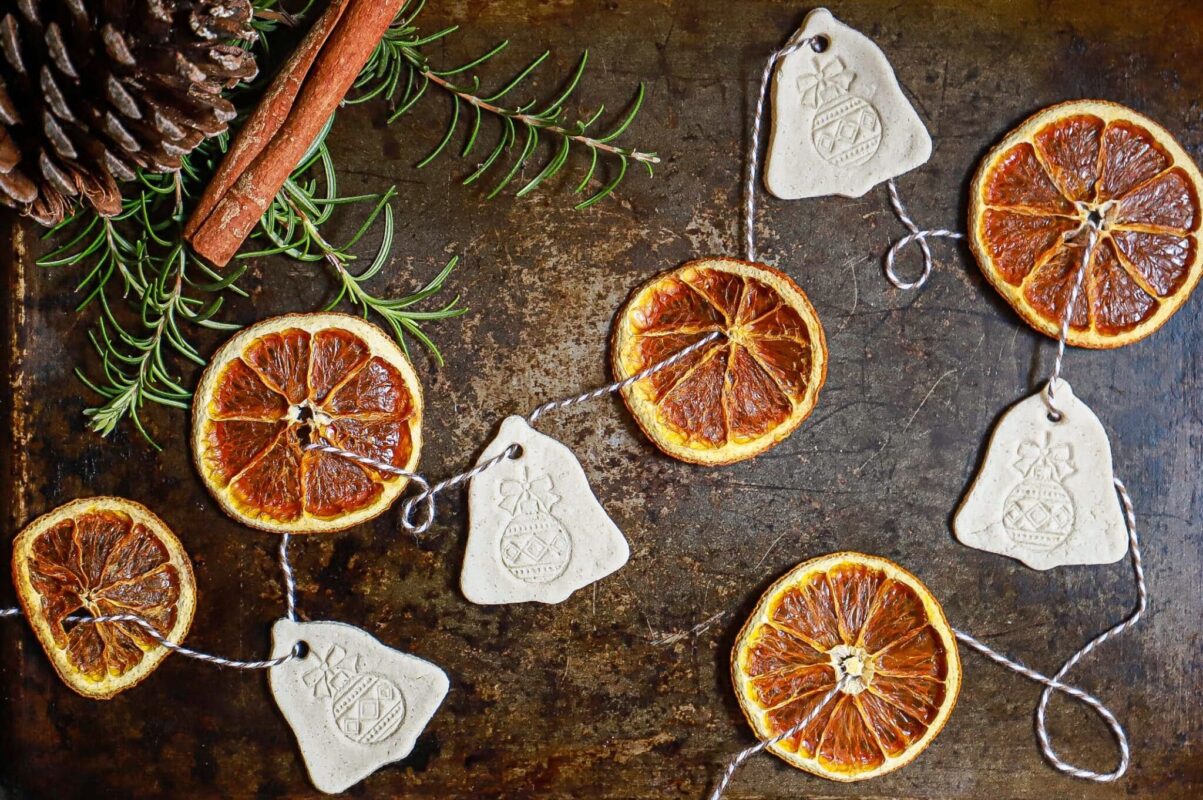
You know the little bits of ribbon that come in the shoulders clothes? The little bits we always cut off? I keep those in a little bag for craft projects just like this one. Tie the ribbon through the ornament to hang on the tree.
These salt dough ornaments will last a few years – even longer if you spray them with a top coat to seal.
If you don’t spray them or paint them, you can compost them after Christmas and enjoy the fun of making them all over again next year.
For troubleshooting tips and embellishment ideas, keep reading to the end of the article.
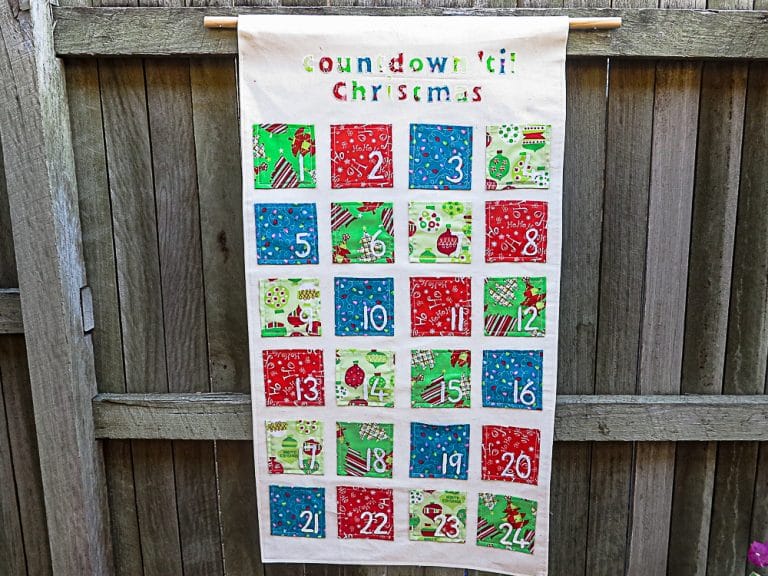
We make these as part of our holiday advent calendar tradition (family activities instead of chocolates each day). Yes, it’s full-on during a busy season, but taking time to connect and have fun is sooo worth the effort! Looking for ideas, I’ve got a whole post of ideas we’ve done over the years – Christmas Minute-to-Win-It is by far the favourite.

Free and Low-Cost Fun Advent Calendar Ideas (Ideal for Warm Climates – Free Printable List and Planner)
Salt Dough Christmas Decorations
Materials
- 1 cup salt
- 2 cups plain flour
- 1/2 – 1 cup of water
Tools
- Mixing bowl
- Mixing spoon
- Measuring cups
- Rolling pin
- Cookie cutters
Instructions
- Mix salt and flour in a bowl.
- Add the water a bit at a time until the flour forms a dough.
- Knead until smooth and let rest for 20 minutes.
- Roll out the dough and cut into shapes.
- Bake at 120°C for 2 hours or until dry and hard. Cool completely before decorating.
Notes
See article for decoration ideas.
Recommended Products
As an Amazon Associate and member of other affiliate programs, I earn from qualifying purchases.

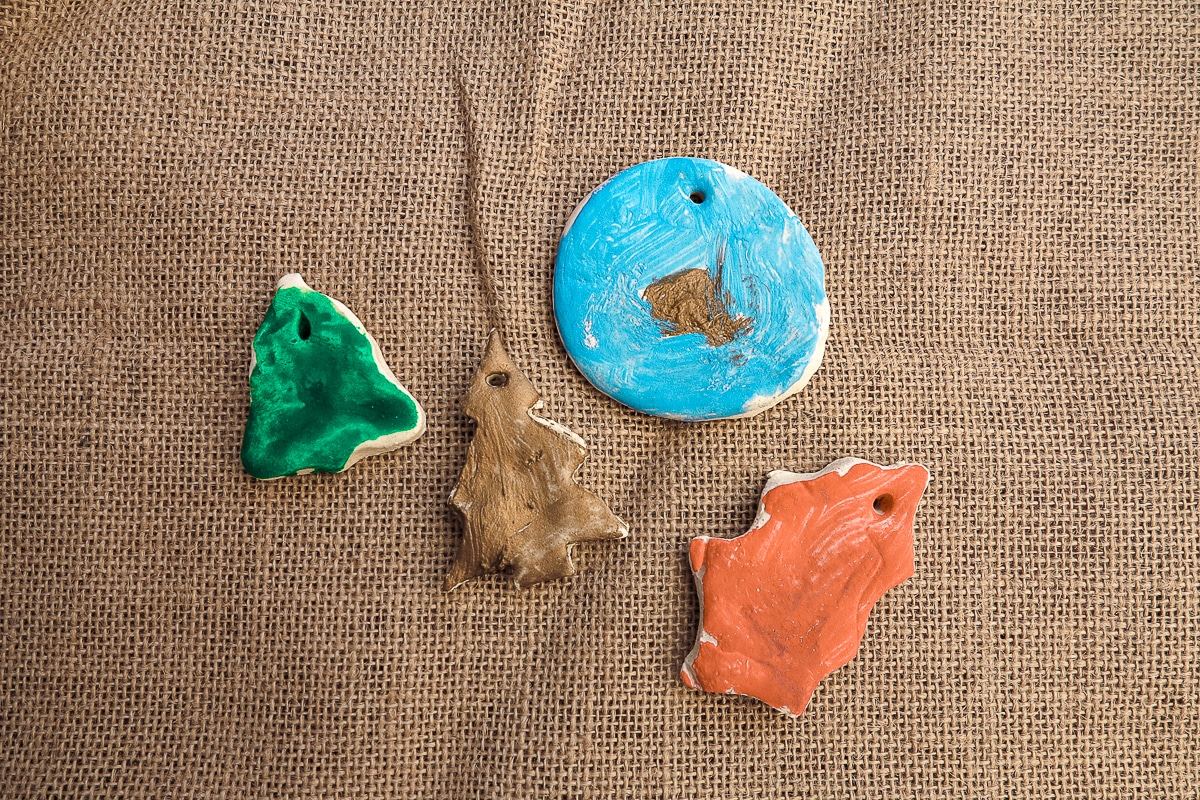
Ideas for Decorating Your Salt Dough Ornaments
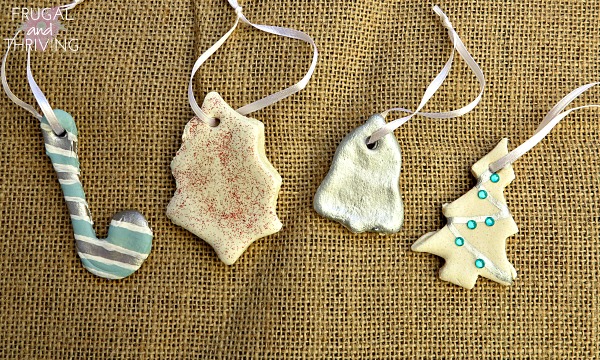
I like the simple elegance of plain white salt ornaments in Christmas shapes against the dark green leaves of the Christmas tree, but if you want to zhuzh them up, here are some suggestions.
If you want to compost your ornaments at the end of the holiday season, stick to natural embellishments.
Natural Salt Dough Embellishments
- Make your own ochre paint for natural ornaments. As kids, we would do this by rubbing rocks together or on the cement path, and mixing the coloured dirt with water (simplest method, but the linked video shares other tips and ingredients.
- Cut snowflake designs from your ornaments.
- Stamp using regular paper stamps. You can either stamp your ornaments plain or use ink to give your impression a bit of colour. Don’t forget, stamp before you cook your ornaments so that you leave an impression. It’s easier to stamp first and then cut out your ornament around the stamp.
- Add texture. Similar to stamping, add texture to your uncooked ornaments by pressing a textured surface into the dough. Ideas include leaves, lace, burlap, bark, shells. Anything textured. Again, it’s usually easier to add texture to the dough first and then cut out your ornament shape.
- Glue on natural embellishments to your cooked ornaments including seeds, leaves, nuts, bark, feathers etc.
- Use a toothpick to draw designs or write words in your ornaments before cooking.
- Press your child’s hand into the dough each year for a hand print ornament keepsake.
Non-Natural Salt Ornament Embellishments
- Paint your cooked ornaments. Paint them a single colour or paint faces on your ornaments.
- Add a raised textured design with glue after the ornament has cooked. Then paint over the glue.
- Add embellishments to your cooked ornaments by gluing on glitter, sequins, buttons, ribbons, or other craft materials. If you plan to throw the ornaments out, take the embellishments off so they can be reused next year.
- Use a marker to draw patterns or write on your ornament. Coloured sharpies work well or you could try a paint pen. A gold paint pen adds a touch of class.
- If you’re super creative, rather than cutting out flat ornaments, use the dough to sculpt a 3D ornament. These will take longer in the oven to dry out.
You might also like:
Troubleshooting and FAQ: Salt Dough Ornaments
1. Sticky dough
If your dough is sticking to your hands or rolling pin, add more flour, a tablespoon at a time, and knead it thoroughly until it reaches a smoother, less sticky consistency. Be careful not to add too much flour at once, as it can make the dough too dry and crumbly.
2. Dry dough
Add water, a teaspoon at a time, and knead the dough until it becomes smooth and pliable again. Kneading thoroughly helps distribute the moisture evenly.
3. Can I air-dry my salt dough?
Yes, you can air-dry the ornaments! However, keep in mind that air drying can take several days depending on the thickness of your ornaments and the humidity in your home. For quicker results, place your ornaments in a dry, warm area with good airflow, and flip them over every few hours to help them dry evenly.
4. Why are my ornaments puffing up in the oven?
If your ornaments are puffing up while baking, it’s usually because the oven temperature is too high. Be sure to bake them at low heat (120°C or 250°F) to prevent this. Also, try rolling your dough thinner, as thicker ornaments may trap air bubbles that cause puffing.
5. My ornaments are still soft after baking.
If your ornaments haven’t hardened completely after baking for two hours, it’s likely because they are either too thick or need more time in the oven. Continue baking them at a low temperature, checking every 30 minutes, until they are firm to the touch. Make sure to let them cool completely before decorating.
6. How do I make my ornaments last longer?
To ensure your ornaments last for years, it’s a good idea to seal them with a clear varnish or spray-on sealant after painting. This will protect them from moisture and preserve their appearance. Without a sealant, salt dough ornaments can absorb moisture from the air over time, which may lead to softening or cracking.
7. Can I make salt dough ornaments without cookie cutters?
Yes! If you don’t have cookie cutters, you can use household objects like cups or lids to cut out shapes. You can also get creative and shape the dough by hand or use a knife to carve out custom designs.
8. What if my ornaments are uneven in thickness?
Ornaments with varying thickness can bake unevenly, with thicker areas staying soft while thinner parts become overdone. To avoid this, use a rolling pin to roll out your dough evenly, aiming for a thickness of about 1.5cm. If your ornaments still come out uneven, try flipping them halfway through baking to ensure both sides dry evenly.
9. Can I add scent to my salt dough ornaments?
Yes! For a festive touch, you can add a few drops of essential oil (like cinnamon, peppermint, or pine) to your dough while mixing it. Alternatively, sprinkle cinnamon or other holiday spices into the dough for a subtle scent. Just be mindful that strong oils may affect the dough’s consistency and can also turn it yellow, so adjust the flour and water as needed.
10. How should I store my salt dough ornaments after the holidays?
To keep your ornaments in good shape for next year, store them in a cool, dry place. Wrapping them in tissue paper or placing them in an airtight container will protect them from moisture and prevent damage during storage.
11. Can I make these ornaments with gluten-free flour?
Yes, you can use gluten-free flour, though the texture of the dough may be slightly different. Rice flour or a gluten-free all-purpose flour mix will generally work well. Be prepared to experiment with the amount of water to get the right consistency.
Do you do Christmas crafting or have other Christmas traditions? Why not share them in the comments below.


Hi Melissa,
We definitely have something in common, as I was mastering the art of salt dough this afternoon with those enthusiastic little crafters of mine ! Can’t show our creations as they are still in the oven. I really like the result so far, eventhough I didn’t think of adding white paint (they are just plain, which is fine by me). Painting is on the menu tomorrow. I’m also thinking of decorating oranges with cloves, I’m sure kiddies will love that.
Don’t you think that there is nothing better than old proven activities with children ?
I just need to remember to restock salt as I used it all today :-)
Have fun crafting !
Corinne
Pinterest is awesome for ideas and one pinner said they put white paint in theirs :). Salt is also on our list too. The old proven activities are the best!
Hi melissa,this post made me smile…i still have salt dough decorations on our tree that my 24 and 21 year old children made.Its a great craft for young and old.
That’s really precious! Thanks for sharing that.